Cleaning for a move involves a detailed checklist to guarantee every corner of your home is spotless. Start by understanding your move-out cleaning requirements, then gather essential cleaning supplies. Focus on each room with targeted tasks, especially in high-traffic areas like the kitchen and bathroom. Don’t forget post-cleaning inspections to catch any missed spots. If you want a stress-free experience, consider hiring professionals for a thorough clean. Discover more tips and tricks to streamline your moving process!
Understanding Move-Out Cleaning Requirements
When you’re preparing to move out, understanding the cleaning requirements can save you time and hassle. Start by reviewing your lease agreement, which often outlines specific cleaning obligations.
Realtors might’ve particular cleanliness standards that you need to meet to guarantee you get your security deposit back. To avoid any misunderstandings, clarify these expectations with your landlord or property manager.
Creating a professional move-out cleaning checklist can be invaluable, helping you systematically tackle all areas of your home. This approach not only boosts your efficiency but also guarantees you comply with the necessary standards for a successful move-out. Additionally, ensuring proper disinfection of high-touch surfaces is essential to maintain a hygienic environment for future occupants.
Essential Cleaning Supplies for Your Move
Leaving your old home in top condition is just one part of the moving process; having the right cleaning supplies on hand is another. Start by gathering essentials like multi-surface cleaners, microfiber cloths, sponges, and trash bags to tackle your move-out checklist effectively.
Don’t forget specialized products such as glass cleaner for mirrors and windows, disinfectants for kitchens and bathrooms, and degreasers for stove tops. Consider eco-friendly options like vinegar and baking soda, which are safe and effective. Incorporating natural odor control methods can enhance your cleaning routine and ensure a fresh environment in your new home.
Prepare a checklist to guarantee you have everything before you start cleaning, making your process more organized.
Finally, keep a separate box for your cleaning supplies so you can address cleaning tasks immediately when you arrive at your new home.
Step-by-Step Bedroom Cleaning Guide
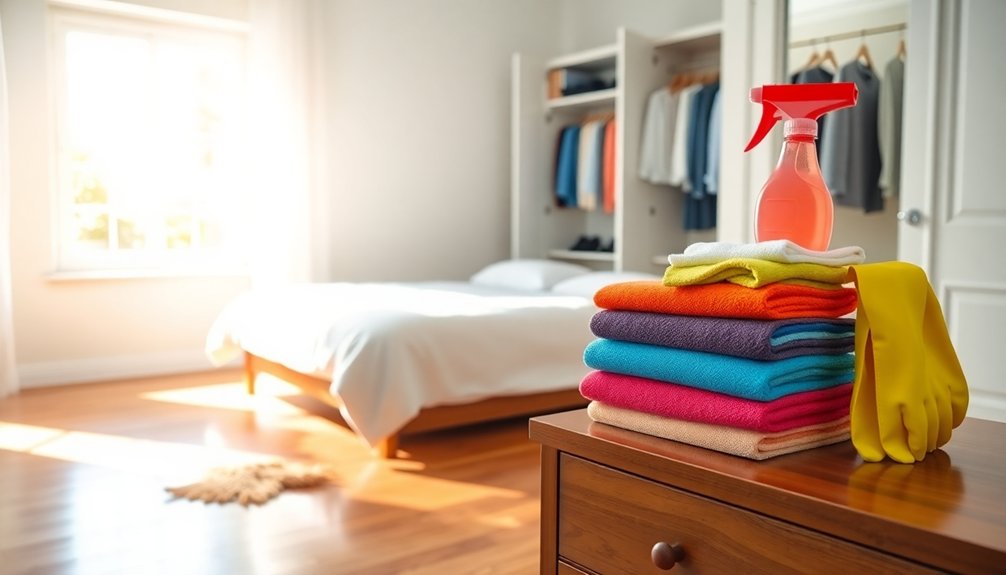
To guarantee your bedroom is spotless before moving out, start by dusting all surfaces, including furniture, shelves, and light fixtures.
Ensure your bedroom shines by thoroughly dusting all surfaces, from furniture to light fixtures, before moving out.
Follow this step-by-step guide from your move-out checklist for effective house cleaning:
- Clean closet interiors and exteriors: Organize and remove any unnecessary items or debris.
- Remove marks from walls and baseboards: Use appropriate cleaning solutions to restore the appearance of the space.
- Clean mirrors and windowsills: A glass cleaner will give you that streak-free shine, enhancing room brightness.
- Vacuum carpets and area rugs: Don’t forget to damp-mop hard surface floors for a deep clean. Regular maintenance prevents build-up and ensures a fresh environment for your new space.
Thorough Bathroom Cleaning Checklist
Now that you’re ready to tackle the bathroom, it’s important to gather essential cleaning supplies first. With the right tools in hand, you can follow a step-by-step cleaning guide to guarantee every corner shines. Let’s break down what you need and how to get it done efficiently. Incorporating non-toxic cleaning solutions can enhance both safety and effectiveness during your cleaning process.
Essential Cleaning Supplies Needed
When you’re ready to tackle your bathroom cleaning, make certain you’ve gathered the essential supplies for the job.
Having the right tools can make all the difference, especially during the move-out process. Here’s what you’ll need:
- Disinfectant – To sanitize surfaces effectively.
- Toilet Bowl Cleaner & Brush – For a thorough clean inside and out.
- Microfiber Cloths – For streak-free mirrors and glass.
- Multi-surface Cleaner – Ideal for countertops and sinks.
Don’t forget your garbage bags for easy disposal of trash and debris.
With these essential cleaning supplies, you’ll feel empowered to get your bathroom sparkling, whether you’re doing it yourself or considering a cleaning service for added help.
Step-by-Step Cleaning Guide
As you immerse yourself in the cleaning process, following a step-by-step guide can guarantee no corner of your bathroom is overlooked.
Start by cleaning and sanitizing the bathtub and shower walls, focusing on grout and soap scum buildup. Next, scrub the sink and toilet inside and out with disinfectant, paying special attention to high-touch areas to confirm a germ-free environment.
Dust and wipe all surfaces, including cabinets and countertops, to remove accumulated debris. Clean mirrors and interior windowsills with glass cleaner for a streak-free finish.
Finally, vacuum and wash the floor, making sure to clean inside window tracks and corners. Completing this thorough checklist is key to securing your security deposit upon moving out!
Kitchen Cleaning Tips for a Fresh Start
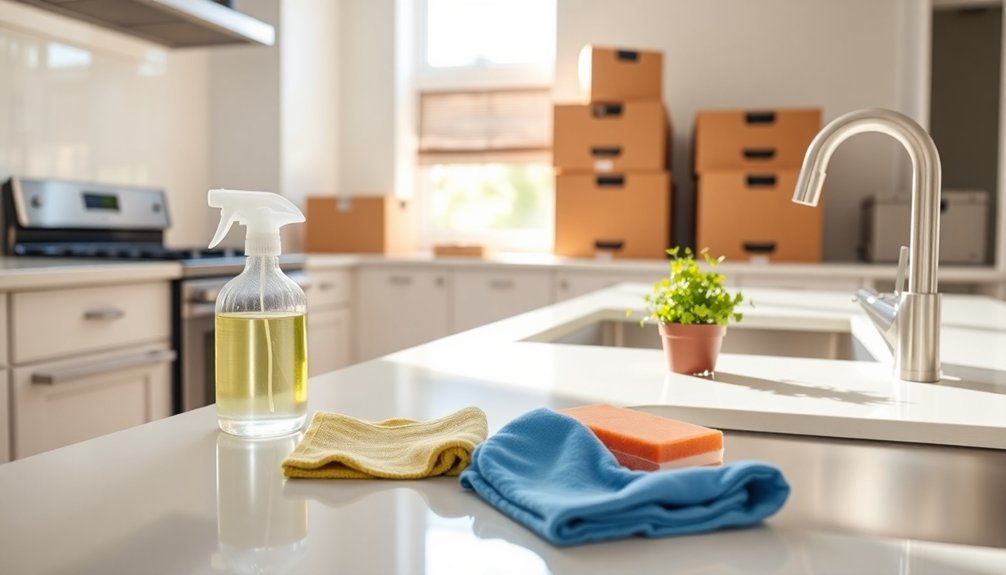
Cleaning your kitchen before unpacking can make a world of difference in how you feel about your new space. A sparkling kitchen not only sets a welcoming tone but also helps protect your security deposit.
A clean kitchen creates a welcoming atmosphere and safeguards your security deposit in your new home.
Here are some essential kitchen cleaning tips:
- Deep clean the refrigerator: Remove shelves and drawers, disinfect them, and wipe down the interior surfaces.
- Scrub your appliances: Clean the oven, stovetop, and microwave according to the manufacturer’s instructions.
- Disinfect surfaces: Use a powerful disinfectant on countertops, backsplashes, and sink areas to eliminate germs.
- Tidy cabinets and floors: Wipe down inside cabinets and drawers, then vacuum and mop the kitchen floor for a spotless finish.
Additionally, don’t forget to purge expired food and any unused gadgets to streamline organization, ensuring a fresh start in your new home!
Living Area Cleaning Strategies
To get your living area ready for the next occupants, start by dusting all surfaces thoroughly. Don’t forget to vacuum and mop the floors to remove any lingering dirt and allergens. Utilizing efficient mopping techniques will help ensure that dirt isn’t spread around, creating a fresh and welcoming environment.
Dusting Surfaces Thoroughly
Dusting surfaces thoroughly is essential for creating a clean and inviting living space. Start high with ceiling fans and shelves, letting dust settle down for easier cleaning. Use a microfiber cloth or duster for effective dust trapping, ensuring you don’t just stir it up.
Don’t forget those often-overlooked areas that accumulate dust over time.
- Baseboards
- Light fixtures
- Window sills
- Upholstered furniture
Incorporate dusting into your cleaning routine every two weeks to maintain a fresh atmosphere and improve air quality. Document the condition of surfaces before you start, so you can easily track your progress.
A little effort now means a healthier, more welcoming home later.
Vacuuming and Mopping Floors
After you’ve tackled dusting surfaces, it’s time to focus on vacuuming and mopping your floors for a truly clean living area.
Start vacuuming from the farthest corner and work your way towards the exit to avoid tracking dirt back onto cleaned areas. For carpets, use a vacuum with a HEPA filter to capture allergens and improve indoor air quality.
Don’t forget to vacuum upholstered furniture and cushions, reaching those tricky crevices with attachments.
When mopping hard floors, use a damp mop with the right cleaner—like a wood-safe solution for hardwood—to prevent damage.
Aim to vacuum or mop at least once a week during the moving process to keep your whole home organized and fresh.
Inspecting Your Home After Cleaning
Once you’ve finished cleaning, it’s essential to inspect your home thoroughly to confirm every task meets your standards. This step can help prevent any issues with your security deposit later on.
Here’s what to focus on during your inspection:
- Walkthrough Each Room: Check corners, baseboards, and high surfaces to make sure nothing’s been missed.
- Document Condition: Take photos of existing damages or cleanliness issues for your records.
- Test Appliances: Verify all appliances are clean and operational; run the dishwasher with vinegar for a fresh start.
- Check for Odors: Inspect hidden areas like under sinks and behind appliances for lingering smells or hidden dirt. Regular inspection can greatly enhance overall cleaning efficiency, ensuring nothing is overlooked.
Eco-Friendly Cleaning Options to Consider
As you prepare for your move, considering eco-friendly cleaning options can make a notable difference.
Natural ingredients like vinegar and baking soda can effectively tackle tough stains and disinfect surfaces without harmful chemicals. Many eco-friendly brands offer biodegradable cleaners that are free from synthetic fragrances, ensuring they’re safer for both the environment and your health.
Using reusable microfiber cloths instead of traditional paper towels not only reduces waste but also traps dust and dirt more effectively. Research shows that these natural cleaners can considerably lower indoor air pollution, enhancing your healthier home environment. Additionally, incorporating natural cleaning solutions into your routine promotes a cleaner kitchen with minimal environmental impact.
Benefits of Hiring a Professional Cleaning Service
When you hire a professional cleaning service, you gain more than just a spotless home; you also free up valuable time to focus on other aspects of your move.
Here are some benefits to take into account:
- Expertise: Professionals know how to tackle tough stains and hard-to-reach areas that DIY cleaning might miss.
- Tailored Packages: Many services offer move-in and move-out cleaning options that meet your specific needs, ensuring landlords are satisfied.
- Security Deposit: A thorough clean enhances your chances of securing the return of your security deposit.
- Peace of Mind: With a reliable cleaning service, you can relax during a stressful change, knowing your space is in good hands. Additionally, using eco-friendly solutions in your cleaning process promotes a healthier living environment.
Investing in a professional cleaning service makes your moving experience smoother and more manageable.
Organizing Your Moving Process Efficiently
To organize your moving process efficiently, start by prioritizing essential tasks that need immediate attention. Use checklists to keep track of what’s done and what still needs to be addressed, ensuring nothing falls through the cracks. This structured approach will help you stay focused and make your move smoother. Incorporating efficient cleaning routines during the packing process can significantly reduce stress and enhance productivity.
Prioritize Essential Tasks
Prioritizing essential tasks is crucial for streamlining your moving process, especially when time is tight. Start by creating an all-encompassing checklist of cleaning tasks for every room, ensuring you don’t overlook any areas. Focus on high-traffic spots, like kitchens and bathrooms, where a clean appearance can greatly impact your security deposit.
Here’s how to prioritize:
- Tackle visible cleaning tasks first—these make a big difference!
- Schedule a final walkthrough with your landlord to clarify cleanliness expectations.
- Delegate cleaning responsibilities to friends or family to lighten your load.
- Gather all necessary cleaning supplies ahead of time to keep momentum.
Utilize Checklists Effectively
Utilizing checklists effectively can transform your moving process from chaotic to organized. A detailed move-out cleaning checklist guarantees you address every area of your home, meeting your landlord or realtor’s cleanliness standards.
Organize your tasks by room—bedrooms, bathrooms, kitchens, and living areas—to make your cleaning more efficient and prevent overlooking any spots. This approach helps clarify expectations, reducing misunderstandings around your security deposit.
Don’t forget to document the property’s condition with photos during your cleaning; this evidence can be essential in case of disputes.
Finally, consider delegating specific tasks from your checklist to friends or family members, streamlining the entire moving process and making it quicker and more manageable for everyone involved.
Conclusion
As you stand at the threshold of your new beginning, think of cleaning as the gentle breeze that sweeps away the past. With each scrub and wipe, you’re not just tidying up; you’re planting seeds for fresh memories to bloom. Embrace the journey, whether you do it yourself or enlist a helping hand. Remember, a clean slate paves the way for new adventures, so take a deep breath and step confidently into your next chapter.