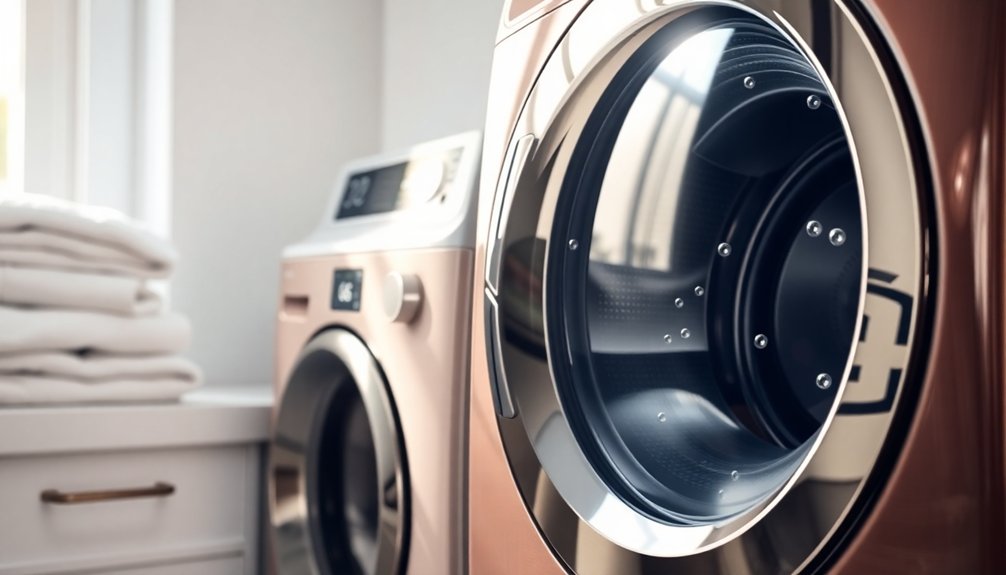
To use your GE washer’s self-clean feature, start by ensuring the drum is empty and clean the door seals and detergent dispensers. Choose a suitable cleaning solution, either a specialized washer cleaner or a vinegar and baking soda mix. Select the “Self Clean” cycle, typically lasting 1-2 hours. Monitor the process via cycle indicator lights and wipe down any residues afterward. To maximize efficiency, leave the door ajar for a few hours post-clean. There’s more valuable maintenance info ahead.
Preparing Your Washer for Self-Cleaning
To prepare your GE washer for self-cleaning, start by verifying it’s completely empty of all laundry and items. This allows for effective cleaning.
Next, remove any visible debris or residue from the drum and door seals to enhance the cleaning process.
Don’t forget to check and clean the detergent dispenser and any filters to prevent clogs during the self-cleaning cycle.
For best results, use a recommended cleaner or a mixture of vinegar and baking soda specifically designed for washing machines.
Finally, make sure to close the washer door securely before starting the self-cleaning cycle to guarantee safety and effectiveness. Regular cleaning of high-touch areas ensures consistent hygiene and contributes to overall household well-being.
For further assistance, consult GE Appliances official support and the documentation for owners, which provides additional guidance.
Choosing the Right Cleaning Solution
Selecting the right cleaning solution is essential for maintaining your GE washer’s efficiency and performance.
Opt for products specifically formulated for high-efficiency (HE) washers to prevent excessive sudsing and guarantee maximum cleaning. You can also use a bleach solution, mixing no more than 1 cup of liquid chlorine bleach with water, to effectively eliminate odors and sanitize the drum without damaging components.
Choose high-efficiency washer products to avoid suds and use a bleach solution for odor elimination and sanitization.
Avoid traditional laundry detergents, as they can leave residues and contribute to buildup over time. Consider washer cleaner tablets designed to break down limescale, mold, and mildew for a thorough clean. Additionally, using natural cleaning agents like vinegar or baking soda can be an eco-friendly alternative for maintaining your washer.
Always follow the manufacturer’s recommendations in genuine GE Appliances and Appliances Support Articles to maintain the longevity and efficiency of your washer.
Selecting the Self-Clean Cycle
To select the Self-Clean cycle on your GE washer, turn the cycle selector knob to the “Self Clean” or “Clean Washer” option. This cycle effectively cleans the drum and should be run when the washer is empty, typically every one to three months for peak performance. Understanding the cycle settings and recommended cleaning frequency can help maintain your washer’s efficiency and longevity. Regular upkeep positively impacts overall health and well-being, contributing to a healthier living environment.
Cycle Settings Overview
When you want to maintain your GE washer’s performance, choosing the Self-Clean cycle is essential.
To select it, simply turn the cycle selector knob to the designated Self-Clean setting, clearly marked for your convenience. This cycle uses high-temperature water to clean the washer drum, and it’s recommended to run it every 30 to 60 washes for ideal maintenance.
Before starting, verify the washer is empty and detergent dispensers are free of residue for the best results. The process typically lasts 1-2 hours, depending on your model, as the washer fills, agitates, and drains automatically.
Always consult the official support documentation for specific instructions tailored to your appliance inventory available. This guarantees efficient cleaning and longevity of your washer.
Recommended Cleaning Frequency
Regularly maintaining your GE washer is essential for peak performance, and running the self-clean cycle at least once a month is highly recommended.
This cycle effectively eliminates residues, odors, and bacteria that can accumulate over time. If your household generates heavy laundry loads or frequently uses fabric softeners, consider increasing the cleaning frequency to every two weeks to guarantee ideal hygiene.
Always make sure the washer drum is empty before starting the self-clean cycle for the best results. For specific instructions and recommendations tailored to your model, refer to your GE washer’s user manual.
If you need further assistance, don’t hesitate to reach out to GE Appliances Support for expert guidance.
Monitoring the Cleaning Process
How can you guarantee that your GE washer’s self-cleaning cycle is effective? Start by monitoring the washer’s performance throughout the process.
Use the cycle indicator lights to track real-time updates on the cleaning status. The self-clean cycle lasts between 60 to 90 minutes, so keep an eye on the timer to prepare for the next steps.
Make sure the washer door remains closed to maximize the cleaning efficiency and prevent interruptions. According to GE Appliances official guidelines, running the self-clean cycle every 1 to 3 months is advisable, depending on usage.
After the cycle, inspect for any residue or odors, as this will help you determine if further action is necessary to maintain peak performance. Regular cleaning of your appliances, similar to the importance of bathtub disinfection, is essential for overall home hygiene.
Post-Cleaning Maintenance

After completing the self-clean cycle, taking immediate steps for post-cleaning maintenance is essential to guarantee your GE washer remains in peak condition.
Start by wiping down the door seal and drum with a damp cloth to eliminate any residual detergent or debris.
Wipe the door seal and drum with a damp cloth to remove any leftover detergent or debris.
To prevent mold and mildew growth, leave the washer door open for a few hours to allow proper air circulation.
Regularly check and clean the detergent dispenser drawer, ensuring it operates smoothly.
Don’t forget to inspect and clean the GE Appliances filters as outlined in your user manual; this helps maintain peak performance.
Schedule self-clean cycles every 1-3 months based on usage to keep your washer and its parts and accessories functioning effectively. Additionally, consider implementing a 10-minute tidy-up routine to help maintain the overall cleanliness of your laundry area.
Troubleshooting Common Issues
When you encounter issues with your GE washer’s self-clean cycle, identifying common error codes can guide you to the right troubleshooting steps. Additionally, regular maintenance tips can help prevent these problems from occurring in the first place. To further enhance the longevity of your washer, consider implementing monthly deep cleaning practices that target hidden dirt and germs. Let’s explore these aspects to guarantee your washer operates efficiently.
Common Error Codes
Understanding common error codes on your GE washer can greatly simplify troubleshooting during the self-clean cycle.
If you encounter the “dE” error code, it means the door isn’t securely closed; make sure it latches properly.
The “nd” error code indicates a drainage issue; check for clogs in the drain hose or filter to resolve this.
Seeing the “LE” error code signals a motor fault; unplug your washer for a few minutes before restarting the self-clean cycle.
The “tE” code points to a temperature sensor problem; inspect the sensor connections and replace it if necessary.
Finally, a “PF” error indicates a power failure; reset the washer and restart the self-clean process after restoring power.
Maintenance Tips
Regular maintenance is essential for keeping your GE washer in top condition and preventing common issues.
To maintain peak cleaning performance, use the self-clean feature every 1-3 months. Always verify the washer drum is empty before starting the self-clean cycle to allow for thorough cleaning.
For effective results, consider using a specialized washer cleaner or a mixture of white vinegar and baking soda to eliminate odors and residue. After the self-clean cycle, run an additional rinse cycle to clear any remaining cleaning agents.
If you still notice odors or residue, inspect and clean the door seals and detergent dispensers, as these areas can trap buildup.
Keeping these tips in mind will enhance your washer’s longevity and efficiency.
Conclusion
By following these steps, you can guarantee your GE washer stays in top condition, enhancing its performance and longevity. Regular self-cleaning helps prevent odors and buildup, but have you considered the impact of neglecting this crucial maintenance? Keep an eye on the cleaning process and address any issues promptly. With just a little effort, you’ll enjoy cleaner clothes and a more efficient appliance. Make self-cleaning a routine part of your washer care!