To clean your freezer’s ice maker, start by unplugging the fridge for safety. Remove the ice bin and any other detachable parts. Wipe down the surfaces with warm soapy water and a cloth, using a toothbrush for tricky spots. If needed, use a commercial ice maker cleaner. Once everything’s clean and dried, plug the fridge back in and run a few ice cycles, discarding the first batches. There’s even more you can do to keep your ice maker in top shape!
What You’ll Need to Clean an Ice Maker
To clean your ice maker effectively, you’ll need a few essential items. Start by gathering two clean dishcloths, a bowl for mixing, warm soapy water with mild soap, and a sponge for scrubbing.
If you prefer a specialized cleaning solution, consider using an approved ice maker cleaner, such as Affresh. You might also want a toothbrush for those hard-to-reach areas.
Before you begin, make sure to remove the ice bin to access all surfaces properly. It’s helpful to have a bucket or sink on hand to dispose of leftover ice and cleaning residue.
Remove the ice bin for thorough access and keep a bucket or sink ready for disposing of ice and cleaning waste.
Finally, always consult your owner’s manual for specific instructions regarding removable parts or recommended cleaning products tailored to your ice maker model. Additionally, using non-toxic cleaners can help ensure a safe cleaning process while effectively removing any buildup.
Step 1: Clean Out and Wipe Freezer
Cleaning out the freezer is essential for maintaining your ice maker’s performance and guaranteeing the quality of your ice. Start by removing any unnecessary or expired items to create a clean workspace.
Then, follow these steps:
- Unplug the refrigerator to prevent the ice maker from working during cleaning.
- Remove the bin and any removable parts as instructed in your owner’s manual.
- Wipe down the ice maker and surrounding surfaces with warm soapy water.
- Eliminate any spills or residues that could affect ice quality.
- Verify all surfaces are sanitized effectively to promote hygiene. Regular sanitization helps prevent mold and mildew growth to ensure your ice remains clean and safe for consumption.
Step 2: Unplug the Fridge

Before you start cleaning, it’s essential to unplug the fridge.
This step not only prevents ice production but also guarantees your safety while working on the ice maker. Regular maintenance of your appliance can also enhance its efficiency and prolong its lifespan.
Always check your owner’s manual for any specific instructions related to your model.
Safety First
Guaranteeing safety while maintaining your ice maker starts with unplugging the refrigerator. This vital step prevents any accidental operation and minimizes electrical hazards.
While some models have a lever to turn off the ice maker, unplugging the fridge is the most reliable method. It also allows for a thorough cleaning without the worry of new ice forming. Always consult the owner’s manual for specific guidance on your appliance.
Keep in mind these safety tips:
- Unplug the fridge for the entire cleaning process.
- Use appropriate cleaning tools to avoid damage.
- Make sure the area is dry to prevent slips.
- Check for any visible wear on cords.
- Take breaks if needed to avoid fatigue.
Putting safety first makes your cleaning experience smooth and effective!
Prevent Ice Production
To effectively prevent ice production while you maintain your ice maker, start by unplugging your fridge. This step is essential for guaranteeing a safe cleaning environment and minimizing electrical hazards.
Before unplugging, remove any food items from the freezer, as this is a temporary measure. Consult your owner’s manual for specific instructions on safely shutting off the ice maker, especially if your model has unique features.
Unplugging the fridge not only stops ice production but also prevents cleaning solutions from freezing inside the ice maker.
After you’ve cleaned, wait a few minutes before plugging it back in to allow any residual moisture to evaporate. This way, you’ll confirm your ice maker is ready for clean water and effective operation.
Step 3: Clean Any Removable Parts
Cleaning the removable parts of your ice maker is essential for maintaining its efficiency and guaranteeing clean ice. Start by removing the ice bin and any other removable parts. Here’s how to clean them effectively:
- Wash the ice bin with warm water and mild soap, avoiding the dishwasher.
- Use a warm washcloth to gently dislodge stubborn ice build-up.
- If needed, apply a commercial ice machine cleaner, following the manufacturer’s instructions for disinfecting.
- Rinse everything thoroughly after cleaning to remove soap residue.
- Confirm all parts are completely dried before reassembling to prevent moisture-related issues. Additionally, ensure you regularly disinfect surfaces, as clean surfaces contribute to overall home hygiene and prevent contamination in your ice maker.
Step 4: Remove Ice and Wipe Interior of Ice Maker
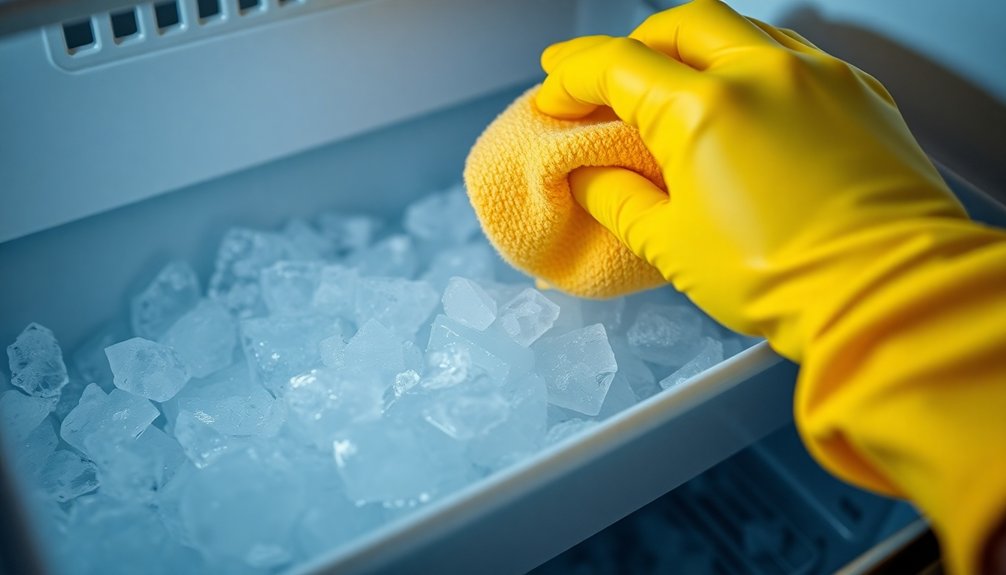
To keep your ice maker running smoothly, start by turning it off and unplugging the refrigerator for safety.
Remove the ice bin and empty any ice into a bucket or sink to avoid spills.
Once that’s done, you can wipe down the interior surfaces, ensuring you tackle any stuck ice or residue. Consider using a natural cleaning agent like vinegar and water solution to effectively clean and sanitize the surfaces without harsh chemicals.
Empty Ice Bin
Maintaining a clean ice maker starts with emptying the ice bin. First, remove all the ice and place it in a bucket or sink. This step prevents any old ice from affecting the ice quality.
Next, use warm water with a washcloth to dislodge any stuck ice. For deeper cleaning, mix one part warm water and one part vinegar, but be careful not to let it touch the stainless steel surfaces.
After cleaning, make sure to thoroughly dry the ice bin to avoid moisture buildup.
Here are some tips to keep in mind:
- Empty the ice bin regularly
- Use warm water for stuck ice
- Avoid vinegar on stainless steel
- Dry the bin completely
- Check for odors frequently
Clean Ice Maker Interior
With the ice bin emptied and ready for a thorough clean, the next step involves addressing the interior of the ice maker.
First, turn off the ice maker and unplug the refrigerator to guarantee safety. Carefully remove any remaining ice and throw it away.
Using a washcloth soaked in soap and warm water, wipe down the clean ice maker interior, dislodging any stuck ice.
For a deeper clean, mix equal parts of warm water and white vinegar to eliminate mold or mildew.
After scrubbing, make certain to dry all surfaces completely with a clean dish towel. This not only helps with ice maker troubleshooting but also guarantees the first 2-3 batches of ice are fresh and clean.
Check the Water Filter
Regularly checking the water filter in your ice maker is essential for peak performance and ensuring high-quality ice.
A clean and functioning water filter helps maintain fresh ice by removing impurities that can affect taste.
To keep your ice maker running efficiently, follow these tips:
- Check the water filter every six months.
- Replace a clogged or outdated filter promptly.
- Consult your owner’s manual for specific replacement instructions.
- Consider setting a reminder on your calendar.
- Enjoy the benefits of better-tasting ice! Additionally, regular cleaning routine helps promote a hygienic environment around your ice maker.
Step 5: Plug Fridge Back In and Run a Few Cycles
After completing the cleaning process, it’s time to plug the fridge back in and restore power to your ice maker.
Start running a few cycles to verify it’s functioning properly and producing ice again. Remember to discard the first 2-3 batches of ice, as they may contain residual dirt or cleaning solution. This step is essential for maintaining the quality of your ice.
As you monitor the ice production, keep an eye out for any irregularities that might indicate a need for further maintenance or inspection. Regular checks on the ice maker’s performance will help guarantee consistent quality and taste of the ice produced, making sure you always have clean, fresh ice on hand. Additionally, ensure to regularly clean small appliances to prevent bacteria buildup, which is crucial for maintaining hygiene in your kitchen.
Conclusion
Now that you’ve tackled the cleaning process, your ice maker should be sparkling and ready to serve up new ice. Think of it as giving your freezer a revitalizing spa day! By following these steps regularly, you’ll not only extend the life of your ice maker but also guarantee that every cube is crystal clear and tasty. So, go ahead—enjoy that chilled drink knowing your ice maker is in top shape! Cheers to clean ice!