Cleaning your microwave’s a breeze with natural ingredients. Start with steam from a bowl of water, then freshen it up using lemon juice. Harness the power of white vinegar for tough odors, or scrub away stains with a baking soda paste. Add essential oils for a pleasant aroma, and try cream of tartar for stubborn spots. Establish a regular cleaning routine to maintain freshness. Stick around to discover even more tricks for a sparkling clean microwave!
Start With Steam: How to Clean Your Microwave With Water
Have you ever wondered how to tackle those stubborn stains in your microwave without harsh chemicals?
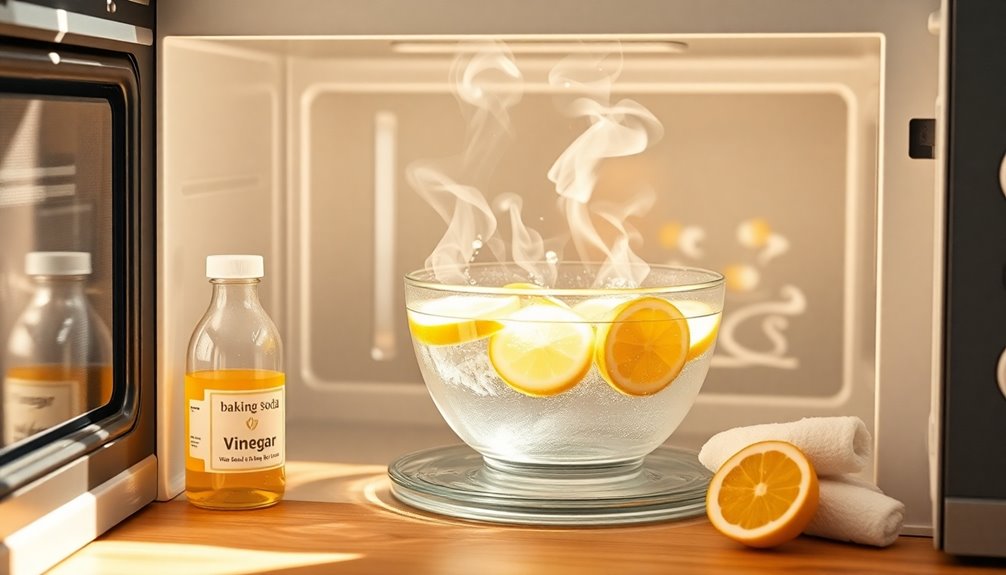
Start by harnessing steam efficiency! Fill a microwave-safe bowl with water, about halfway full. You can add a slice of lemon for a fresh scent, but that’s optional.
Harness the power of steam! Fill a microwave-safe bowl with water and enjoy a fresh scent by adding a slice of lemon.
Place the bowl inside and heat on high for about five minutes. The steam will loosen the grime, making it easier to wipe away.
Once the timer goes off, carefully remove the bowl—watch out for the hot steam! Use a damp cloth or sponge to wipe down the microwave’s interior.
This method not only guarantees microwave safety by avoiding harsh cleaners but also leaves your appliance sparkling clean and fresh without the harsh chemicals. Additionally, using natural ingredients aligns with the principles of non-toxic cleaners that promote a safe and healthy living space.
Freshen up With Lemon Juice: a Natural Cleaning Solution
While steam is great for loosening grime, lemon juice offers a natural way to freshen up your microwave and tackle odors.
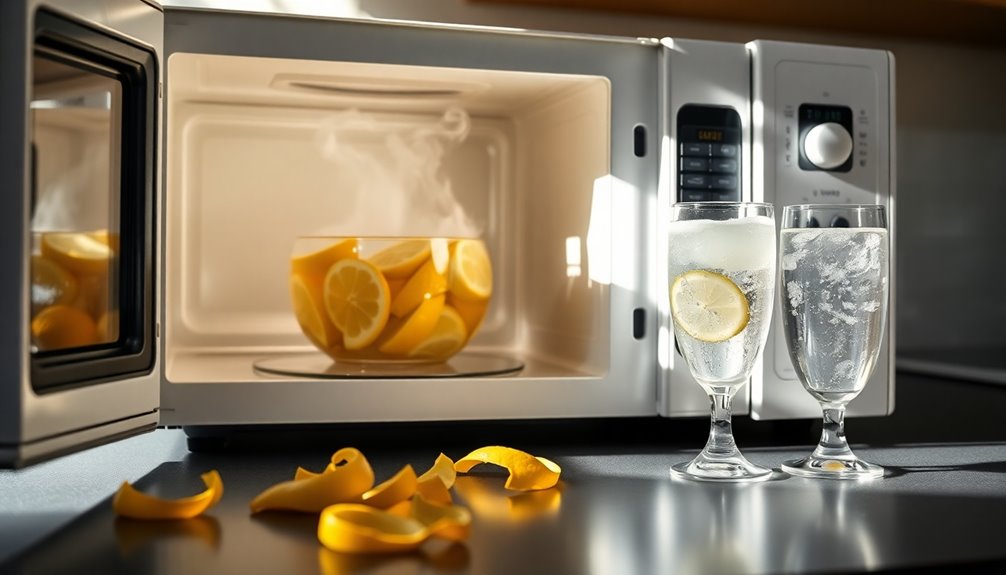
Simply slice a lemon in half, squeeze the juice into a microwave-safe bowl, and add the lemon halves. Microwave on high for five minutes. The steam will work its magic, and the citrus cleaning power will leave your microwave smelling fresh.
Don’t forget about lemon zest benefits; you can add some zest from the lemon for an extra cleaning boost! Additionally, using eco-friendly methods like this not only cleans effectively but also protects your home environment from harsh chemicals.
Once the time’s up, carefully remove the bowl and wipe down the interior with a cloth. You’ll not only remove stains but also eliminate lingering smells, leaving your microwave clean and refreshed.
Enjoy the natural aroma!
Vinegar Magic: Harnessing the Power of White Vinegar
White vinegar is a powerful cleaning ally you can easily use in your microwave.
With its steam cleaning method, it not only helps eliminate odors but also tackles stubborn stains.
Let’s explore how you can harness this versatile ingredient for a sparkling clean microwave. Additionally, using vinegar aligns with eco-friendly products that promote a healthier home environment.
Vinegar Steam Cleaning Method
If you’re looking for a simple and effective way to tackle stubborn microwave stains, the vinegar steam cleaning method is your best friend.
Start by filling a microwave-safe bowl with equal parts water and white vinegar. Place it in the microwave and heat on high for about five minutes. The steam produced will help loosen grime and food particles, showcasing the steam effectiveness.
Once the time’s up, let the bowl sit for a minute before carefully removing it. Wipe down the interior with a cloth, and watch those stains disappear!
The vinegar benefits don’t stop there; it also leaves your microwave smelling fresh. This method is quick, natural, and perfect for busy schedules.
Give it a try!
Odor Elimination With Vinegar
After you’ve tackled those microwave stains with the vinegar steam cleaning method, you might notice lingering odors that need attention.
You can easily eliminate these smells using simple vinegar solutions. Just fill a microwave-safe bowl with equal parts water and white vinegar, then heat it for five minutes. The steam will help neutralize odors, leaving your microwave fresh.
One of the best vinegar benefits is its natural ability to break down odor-causing particles without harsh chemicals.
After the steam session, wipe down the interior with a clean cloth to guarantee a thorough cleanse. You’ll be amazed at how effectively vinegar can refresh your microwave, making it a go-to solution for tackling unwanted smells in your kitchen.
Stain Removal Techniques
Harnessing the power of vinegar can transform your microwave cleaning routine, especially when it comes to stubborn stains.
White vinegar’s acidity breaks down various stain types, from food splatters to greasy residues. For effective cleaning, mix equal parts of vinegar and water in a microwave-safe bowl. Heat it for about five minutes, allowing the steam to loosen the stains. After that, simply wipe down the interior with a soft cloth or sponge.
To maintain a spotless microwave, aim for a cleaning frequency of at least once a week. This proactive approach not only keeps stains at bay but also minimizes odors.
With vinegar magic on your side, your microwave will shine like new!
Baking Soda Paste: Scrub Away Stains With Ease
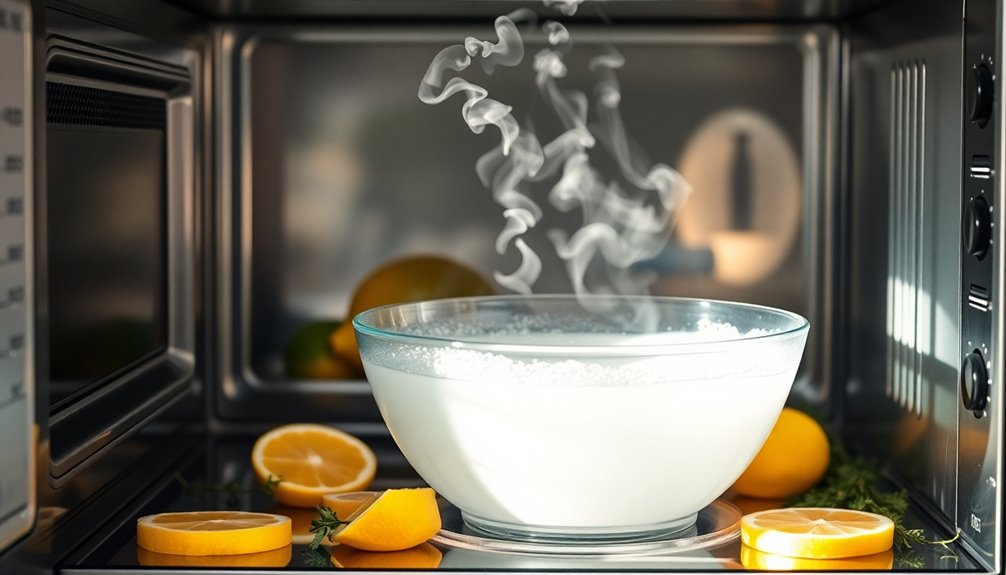
When it comes to tackling stubborn stains in your microwave, a baking soda paste can be your best ally. Known for its baking soda effectiveness, this natural stain remover works wonders without harsh chemicals.
Here’s how to create and use it:
- Mix: Combine three tablespoons of baking soda with water to form a thick paste.
- Apply: Spread the paste on the stained areas of your microwave.
- Wait: Let it sit for 10-15 minutes to break down the grime.
- Scrub: Use a damp cloth or sponge to scrub away the stains easily.
You’ll be amazed at how effectively this simple solution cleans your microwave, leaving it fresh and ready for your next culinary adventure! Its non-toxic nature makes it suitable for kitchen surfaces, ensuring safety while cleaning without harsh chemicals.
Essential Oils for a Fresh Aroma: Adding a Scented Touch
Adding essential oils to your microwave cleaning routine can transform the scent of your kitchen. These oils not only mask odors but also provide antibacterial benefits. Let’s explore some popular choices and effective ways to use them for a fresh aroma. Additionally, incorporating antimicrobial properties of essential oils ensures a cleaner and healthier cooking environment.
Benefits Of Essential Oils
Essential oils not only elevate your cleaning routine but also infuse your space with delightful aromas that can uplift your mood.
By incorporating essential oils into your natural cleaning process, you’ll enjoy several benefits:
- Mood Enhancement: Scents like lemon or lavender can boost your spirits and create a calming atmosphere.
- Natural Antibacterial Properties: Many essential oils, such as tea tree or eucalyptus, have antimicrobial effects, making them great for cleaning.
- Chemical-Free Freshness: You can enjoy a fresh, pleasant scent without the harsh chemicals found in conventional cleaners.
- Personalization: You can mix and match oils to create your unique fragrance blend, tailored to your preferences.
Embrace these essential oil benefits to enhance your microwave cleaning experience!
Popular Essential Oil Choices
Transform your cleaning routine by choosing the right essential oils to create a new aroma in your home.
Lavender oil benefits include its calming scent, which not only soothes your mind but also helps eliminate unwanted odors. Just a few drops can make your microwave smell delightful and inviting.
On the other hand, eucalyptus oil properties are known for their antibacterial and antiviral qualities, making it a powerful choice for cleaning. Its revitalizing scent can invigorate your space while tackling germs.
Combining these oils can elevate your cleaning experience, leaving your microwave spotless and smelling great. Experiment with different blends to find your favorite scent, and enjoy a naturally new environment every time you use your microwave.
Application Methods Explained
There are several effective methods to apply essential oils for a fresh aroma in your microwave.
These application techniques not only enhance the scent but also help keep it clean:
- Essential Oil Spray: Mix water with a few drops of your favorite essential oil in a spray bottle. Lightly mist the microwave interior after cleaning it with natural cleaning supplies.
- Steam Infusion: Add water and essential oils to a microwave-safe bowl, heat for a few minutes, and let the steam work its magic.
- Cotton Balls: Soak cotton balls in essential oils and place them inside the microwave overnight for a lingering scent.
- Scented Rags: Dampen a cloth with essential oils and microwave it briefly to release pleasant aromas.
These techniques make your microwave smell fresh and inviting!
Coffee Grounds: A Surprising Microwave Cleaner
Although you mightn’t think of coffee grounds as a cleaning tool, they can effectively freshen up your microwave. The coffee ground benefits extend beyond your morning brew; they serve as a natural deodorizer and scrubbing agent.
Just sprinkle used coffee grounds on a damp sponge and get ready for effective scrubbing. The coarse texture helps lift stubborn stains and grime without scratching your microwave’s surface. Additionally, using natural cleaners like white vinegar can enhance your microwave cleaning routine by tackling odors and bacteria.
After you’ve scrubbed, wipe down the interior with a damp cloth to remove any residue. You’ll not only clean your microwave but also leave it smelling fresh and inviting.
Salt and Water: A Simple Solution for Tough Grime
When your microwave’s interior is covered in tough grime, salt and water can come to the rescue with minimal effort. This simple solution acts as a powerful salt scrub that tackles stubborn stains effectively.
Here’s how to use it:
Discover the simple steps to effortlessly clean your microwave with a powerful salt and water solution.
- Mix 1/4 cup of salt with 1/4 cup of water in a bowl to create your water solution.
- Place the bowl in the microwave and heat on high for 5 minutes.
- Let it sit for a few minutes to allow steam to loosen the grime.
- Use a sponge or cloth to wipe away the residue, using the salt scrub for any remaining tough spots.
You’ll be amazed at how easily your microwave becomes spotless! Additionally, using natural solutions like salt can contribute to a healthier home environment, as they avoid harsh chemicals found in commercial cleaners.
Orange Peels: Using Citrus to Eliminate Odors
If you want to freshen up your microwave, orange peels are a natural odor neutralizer. Simply pop a few in and let their citrus scent fill the air, improving the overall quality of your microwave. It’s an easy and eco-friendly way to tackle stubborn smells! Additionally, maintaining a clean and hygienic environment in your kitchen is crucial for your family’s health, as it helps to prevent the buildup of harmful bacteria.
Natural Odor Neutralizer
Orange peels aren’t just a tasty snack; they’re also a powerful ally in your quest to eliminate unwanted odors from your microwave. Their natural scents and odor absorption properties make them perfect for freshening up your space.
Here’s how to use them effectively:
- Place Fresh Peels: Put a few orange peels in a bowl of water and microwave for 5 minutes.
- Steep and Cool: Let the mixture cool in the microwave to let the scents permeate.
- Wipe Down Surfaces: Use the bowl’s water to wipe down the microwave’s interior for added freshness.
- Store for Future Use: Keep leftover peels in the fridge for your next round of odor neutralization.
Enjoy a fresher microwave with this simple trick!
Freshening Microwave Air Quality
Using citrus, particularly orange peels, can greatly enhance the air quality inside your microwave.
These peels not only smell delightful but also pack a punch against lingering odors. To invigorate things up, simply place a few orange peels in a microwave-safe bowl filled with water.
Heat the mixture for about five minutes, allowing the steam to circulate and infuse the space with natural scents. Afterward, wipe down the interior surfaces with a cloth to remove any residue.
You’ll notice that any unpleasant smells will be replaced with the revitalizing aroma of citrus. This simple trick not only improves air quality but also makes your microwave a more inviting space for cooking.
Enjoy the fresh scent!
Dish Soap and Water: The Classic Cleaning Duo
Dish soap and water are a powerful duo when it comes to cleaning your microwave. The dish soap benefits include breaking down grease and grime, making your job easier.
Here’s how you can maximize this classic combination:
- Choose the Right Temperature: Use warm water to enhance the soap’s effectiveness.
- Mix It Up: Combine a few drops of dish soap with warm water in a bowl.
- Soak and Scrub: Dip a sponge into the solution and scrub the interior surfaces.
- Wipe Down: Rinse the sponge and wipe away any soap residue, ensuring a clean finish.
With these simple steps, you’ll have a sparkling microwave without harsh chemicals. Enjoy the fresh results! Regular cleaning cycles with vinegar can also help maintain a clean microwave environment by removing residues.
Cornstarch for a Shine: Polishing Your Microwave’s Interior
If you want a sparkling clean microwave, cornstarch is your secret weapon. Not only does it leave a shine, but it’s also super easy to apply. Let’s explore how this simple ingredient can transform your microwave’s interior. Using natural ingredients like cornstarch aligns with the environmental sustainability principles of homemade cleaners, ensuring a safer cleaning experience.
Benefits Of Cornstarch
While many household cleaners can leave your microwave sparkling, cornstarch offers a natural and effective alternative that not only cleans but also polishes the interior surfaces.
Here are some cornstarch benefits that make it an ideal choice for your microwave:
- Non-Toxic: You won’t have to worry about harmful chemicals when using cornstarch.
- Natural Polishing: It leaves a smooth, shiny finish without scratching your microwave.
- Absorbent: Cornstarch helps absorb moisture, preventing odors and mildew.
- Cost-Effective: It’s an inexpensive option compared to commercial cleaners.
Easy Application Method
For those looking to keep their microwave clean and shiny, using cornstarch is a simple and effective method.
Start by mixing one tablespoon of cornstarch with two cups of water in a microwave-safe bowl. Heat the mixture in your microwave for about four minutes, allowing steam to build up and loosen any grime.
After it cools slightly, use a damp cloth to wipe down the interior surfaces. The cornstarch helps polish the microwave, leaving it with a nice shine.
Incorporating this into your cleaning schedule can make a big difference, as it’s an easy task that uses natural alternatives to harsh chemicals.
With just a bit of effort, you’ll keep your microwave looking great!
Grapefruit and Baking Soda: A Zesty Cleaning Combo
Grapefruit and baking soda make a powerful duo for tackling stubborn microwave stains. The natural acidity of grapefruit works wonders, while baking soda’s abrasive properties help lift grime without scratching surfaces. Together, they create an effective cleaning solution that’s safe and eco-friendly.
Grapefruit and baking soda combine to create a powerful, eco-friendly cleaning solution for stubborn microwave stains.
Here’s how to use this zesty combo:
- Cut a grapefruit in half and sprinkle the cut side with baking soda.
- Scrub the microwave surfaces with the grapefruit, using the baking soda as a gentle abrasive.
- Wipe down with a damp cloth to remove any residue.
- Admire your sparkling microwave, free from tough stains and odors!
Enjoy the grapefruit benefits of a fresh scent, alongside baking soda properties that guarantee a deep clean.
Hydrogen Peroxide: Disinfecting and Cleaning in One Step
Hydrogen peroxide is a versatile cleaning agent that not only disinfects but also effectively removes stains in your microwave. As a natural disinfectant, it’s safe and easy to use.
To clean, mix equal parts of hydrogen peroxide and water in a microwave-safe bowl. Heat the mixture for about five minutes, allowing the steam to loosen grime and stains.
Afterward, simply wipe down the interior with a microfiber cloth. For tougher stains, apply hydrogen peroxide directly to the affected area and let it sit for a few minutes before wiping it away.
This method not only kills bacteria but also leaves your microwave sparkling clean. Embrace this simple trick for a healthier cooking environment!
Cream of Tartar: A Lesser-Known Stain Remover
While many people may not realize it, cream of tartar is an excellent stain remover that can work wonders in your microwave. This lesser-known gem not only has a fascinating tartar history but also offers various cream benefits.
Here’s how you can use it effectively:
- Create a paste: Mix cream of tartar with water to form a thick paste.
- Apply generously: Spread the paste on stained areas inside your microwave.
- Let it sit: Allow the paste to sit for about 15 minutes to break down stains.
- Wipe clean: Use a damp cloth to wipe away the paste and reveal a spotless surface.
With these simple steps, you can harness cream of tartar’s power for a cleaner microwave!
Coconut Oil: Grease-Busting Power From Nature
If you’re looking for another natural solution to tackle stubborn microwave stains, coconut oil is a fantastic option.
This versatile oil boasts impressive coconut benefits, including its ability to break down grease effortlessly.
To use it, simply dab a cloth or sponge in a bit of coconut oil and wipe down the greasy areas inside your microwave.
The oil not only lifts grime but also acts as a natural moisturizer for your microwave’s surfaces, preventing them from drying out.
Plus, the pleasant scent of coconut can leave your appliance smelling fresh.
With just a little effort and this powerful natural cleaner, you’ll have a sparkling microwave in no time, all while enjoying the advantages of coconut oil!
Keep It Regular: Establishing a Cleaning Routine
Establishing a regular cleaning routine for your microwave not only keeps it looking pristine but also prevents the buildup of stubborn stains and odors.
By incorporating simple daily habits into your cleaning schedule, you’ll find maintenance effortless.
Here are four easy steps to get you started:
- Wipe down surfaces: After each use, quickly wipe down the interior with a damp cloth.
- Steam clean weekly: Use a bowl of water and vinegar to steam clean your microwave once a week.
- Check for spills: Regularly inspect for any food spills and address them immediately.
- Deep clean monthly: Dedicate time each month for a thorough clean, using natural ingredients.
Stick to these habits, and your microwave will thank you!
Tips for Preventing Future Stains and Odors: Maintenance Matters
Maintaining a fresh and clean microwave is essential for preventing future stains and odors. To keep your appliance in top shape, implement some simple preventive measures.
Start by placing a microwave-safe bowl filled with water and lemon juice inside and running it for a few minutes. This not only freshens the interior but also helps loosen stuck-on food particles.
Don’t forget to perform routine checks; wipe down the interior and exterior weekly to catch spills before they harden.
Always cover your food while microwaving to minimize splatter.
Finally, avoid using metal containers, as they can cause damage and lingering smells.
Conclusion
By embracing these natural cleaning tricks, you’re not just tidying up your microwave; you’re also channeling the wisdom of generations past who relied on simple ingredients. Just as the ancients harnessed the power of nature to cleanse and purify, you too can maintain a fresh, sparkling kitchen without harsh chemicals. So, take a moment to appreciate the art of cleaning and establish that routine—your microwave will thank you, and so will the planet.