A clean kitchen‘s essential for a healthy home and enjoyable cooking. To achieve a sparkling space, start by gathering must-have cleaning tools like microfiber cloths and cellulose sponges. Tackle grease buildup, stuck-on food, and hard-to-reach areas with effective techniques. Create daily, weekly, and monthly routines to maintain your kitchen’s cleanliness. Consistency is key to a tidy environment, and there’s plenty more to discover about each step to keep your kitchen shining bright.
Importance of a Clean Kitchen
When you maintain a clean kitchen, you’re not just tidying up; you’re creating a healthier environment for yourself and your family. A clean kitchen prevents harmful bacteria from thriving, especially in germ-prone areas like the sink and stove.
Regularly cleaning your kitchen reduces the risk of pest infestations, as crumbs and spills attract unwanted guests. Additionally, a tidy kitchen enhances your cooking experience, making meal prep enjoyable and less stressful.
It also helps preserve your appliances, countertops, and cabinetry by preventing grease buildup, ensuring they last longer. While busy lifestyles often lead to neglect, prioritizing kitchen cleanliness can considerably improve hygiene and health outcomes for everyone at home. Moreover, proactive measures can significantly reduce the need for aggressive cleaning agents.
Must-Have Kitchen Cleaning Tools
A clean kitchen starts with the right tools, and having five essential cleaning items can make a world of difference.
A clean kitchen begins with essential tools that transform your cleaning routine into an effortless task.
First, a reusable spray mop with washable pads allows you to deep clean your floors without wasteful disposables.
Next, cellulose sponges, made from plant-based fibers, offer scratch-free scrubbing power for all surfaces.
Don’t forget a vacuum with a HEPA filter to capture fine dust and allergens, ensuring a healthier environment.
Incorporating a scrub brush with a bamboo handle and natural bristles promotes sustainability while tackling tough grime.
Finally, keep a set of microfiber cloths handy; they trap grease, dust, and bacteria effectively. Utilizing eco-conscious cleaning tools will further enhance your kitchen’s cleanliness and sustainability efforts.
With these cleaning tools and supplies, you’ll maintain a sparkling kitchen effortlessly.
Microfiber Cloths
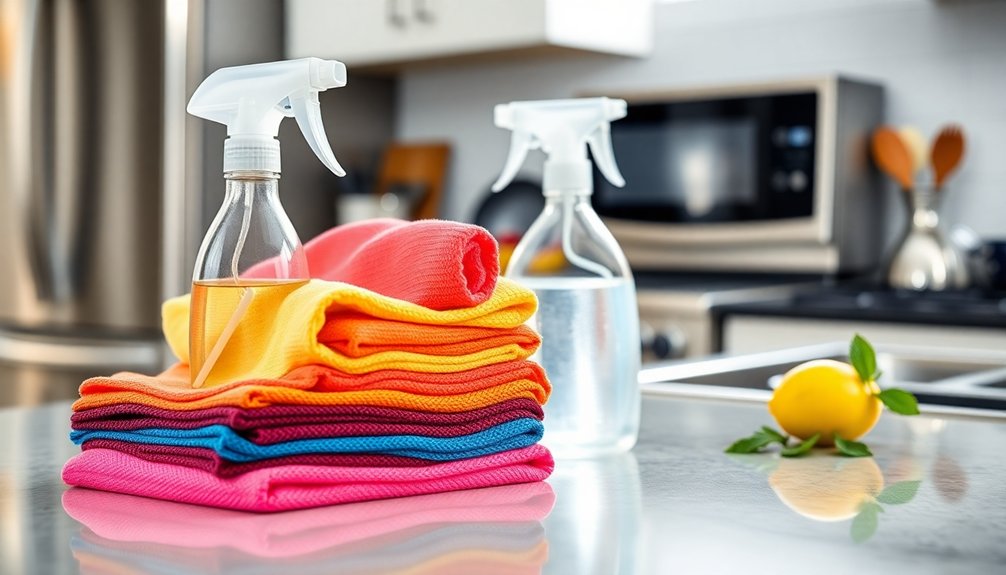
Microfiber cloths are game changers for your kitchen cleaning routine. They trap dirt and bacteria more effectively than traditional cloths and can absorb a lot of water, making your cleaning faster and easier. Additionally, using microfiber cloths for effective dust capture can enhance your overall cleaning efficiency and ensure a sparkling kitchen.
Let’s explore the benefits, proper cleaning techniques, and care tips to keep your microfiber cloths in top shape.
Benefits of Microfiber Cloths
Not only do microfiber cloths effectively trap up to 99% of bacteria and allergens, but they also offer a range of benefits that make them a superior choice for kitchen cleaning.
Here are four key advantages of using microfiber cloths for your cleaning tasks:
- Superior Cleaning Power: Their tiny fibers reach into crevices, picking up dirt and grime that traditional cloths can miss.
- Reusable and Eco-Friendly: You can wash and reuse them, reducing waste and saving money compared to disposable options.
- Versatility: Use them dry for dusting or damp for deep cleaning, adapting to various surfaces easily.
- Chemical-Free: They effectively clean with just water, promoting a more eco-friendly approach to your kitchen cleaning tasks.
Proper Cleaning Techniques
When using microfiber cloths for kitchen cleaning, mastering the right techniques can enhance their effectiveness.
Start by dampening your microfiber cloth slightly; this helps it trap dirt and grease better than standard cleaning rags. Wipe surfaces with a gentle back-and-forth motion, allowing the cloth to lift and hold onto particles rather than pushing them around.
For tougher stains, use a little water or a mild cleaner, but avoid anything harsh that could damage the fibers. After cleaning, rinse the cloth thoroughly to remove trapped grime.
Remember, microfiber cloths are reusable and eco-friendly, so launder them without fabric softeners or bleach to maintain their superior cleaning ability.
Enjoy a sparkling kitchen with these efficient tools!
Maintenance and Care Tips
To keep your microfiber cloths in prime condition, follow a few simple maintenance tips that can extend their lifespan and enhance their cleaning performance.
These cloths are fantastic for trapping dirt and bacteria, but proper care is essential.
- Wash without fabric softeners or bleach to protect the fibers and maintain their effectiveness.
- Separate cloths by color or purpose (like kitchen or bathroom) to avoid cross-contamination of germs and dirt.
- Air dry or tumble dry on low to prevent damage and preserve the cloth’s absorbency.
- Regularly replace worn-out microfiber cloths to guarantee peak cleaning results and keep your cleaning solutions effective.
Cellulose Sponges
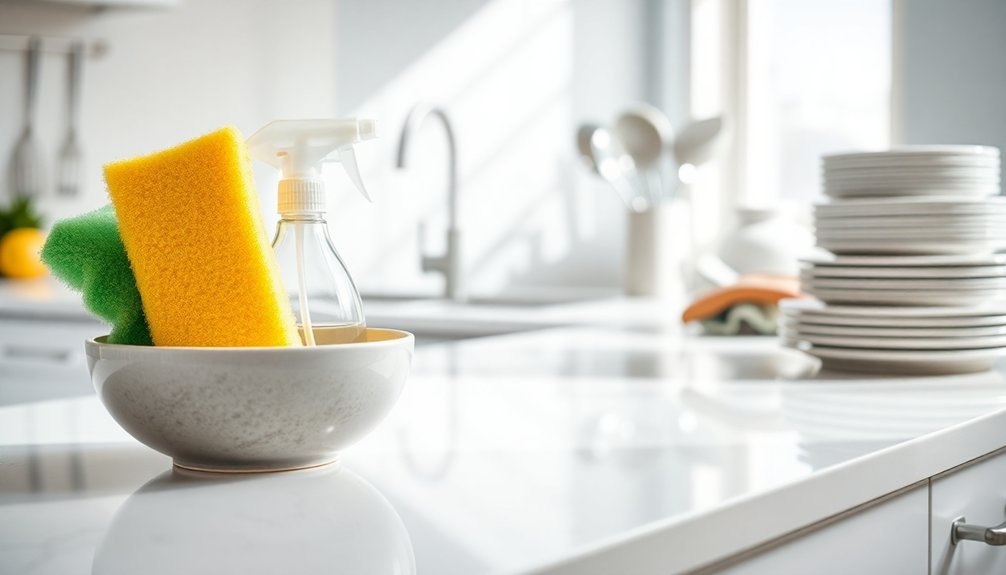
When it comes to eco-friendly cleaning, cellulose sponges are a fantastic choice for your kitchen.
Their impressive absorbency and gentle texture give you effective scrubbing power without damaging surfaces.
Plus, they’re biodegradable, making them a sustainable option for tackling spills and messes. Additionally, using eco-friendly ingredients like vinegar and baking soda can enhance your cleaning routine while being safe for your family.
Eco-Friendly Cleaning Choice
There’s a smart choice for cleaning your kitchen that not only gets the job done but also cares for the planet: cellulose sponges.
These eco-friendly sponges are made from plant-based fibers and are biodegradable, making them a sustainable alternative to traditional sponges.
Plus, they can absorb up to 15 times their weight in water, providing excellent cleaning power.
Here’s why you should switch to cellulose sponges:
- Biodegradable: They break down naturally, reducing landfill waste.
- Non-toxic: Free from harmful chemicals, promoting a healthier kitchen.
- Machine washable: Reusable multiple times, cutting down on replacements.
- Odor-resistant: They naturally resist bacteria and odors, keeping your kitchen sanitary.
Make the eco-friendly choice today!
Effective Scrubbing Power
Cellulose sponges not only offer eco-friendly benefits but also pack a punch when it comes to scrubbing power. When you’re cleaning the kitchen, these biodegradable sponges made from plant-based fibers provide effective scrubbing power without scratching your delicate surfaces, like non-stick cookware.
Their high absorbency allows them to soak up to 20 times their weight in liquid, making quick work of spills and messes. Plus, you can easily sanitize them by soaking in vinegar and water or microwaving for a minute, extending their lifespan.
Unlike synthetic sponges, cellulose sponges resist bacteria growth and odors, promoting a cleaner, healthier kitchen environment. Choose these sponges for a sustainable and effective way to keep your kitchen sparkling.
Reusable Spray Mop With Washable Pads
A reusable spray mop with washable pads is an eco-friendly solution that transforms your floor cleaning routine.
It reduces waste compared to disposable pads, making it a sustainable choice for your cleaning schedule.
Here are some benefits of using this innovative tool:
Discover the advantages of a reusable spray mop and elevate your floor cleaning routine with efficiency and sustainability.
- Built-in Spray Mechanism: Apply cleaning solutions directly onto the floor for enhanced efficiency.
- Washable Pads: Reuse them multiple times, saving you money and reducing environmental impact.
- Microfiber Technology: Effectively traps dirt, dust, and bacteria for a deeper clean than traditional mops.
- Quick Touch-ups: Simplify your cleaning process and maintain clean floors effortlessly, making it perfect for busy households.
Incorporate this into your cleaning checklist for a sparkling kitchen! Additionally, using a vacuum mop combo can further streamline your hardwood floor maintenance.
Scrub Brush With a Replaceable Head
A scrub brush with a replaceable head is a smart, eco-friendly choice for your kitchen cleaning routine.
You can easily swap out the head to maintain hygiene and effectiveness, while enjoying versatile cleaning applications on various surfaces.
Plus, the ergonomic handle guarantees you can scrub comfortably without straining your hands. Additionally, using a scrub brush helps to reduce the risk of foodborne illnesses, ensuring that your kitchen remains a safe and healthy environment.
Eco-Friendly Cleaning Option
When you’re looking for an eco-friendly cleaning solution, consider a scrub brush with a replaceable head. This option not only minimizes plastic waste but also promotes a more sustainable cleaning routine.
Here are some reasons to choose one:
- Sustainable Materials: Many brushes feature biodegradable handles, like bamboo, and plant-based bristles.
- Durable Design: They come with sturdy bristles that tackle tough grime on various surfaces efficiently.
- Comfortable Use: Ergonomic handles prevent hand fatigue during extended cleaning sessions.
- Hygiene Maintenance: Regularly replacing the head keeps your scrub brush performing effectively and free from bacteria.
Replaceable Head Benefits
While traditional scrub brushes often end up in landfills once the bristles wear out, using a scrub brush with a replaceable head lets you maintain your cleaning tools sustainably. This innovative design not only reduces waste but also boosts your cleaning efficiency.
By swapping out the heads when they wear down, you guarantee that your brush remains effective without the need for an entire new tool. Plus, many of these scrub brushes come with various head options, letting you choose the right bristle stiffness for different surfaces.
Over time, this can be more cost-effective, as you’ll save money on frequent brush replacements. With ergonomic handles designed for comfort, you’ll enjoy a better cleaning experience with your essential cleaning supplies.
Versatile Cleaning Applications
Scrub brushes with replaceable heads offer remarkable versatility, making them perfect for various cleaning tasks around the kitchen.
You can easily switch out the bristle heads to tackle different surfaces, enhancing your kitchen cleaning routine. Here are four ways to use your scrub brush effectively:
- Pots and Pans: Use a tough bristle head to scrub away stubborn food residues.
- Countertops: Switch to a softer head for safe cleaning of sensitive surfaces.
- Floors: A durable head can help lift grime from tiled or vinyl floors.
- Grill Grates: Use a heavy-duty head for deep cleaning your grill after use.
With a bamboo handle, this eco-friendly scrub brush not only cleans effectively but also reduces your environmental impact.
Vacuum With a HEPA Filter
Vacuuming with a HEPA filter is essential for maintaining a clean and healthy kitchen environment. A HEPA filter captures at least 99.97% of particles, including allergens like dust, pet dander, and pollen, which are commonly found on your kitchen floor.
By regularly vacuuming, you help reduce harmful bacteria and dust mites, promoting a healthier cooking and dining space. Aim to vacuum your kitchen floors at least once a week, especially in high-traffic areas, to prevent the buildup of crumbs and debris that attract pests.
Additionally, using a vacuum equipped with a HEPA filter considerably improves indoor air quality, minimizing airborne contaminants that can irritate respiratory conditions. Keeping your kitchen clean starts with effective vacuuming! Regular use of HEPA filter vacuums significantly reduces allergens in the environment, contributing to overall well-being.
Go-To Kitchen Cleaners
Maintaining a clean kitchen goes beyond just vacuuming; it’s also about using the right cleaners to tackle various surfaces effectively.
Opting for DIY all-purpose and eco-friendly products not only saves you money but also keeps your kitchen safe for your family. Here are some go-to cleaners you can easily make at home:
- DIY All-Purpose Cleaner: Mix water, distilled white vinegar, and lemon essential oil for a natural solution.
- Homemade Degreaser: Combine mild dish soap, baking soda, and warm water to cut through tough grease.
- Sanitizing Spray: Use 3% hydrogen peroxide mixed with lemon essential oil for a safe sanitizing option.
- Baking Soda Deodorizer: Place it in your fridge to absorb odors effectively.
Incorporating these natural degreasers into your cleaning routine will keep your kitchen sparkling!
DIY All-Purpose Cleaner
Creating your own DIY all-purpose cleaner is a simple and effective way to keep your kitchen spotless.
Mix one part distilled white vinegar with one part water, and add a few drops of lemon essential oil for a fresh scent. This eco-friendly solution works wonders on countertops, appliances, and other surfaces, effortlessly removing dirt, grease, and bacteria without harsh chemicals.
Vinegar’s natural antibacterial properties help disinfect surfaces, making it perfect for food preparation areas. Just remember to avoid using vinegar on natural stone surfaces like granite and marble, as it can damage their finish over time. Regular use of DIY non-toxic cleaners ensures a hygienic space while prioritizing family safety.
With this cleaning guide, you’ll have a versatile cleaner that’s both effective and safe for your kitchen environment.
DIY Degreaser
When grease and grime take over your kitchen surfaces, a DIY degreaser can come to the rescue. Making your own eco-friendly degreaser is simple and effective. Here’s how to whip it up:
- Mix a paste of mild dish soap, baking soda, and warm water to cut through grease.
- Spray a solution of equal parts vinegar and water on tougher spots, letting it sit for a few minutes.
- Use the baking soda’s natural abrasiveness to lift stubborn stains without scratching surfaces.
- Regularly apply your DIY degreaser on high-use areas like stovetops and countertops to keep those clean kitchen surfaces free from grime.
Incorporating eco-friendly ingredients not only enhances your cleaning power but also promotes a healthier kitchen environment. With this easy recipe, you’ll enjoy a sparkling, grease-free kitchen!
DIY Kitchen Sanitizer
When it comes to creating your own kitchen sanitizer, you’ll want to gather a few simple ingredients. Knowing the right application techniques and how to store your mixture can maximize its effectiveness and shelf life. Let’s explore how to whip up a powerful sanitizer that keeps your kitchen safe and fresh.
Ingredients for DIY Sanitizer
To guarantee your kitchen stays germ-free, it’s easy to whip up a DIY sanitizer using simple ingredients.
Here’s what you’ll need to create an effective all-purpose cleaner:
- 3% hydrogen peroxide – This acts as the primary disinfectant.
- Lemon essential oil – Add a few drops for a fresh scent and additional antibacterial properties.
- Distilled white vinegar – Combine one part with one part water for a powerful odor-neutralizing solution.
- Water – Use this to dilute vinegar and enhance your sanitizer’s effectiveness.
Remember to let your DIY sanitizer sit on surfaces for at least 10 minutes before wiping it off.
Always label your creations clearly and store them out of reach of children for safety.
Application Techniques
Applying your DIY kitchen sanitizer effectively is essential to ensuring a germ-free environment.
Start by mixing one part 3% hydrogen peroxide with one part water in a dark glass spray bottle to create a powerful cleaning disinfectant. When you’re ready, spray the solution on kitchen surfaces and allow it to dwell for at least 10 minutes. This step is vital for killing bacteria and viruses effectively.
Afterward, wipe the surface with a clean cloth. For an eco-friendly alternative, mix equal parts distilled white vinegar and water to deodorize and disinfect.
Always remember to label your homemade sanitizers clearly and store them in a cool, dark place to maintain their effectiveness.
Happy cleaning!
Storage and Shelf Life
Proper storage of your DIY kitchen sanitizer is key to maintaining its effectiveness.
To make certain you’re getting the most from your homemade cleaner, keep these tips in mind:
- Use a Dark Glass Bottle: This protects your sanitizer from light degradation.
- Label the Bottle: Include the ingredients and the date of preparation for safe and proper usage.
- Store in a Cool, Dry Place: Avoid heat and moisture, which can decrease shelf life.
- Replace Regularly: Check your sanitizer every 1-2 months and replace it to guarantee maximum potency.
DIY Floor Cleaner
Creating your own floor cleaner at home is both easy and effective. Just mix one cup of distilled white vinegar with one cup of water, and add a few drops of lemon essential oil for an invigorating scent and antibacterial properties.
This eco-friendly solution tackles grease and grime on various floor types, including tile, laminate, and vinyl.
To use it, combine the ingredients in a spray bottle, spray the solution onto your floor, and mop with a damp microfiber cloth for a streak-free finish.
The vinegar’s acidity disinfects surfaces and neutralizes odors, making it a safer alternative to commercial cleaners.
Regularly using this DIY floor cleaner promotes a healthier indoor environment by reducing toxins and allergens.
DIY Deodorizer
Creating a DIY deodorizer is simple and uses natural ingredients like baking soda and essential oils to keep your kitchen smelling fresh.
You can apply these deodorizers in various ways, whether as a spray or a paste, depending on your needs.
Plus, knowing how to store them properly guarantees they last longer, making your cleaning routine even more efficient.
Natural Ingredients for Deodorizer
If you’re looking for an effective way to freshen up your kitchen, using natural ingredients for a DIY deodorizer is a simple and eco-friendly solution. Here are some great options:
- Baking soda: Place an open container in your fridge or pantry to absorb odors naturally.
- Vinegar: Mix equal parts distilled white vinegar and water in a spray bottle to eliminate odors on surfaces and in the air.
- Citrus peels: Use lemon or orange peels in the garbage disposal or simmer them in water to release a fresh scent.
- Herbs: Add herbs like rosemary or mint to your deodorizer for a pleasant fragrance and natural antibacterial properties.
These ingredients will keep your kitchen smelling fresh and inviting!
Application Methods Explained
Natural ingredients can be easily turned into effective DIY deodorizers with a few simple application methods. Start by mixing baking soda with a few drops of lavender essential oil for a subtle fragrance that absorbs odors.
For tougher smells, fill a spray bottle with equal parts distilled white vinegar and water to neutralize and disinfect surfaces during your kitchen cleaning tasks. You can also place an open container of baking soda in your refrigerator or pantry for continuous odor absorption.
If you prefer a citrus scent, combine lemon juice with water and spray it in odor-prone areas, taking advantage of lemon’s antibacterial properties. Refresh your DIY deodorizer every few weeks to maintain a fresh kitchen environment.
Storage and Shelf Life
While DIY deodorizers can effectively tackle kitchen odors, proper storage and attention to shelf life are essential for maintaining their potency.
Here’s how to guarantee your homemade deodorizer remains effective:
- Use a Sealed Container: Store your baking soda and essential oil mixture in a sealed container to keep it fresh and potent for several months.
- Replace Regularly: Aim to replace your deodorizer every 30 to 60 days, depending on the intensity of odors in your kitchen.
- Choose Open Storage: For maximum odor absorption, consider using an open jar or bowl, allowing for better air circulation.
- Keep Away from Heat: Store your deodorizer in a cool, dark place to preserve its effectiveness and prolong its shelf life.
Step-by-Step Kitchen Cleaning Process
Cleaning your kitchen can be tackled in five simple steps that guarantee a thorough job.
First, gather your cleaning tools and open windows for ventilation.
Next, tidy up the space by decluttering countertops and cabinets—remove expired items and organize contents for a fresh start.
Once that’s done, focus on cleaning appliances; wipe down the refrigerator, oven, and microwave with the right solutions tailored for each surface.
Then, spray and wipe down kitchen surfaces, including countertops and tables, using an all-purpose cleaner. Let it sit for a few minutes to effectively tackle grime.
Finally, mop the kitchen floors to collect any dust and debris, ensuring your freshly cleaned surfaces stay pristine.
Step 1: Prep
To kick off your kitchen cleaning, start by opening the windows for better airflow and to reduce cleaning product odors.
Next, gather all your supplies, like microfiber cloths and all-purpose cleaner, to keep your cleaning process smooth and efficient.
With everything ready, you can focus on making your kitchen shine!
Gather Cleaning Supplies
Before diving into your kitchen cleaning tasks, it’s essential to gather the right supplies to make the process smooth and efficient.
Having the right cleaning supplies on hand not only saves time but also guarantees an effective clean. Here’s a quick list to help you get started:
- Clean microfiber cloths: These are great for trapping dust and grime.
- All-purpose cleaner: A versatile solution for various surfaces.
- Dish soap: Perfect for tackling greasy messes.
- Broom and mop: Essential for keeping your floors spotless.
Consider using a portable caddy to keep your supplies organized.
Don’t forget to check the condition of your items and replace any worn-out tools to maintain hygiene and effectiveness throughout your cleaning session.
Open Windows for Ventilation
Opening a few windows can greatly enhance your kitchen cleaning experience. Good ventilation is key to improving air quality, especially when you’re using cleaning products that can release strong odors.
By letting in fresh air, you’ll not only dissipate those scents but also help dry wet surfaces faster, reducing the risk of mold growth in damp areas.
Plus, proper airflow minimizes the inhalation of harmful fumes, making your cleaning session safer and healthier. Remember, your kitchen is a high-use area, so maintaining adequate ventilation is essential.
With fresh air circulating, you’ll create a more pleasant environment, making your cleaning tasks feel less intimidating and more enjoyable.
Step 2: Tidy Up
Tidy up your kitchen by clearing off countertops and removing any clutter, like decor and small appliances. This creates a clear workspace for your cleaning.
Next, take the time to empty your cabinets and drawers, allowing you to clean their interiors and discard expired or unused items. Organize everything before returning them, maximizing space and ensuring accessibility.
Here’s a quick checklist to help you:
- Remove decor and small appliances from countertops.
- Empty cabinets and drawers to clean their interiors.
- Sort through kitchen tools and utensils, discarding broken or outdated items.
- Organize items by category before placing them back.
A tidy kitchen not only looks great but also makes cooking more efficient and less stressful!
Step 3: Clean the Appliances
Cleaning your appliances is an essential part of maintaining a tidy kitchen. Start by unplugging your small appliances like toasters and coffee makers. Wipe down their exteriors and interiors with an all-purpose cleaner to eliminate crumbs and stains.
For your refrigerator, clean the shelves with warm, soapy water and check for expired items to keep food storage hygienic. To clean the microwave, heat a bowl of water mixed with vinegar and lemon for five minutes, then wipe the interior surfaces with a microfiber cloth.
For the oven, use a baking soda paste or its self-cleaning setting to tackle baked-on food. Finally, don’t forget to clean your garbage disposal by running ice and vinegar through it to freshen it up.
Step 4: Sink and Drain Care
Now that your appliances are sparkling, it’s time to focus on your sink and drains.
You can keep your sink clean with simple techniques, maintain your drains effectively, and use easy methods to deodorize the space.
Let’s explore how to tackle these tasks and keep your kitchen fresh and functional.
Sink Cleaning Techniques
Maintaining a spotless sink and drain is essential for a hygienic kitchen. Here are some effective cleaning techniques to keep your sink in top shape:
- Scrub the sink basin: Use a baking soda paste to tackle stains and grease without scratching the stainless steel surface.
- Rinse thoroughly: After scrubbing, rinse the sink with warm water to guarantee all cleaning agents are washed away.
- Freshen the drain: Pour half a cup of baking soda followed by a cup of vinegar down the drain. Let it fizz for 10 minutes, then flush with cool water.
- Deodorize: Grind ice cubes and lemon peels in the garbage disposal to eliminate odors and maintain cleanliness.
Regular cleaning prevents buildup, guaranteeing a fresh and inviting space.
Drain Maintenance Tips
To keep your kitchen running smoothly, regular drain maintenance is essential. Start by cleaning your sink with baking soda and a gentle cleaner, scrubbing away grease and stains for a hygienic washing area.
To maintain your drains, pour half a cup of baking soda followed by a cup of vinegar down the drain. Let it fizz for about 10 minutes before flushing with cool water to prevent clogs.
Don’t forget to grind ice cubes and lemon peels in the garbage disposal to clean the blades and keep it fresh. Periodically check and clean the drain trap to remove food debris and avoid unpleasant odors.
For a deeper clean, sanitize the sink and faucet with a disinfectant regularly.
Deodorizing Methods
One effective way to keep your kitchen fresh is by deodorizing your sink and drain regularly.
Here are some simple deodorizing methods to try:
- Baking Soda Paste: Scrub your kitchen sink with a paste made of baking soda and water to eliminate odors and grease buildup.
- Baking Soda and Vinegar: Pour half a cup of baking soda followed by one cup of vinegar down the drain. Let it fizz for 10 minutes, then flush with cool water.
- Ice and Lemon: Grind ice cubes and lemon peels in your garbage disposal. This deodorizes while sharpening the blades.
- Monthly Cleaning: Regularly clean your sink and drain to prevent bacteria buildup and keep odors at bay.
These easy steps will guarantee a fresher kitchen environment.
Step 5: Surfaces
While cleaning your kitchen surfaces, it’s essential to use an all-purpose cleaner effectively. Spray the cleaner on the surfaces and let it sit for about two minutes to loosen any grime.
Then, wipe everything down with a clean microfiber cloth. Don’t forget to disinfect high-touch surfaces like countertops and cabinet handles, especially after preparing food, to minimize bacteria transfer.
For tough stains and odors, a mixture of baking soda and lemon juice works wonders without damaging finishes.
Always clean from top to bottom, starting with shelves and countertops, to avoid debris falling onto already cleaned areas.
Finally, use soft cloths or cellulose sponges instead of abrasive ones to protect delicate surfaces from scratches.
Step 6: Floors
Now that you’ve tackled the surfaces, it’s time to focus on the floors.
Start by sweeping or vacuuming to get rid of crumbs and dust, then choose the right cleaner for your flooring type.
With effective sweeping techniques and a good mop, you’ll have your floors looking spotless in no time.
Types of Floor Cleaners
When it comes to cleaning your kitchen floors, choosing the right type of floor cleaner is essential for effective results. Here are some options to evaluate:
- All-Purpose Cleaners: Great for multiple surfaces, but always check compatibility with your floor material to avoid damage.
- pH-Neutral Cleaners: Ideal for hardwood floors; harsh chemicals can strip finishes and cause long-term harm.
- Degreasing Cleaners: Perfect for tile and laminate floors, these tackle tough stains and grime without leaving residue.
- Eco-Friendly Cleaners: Often biodegradable, these options are safer for the environment and your household health.
Selecting the right floor cleaners will leave your kitchen sparkling and in top condition.
Effective Sweeping Techniques
Effective sweeping techniques are essential for maintaining clean kitchen floors. Start by removing any large debris or items from the floor to guarantee an unobstructed sweeping process.
Use a broom with stiff bristles to effectively gather crumbs, dust, and dirt from both tile and hardwood surfaces. Sweep in a systematic pattern, moving from one side of the kitchen to the other for complete coverage.
Angle the broom to capture dust and dirt in corners and along baseboards, where debris tends to accumulate. Once you’ve finished sweeping, use a dustpan to collect the debris.
For a more thorough clean, consider following up with a damp mop to tackle any remaining grime inside your kitchen.
Daily Kitchen Cleaning Checklist
To keep your kitchen fresh and inviting, tackling daily cleaning tasks is essential. By incorporating these habits into your routine, you’ll maintain a sparkling space without much effort.
Here’s your daily cleaning checklist:
- Remove Clutter: Clear countertops and surfaces to prevent grime buildup.
- Wipe Surfaces: Use an all-purpose cleaner or warm soapy water to clean tables and counters after each meal.
- Sweep or Vacuum: Daily, sweep or vacuum kitchen floors to keep crumbs from accumulating.
- Tidy Dishes: Unload the dishwasher and wash any remaining dirty dishes promptly, and always sanitize the sink and faucet.
For a truly clean kitchen, don’t forget to clean the oven regularly as well!
Weekly Kitchen Cleaning Checklist
A solid weekly cleaning routine can elevate your kitchen’s cleanliness and functionality. Start by wiping down the exteriors of all appliances, like the refrigerator and microwave, to eliminate fingerprints and smudges.
Next, thoroughly clean and sanitize the sink, paying special attention to faucet handles and the basin. Don’t forget to mop or clean the kitchen floor, focusing on high-traffic areas and around the stove.
Discard any leftovers or expired items from the refrigerator, and clean the shelves with an all-purpose cleaner to maintain freshness and hygiene.
Finally, wipe down cabinet fronts and handles to remove food splatters and grease, keeping your kitchen looking tidy and well-maintained.
Following this weekly cleaning checklist guarantees a sparkling kitchen!
Monthly Kitchen Cleaning Checklist
Building on your weekly cleaning routine, a monthly kitchen cleaning checklist takes your efforts a step further.
Elevate your cleaning routine with a monthly kitchen checklist for a deeper, more thorough clean.
These monthly tasks focus on deep cleaning areas often overlooked, ensuring your kitchen remains fresh and hygienic.
Here’s what you should include:
- Clean the interior of your refrigerator and freezer, discarding expired items and wiping down shelves with a mild solution.
- Dust and clean the tops of cabinets, light fixtures, and ceiling corners to eliminate allergens.
- Sanitize pantry shelves while checking for expired items to keep your food storage organized.
- Deep clean the oven using a baking soda and vinegar paste or the self-cleaning function to remove built-up grease.
Following this checklist will help maintain a sparkling kitchen!
Seasonal Kitchen Cleaning Checklist
While you may keep up with weekly and monthly cleaning tasks, a seasonal kitchen cleaning checklist guarantees that your kitchen gets the thorough attention it needs every few months.
Focus on deep cleaning tasks like using the self-cleaning setting on your oven and cleaning the microwave filter. Don’t forget to wipe down ceilings and walls to remove dust and grease buildup.
Declutter your cabinets and drawers, check for expired items, and donate unused kitchen tools to optimize space.
Take this opportunity to sharpen your kitchen knives and clean behind large appliances like the refrigerator and garbage can.
Regular seasonal cleaning helps prevent pest infestations and enhances your kitchen’s overall appearance and functionality, ensuring a pleasant cooking environment.
Tips for Sticking to Your Kitchen Cleaning Schedule
Keeping your kitchen clean year-round requires a solid plan to maintain the effort put into seasonal deep cleaning. Here are some tips to help you stick to your kitchen cleaning schedule:
- Schedule specific kitchen cleaning days in your calendar to establish a routine and guarantee consistency.
- Break larger cleaning tasks into smaller, manageable chunks so you won’t feel overwhelmed and can make regular progress.
- Involve family members or housemates in the cleaning process to share the workload and foster teamwork.
- Use reminders or checklists to stay on track with your daily, weekly, and monthly tasks, reinforcing accountability.
Don’t forget to reward yourself for completing tasks—this boosts motivation and makes cleaning more enjoyable!
Pro Tips for Common Kitchen Cleaning Challenges
When it comes to tackling common kitchen cleaning challenges, you’ll find that using the right techniques and tools can make all the difference.
For tough grease stains on your stovetop, mix baking soda and water for a gentle yet effective cleaning solution.
When cleaning stainless steel appliances, always grab a microfiber cloth and a cleaner specifically formulated for stainless steel to avoid scratches and streaks.
Got burnt-on food in your pots? Soak them in a vinegar and water solution or use a baking soda paste to loosen the residue before scrubbing.
Don’t forget about your kitchen sponges—replace them every 1-2 weeks, and you can disinfect them by microwaving damp sponges for 1-2 minutes between replacements!
Grease Buildup
Grease buildup can quickly become a significant issue in your kitchen, especially if you frequently cook with high heat.
It can harbor bacteria and lead to unpleasant odors, so regular cleaning is essential for food safety.
To keep your kitchen sparkling and safe, follow these steps:
- Wipe down stovetops and oven: After cooking, immediately clean surfaces to prevent grease from hardening.
- Scrub kitchen sinks: Rinse away food particles and grease to avoid buildup.
- Clean backsplashes: Use a mixture of baking soda and vinegar to tackle stubborn grease stains.
- Maintain range hoods: Regularly clean filters to guarantee they effectively capture grease and odors.
Stuck-On Food
After tackling grease buildup, it’s time to address another common kitchen challenge: stuck-on food. This residue can harbor bacteria and attract pests, so it’s essential to deal with it promptly.
Start by soaking pots and pans in warm, soapy water for 15-30 minutes to loosen the stuck-on food. For tougher spots, mix baking soda and water into a paste, apply it, and let it sit for a few minutes.
Then, use a non-abrasive scrubber with vinegar or lemon juice to dissolve stubborn particles without damaging surfaces.
Hard-to-Reach Areas
Cleaning those hard-to-reach areas in your kitchen is essential for maintaining a hygienic space. Dust, grime, and even pests can accumulate in these spots if you neglect them.
Here’s a quick checklist to help you tackle those tricky areas:
- Vacuum with a HEPA filter to remove dust and allergens from corners and under appliances.
- Use extendable dusters or microfiber cloths on long handles for high surfaces like cabinet tops and light fixtures.
- Move appliances out from walls every few months for thorough cleaning behind and underneath.
- Regularly check these hard-to-reach areas to prevent pest infestations and keep your kitchen fresh.
Make cleaning these areas a routine task, and you’ll enjoy a cleaner, healthier kitchen!
Kitchen in Need of Some TLC?
Is your kitchen feeling cluttered and grimy? It might be time for some serious TLC. A clean kitchen is essential for preventing bacteria buildup, especially on surfaces like countertops and sinks.
Neglecting to clean your oven regularly can lead to inefficiencies and costly repairs down the line. Start with a deep clean using natural solutions like baking soda and lemon juice to tackle tough stains and odors effectively.
Involve your family in the cleaning process to share the responsibility and reduce your workload. Implementing a structured cleaning schedule with daily, weekly, and monthly tasks will enhance both hygiene and the overall appearance of your kitchen, making it a more enjoyable space for cooking and gathering.
Conclusion
A clean kitchen isn’t just a joy to cook in; it’s the heart of your home. Remember, “A tidy kitchen is a tidy mind.” By following this checklist, you’ll turn your cluttered space into a sparkling sanctuary. So grab your cleaning tools, roll up your sleeves, and get to work! With each step, you’re not just cleaning; you’re creating an inviting atmosphere for family and friends. Your kitchen deserves that extra love and care!