Spring cleaning your kitchen is essential for a hygienic and organized space. Start by gathering your cleaning supplies, including all-purpose cleaners and sponges. Declutter your countertops and organize your pantry. Don’t forget to deep clean appliances like the fridge and oven. Refresh your floors and sanitize your kitchen utensils regularly. Inspect sponges and towels for replacements as needed. Ready to tackle a year-round maintenance plan? There’s plenty more to explore for a sparkling kitchen!
Why Spring Cleaning Your Kitchen Is Essential

Spring cleaning your kitchen is essential for several reasons.
First, it markedly improves kitchen hygiene. Over time, grease, crumbs, and spills accumulate, creating a breeding ground for bacteria. By dedicating time to clean, you make sure your cooking space remains safe and sanitary.
Cleaning your kitchen ensures a safe, sanitary space by eliminating grease, crumbs, and spills that harbor bacteria.
Second, seasonal maintenance helps you keep track of any wear or damage, allowing you to address issues before they escalate. This proactive approach not only saves you money but also enhances the longevity of your appliances and surfaces.
Additionally, a clean kitchen can boost your mood and inspire creativity in meal preparation. Implementing consistent cleaning routines can further prevent dirt and bacteria buildup, ensuring your kitchen remains a welcoming space.
Gather Your Cleaning Supplies and Tools
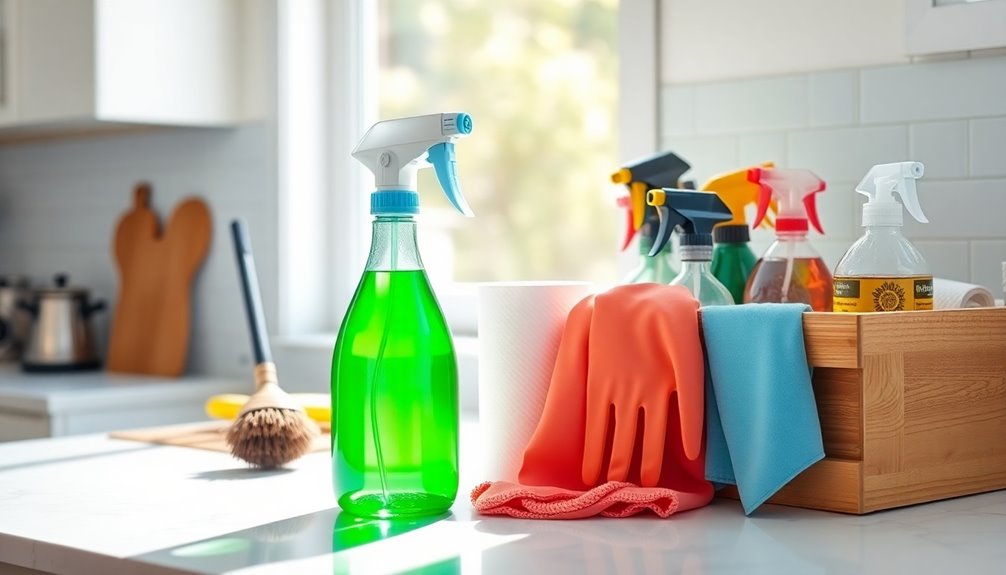
Before diving into your kitchen spring cleaning, you’ll want to gather the right supplies and tools to make the process efficient and effective.
Start by collecting essential cleaning tools like sponges, microfiber cloths, scrub brushes, and a mop. Don’t forget your favorite all-purpose cleaner, disinfectant, and baking soda for tough stains.
Next, grab organizing supplies such as bins, baskets, and labels to help streamline the decluttering process later on. These will assist you in sorting items and keeping everything tidy.
Having these supplies ready will save you time and energy, allowing you to focus on transforming your kitchen into the clean, organized space you desire. Remember to include personal protective equipment to enhance safety during your cleaning tasks.
Get everything together, and you’re one step closer to a spotless kitchen!
Declutter Your Kitchen Countertops and Surfaces
As you tackle your kitchen cleaning, decluttering your countertops and surfaces is essential for creating a fresh and functional space.
Start by clearing everything off your countertops, removing items that don’t belong or are rarely used. Evaluate each item and decide what’s worth keeping.
For effective countertop organization, focus on essentials like your coffee maker or knife block, and find a designated spot for them. Use trays or containers to group similar items together, reducing visual clutter. Additionally, consider implementing drawer dividers to streamline your kitchen storage and enhance daily cooking routines.
Don’t forget about your other surfaces, too—wipe down and clear any dust or grime.
Organize Your Pantry: A Step-By-Step Guide
While it might seem like an intimidating task, organizing your pantry is key to maximizing efficiency in your kitchen. Start by taking everything out and conducting a pantry inventory. This’ll help you identify expired items and what you actually use.
Next, categorize your food—group snacks, baking supplies, and canned goods together. Invest in storage solutions like clear bins and labels to keep everything tidy and accessible. Consider using stackable containers for bulk items to save space. Additionally, incorporating DIY pullout drawers can enhance organization and accessibility of your pantry items.
Once you’ve organized, place frequently used items at eye level and lesser-used items higher up. Finally, maintain your pantry by checking your inventory regularly and adjusting as needed. With these steps, you’ll enjoy a streamlined and functional pantry!
Deep Clean Your Kitchen Appliances Effectively
Deep cleaning your kitchen appliances can breathe new life into your cooking space and improve performance.
Start with your refrigerator: remove all items, wash shelves and drawers, and wipe down the interior.
For your oven, use a mix of baking soda and water to tackle stubborn stains, letting it sit before scrubbing.
Don’t forget your microwave; a bowl of water with lemon can help loosen grime.
Your dishwasher needs attention too—run a cycle with vinegar to remove buildup, as it prolongs the appliance’s lifespan and minimizes performance issues.
Establishing regular cleaning schedules will help with appliance maintenance, ensuring they run efficiently.
Finally, check filters on your range hood and clean them as needed.
A clean kitchen not only looks great but also enhances your cooking experience!
Tackle Your Cabinets: Cleaning and Organizing Tips
It’s time to tackle your cabinets and make the most of your kitchen space.
Start by decluttering and sorting through your items to see what you really need.
Once that’s done, give your shelves and surfaces a thorough clean to create a fresh and organized environment. Consider implementing a labeling system to enhance organization and streamline your efforts.
Declutter and Sort Items
A well-organized kitchen starts with decluttering your cabinets, making it easier to find what you need and enhancing your cooking experience.
Begin by emptying each cabinet, then sort through your items. Keep only what you love and use regularly. If you find duplicates or things you no longer need, consider donating items in good condition to local charities.
For broken or unusable containers, recycle them responsibly. As you sort, group similar items together—like baking supplies, cooking utensils, and dishes. This way, everything has its place, and you’ll save time while cooking.
Once you’ve decluttered, you’ll feel a sense of accomplishment and have a more functional kitchen space. Happy organizing!
Clean Shelves and Surfaces
Once you’ve decluttered your cabinets, it’s time to give your shelves and surfaces a thorough clean.
Start with a solid plan for shelf organization and surface sanitization to guarantee every corner shines.
- Remove everything: Take out all items from your shelves and wipe them down with a damp cloth. Don’t forget to check for expired products!
- Use a cleaner: Apply a gentle cleaner to surfaces, making sure you reach the back and corners. This not only sanitizes but also keeps your kitchen fresh.
- Reorganize: Once everything’s clean, return items to the shelves. Group similar items together for better shelf organization and easy access.
With your shelves and surfaces sparkling, you’re well on your way to a revitalized kitchen!
Don’t Forget the Sink and Faucet: Cleaning Techniques
Your kitchen sink and faucet often collect grime and hard water stains, making them prime candidates for a thorough clean during spring cleaning.
Start by using effective sink scrubbing techniques. A mixture of baking soda and vinegar works wonders; sprinkle baking soda, then spray with vinegar, letting it fizz for a few minutes before scrubbing. For stubborn stains, use a soft-bristle brush.
Next, focus on faucet polishing methods. Use a microfiber cloth and a gentle cleaner to wipe down the faucet, removing any residue. For a sparkling finish, a dab of olive oil can help polish stainless steel. Additionally, consider using lemon juice and baking soda as an eco-friendly solution for tough stains.
Don’t forget to check the crevices where dirt tends to hide, ensuring your sink and faucet shine like new!
Refresh Your Kitchen Floors: Best Practices
Your kitchen floors deserve some attention during spring cleaning.
Start by choosing the right cleaner, then sweep and vacuum to clear away debris.
Finally, mop with a careful technique to guarantee a sparkling finish. Remember to select a cleaner that is compatible with specific floor types to ensure optimal results.
Choose The Right Cleaner
When it comes to revitalizing your kitchen floors, choosing the right cleaner can make all the difference in achieving a spotless finish.
You want something effective yet safe for your family and the environment. Consider these options:
- Vinegar and Water: A simple mix of vinegar and water serves as a powerful natural cleaner that cuts through grime without harsh chemicals.
- Baking Soda: Sprinkle baking soda on tough stains, then scrub with a damp cloth for a gentle but effective clean.
- Eco-Friendly Store-Bought Cleaners: Look for products labeled as eco-friendly options that use natural ingredients, ensuring your kitchen stays fresh without harmful residues.
With the right cleaner, your kitchen floors will shine like new!
Sweep And Vacuum First
Start by sweeping and vacuuming your kitchen floors to remove dirt, crumbs, and debris before diving into deeper cleaning. This step is essential for maintaining kitchen efficiency and sets a solid foundation for your cleaning routine.
Use a broom to gather larger debris, then follow up with a vacuum to pick up fine particles and hidden dust. Pay special attention to corners and under appliances, where dirt tends to accumulate. If you have a vacuum with a brush attachment, it can help reach those tricky spots.
Mop With Careful Technique
To achieve a truly clean kitchen floor, mopping with a careful technique is crucial.
Using the right mopping techniques not only guarantees your floors shine but also extends their life. Here are three best practices for effective floor care:
- Choose the Right Mop: Select a mop that suits your floor type—microfiber for tiles, string mops for larger areas.
- Use the Right Cleaning Solution: Opt for a pH-neutral cleaner that won’t damage your flooring. Always dilute according to the manufacturer’s instructions.
- Mop in Sections: Work in small sections, starting from the farthest corner and moving towards the exit. This prevents stepping on wet areas.
Clean and Sanitize Your Kitchen Utensils and Tools
As you immerse yourself in your spring cleaning, don’t overlook the importance of thoroughly cleaning and sanitizing your kitchen utensils and tools.
Start by gathering all your utensils, including spatulas, whisks, and measuring cups. Wash them in hot, soapy water, then rinse thoroughly. For utensil sanitization, consider soaking them in a solution of one tablespoon of unscented liquid chlorine bleach per gallon of water for about two minutes.
Don’t forget to clean your cutting boards and knives, as they need special attention. After washing, guarantee proper tool maintenance by drying them with a clean cloth or air drying. Additionally, regularly cleaning your cutting boards ensures they remain free from harmful bacteria and contaminants.
Inspect and Replace Kitchen Sponges and Towels
Kitchen sponges and towels can harbor more germs than you might realize, so it’s essential to inspect and replace them regularly.
Kitchen sponges and towels can collect more germs than you think, making regular inspection and replacement crucial for hygiene.
Keeping up with kitchen hygiene means being proactive about these items, as they can easily become breeding grounds for bacteria.
Here’s how to guarantee your sponges and towels are up to par:
- Check for Wear and Tear: If your sponge is fraying or discolored, it’s time for a replacement.
- Smell Test: A foul odor indicates it’s time for sponge disposal; don’t compromise on cleanliness.
- Frequency of Replacement: Aim to replace sponges every two weeks and towels weekly to maintain ideal kitchen hygiene. Additionally, monitoring for signs of damage helps ensure that your cleaning tools are effective and safe.
Create a Maintenance Plan for Year-Round Cleanliness
After ensuring your sponges and towels are up to standard, it’s time to take a proactive approach to maintain your kitchen’s cleanliness year-round.
Start by creating a cleaning schedule that outlines daily, weekly, and monthly tasks. Daily, wipe down surfaces and wash dishes to prevent buildup.
Weekly, focus on deeper cleaning, like scrubbing the sink and mopping the floor.
Monthly, tackle harder-to-reach areas, such as behind appliances and inside cabinets.
Don’t forget to periodically check your pantry for expired items.
By implementing this year-round maintenance plan, you’ll keep your kitchen organized and hygienic, making it easier to enjoy cooking and entertaining.
Stick to your schedule, and you’ll see significant improvements in your kitchen’s cleanliness.
Conclusion
As you stand in your freshly cleaned kitchen, take a moment to appreciate the gleaming countertops and the inviting aroma of a tidy space. You’ve transformed chaos into calm, creating a welcoming haven for cooking and gathering. By following this spring cleaning checklist, you’ve not only revitalized your kitchen but also set the stage for year-round joy and creativity. Embrace the satisfaction of your hard work, and let that sparkle inspire you every day!