To effectively clean your plunger, start by rinsing it in hot water after every use to remove debris. For a thorough disinfecting, swirl it in a toilet bowl filled with bleach or soak it in apple cider vinegar. After disinfecting, rinse it in fresh water and let it air dry completely. Store it in a designated holder to keep germs at bay. Want to learn more about maintenance and storage techniques? Stick around for additional tips!
Importance of Cleaning a Plunger
Cleaning a plunger might seem tedious, but it’s vital for your health and hygiene. Regular cleaning prevents the spread of harmful bacteria like E. coli and salmonella that thrive on its surfaces.
By rinsing the plunger in hot water immediately after use, you can effectively remove debris and reduce the risk of contamination. Additionally, utilizing disinfectants such as bleach or vinegar during your cleaning routine greatly decreases germs on the plunger. This not only helps eliminate unpleasant odors but also guarantees a more hygienic bathroom environment. Properly cleaned and maintained plungers last longer and function more effectively, making them reliable tools for unclogging toilets. Prioritizing this task is a simple yet essential step in maintaining your home’s hygiene. Moreover, using non-toxic cleaners can provide an eco-friendly solution for disinfecting your plunger without harmful chemicals.
How to Clean a Toilet Plunger: The Traditional Way
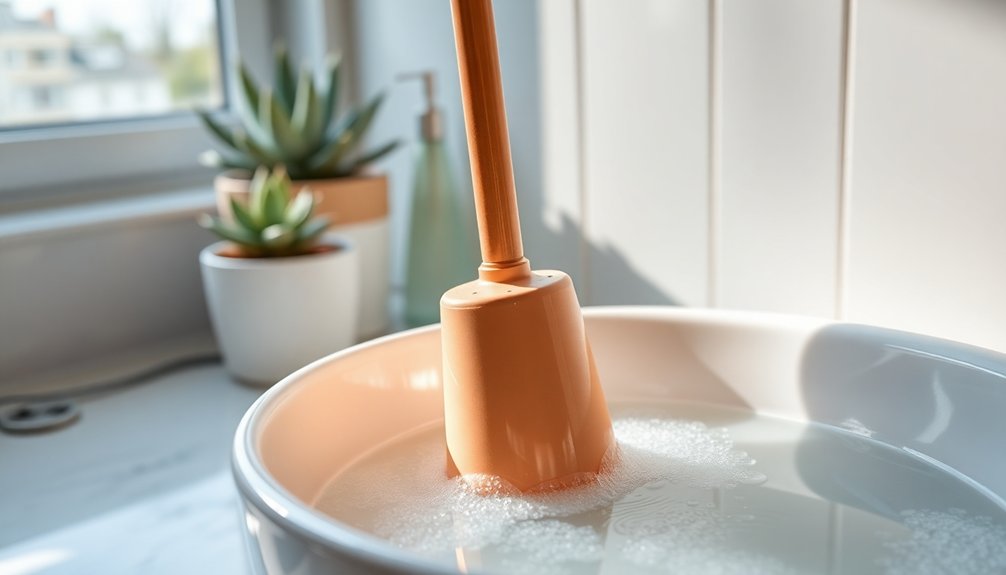
To effectively clean your toilet plunger using the traditional method, start by pouring 2 to 3 caps of liquid chlorine bleach into the toilet bowl.
Vigorously swirl the toilet plunger in the bleached water to guarantee thorough disinfection and germ removal. This step is essential for eliminating any stubborn contaminants.
After swirling, flush the toilet to rinse away the bleach and any debris from the plunger. Next, rinse the plunger in fresh water to remove any remaining bleach residue. This will help maintain a clean plunger without lingering chemicals.
Finally, allow the plunger to air dry completely before storing it to prevent bacterial growth and unpleasant odors. Following these steps guarantees your toilet plunger remains clean and ready for use. Additionally, regular cleaning of your plunger is essential to prevent buildup of harmful bacteria that can lead to infections.
How to Clean a Toilet Plunger: The Organic Way
For a natural and effective way to clean your toilet plunger, start by pouring a generous amount of 5% apple cider vinegar into the toilet. This creates a natural disinfectant solution that’s safe and effective.
Follow these steps:
- Soak and swirl the dirty plunger in the vinegar solution for a few minutes to help break down debris and kill germs.
- Flush the toilet to remove the debris and rinse the plunger in fresh water.
- Allow the plunger to air dry completely before storing it to prevent bacteria growth and odors.
Regular cleaning with apple cider vinegar not only disinfects but also helps maintain the plunger’s longevity and functionality. Additionally, using natural disinfectants like vinegar can significantly reduce health risks linked to toxic chemicals in conventional cleaners.
You’ll have a clean, fresh plunger ready for use!
How to Clean a Toilet Plunger: the Quick N’ Dirty Way
While it’s not the most glamorous task, quickly disinfecting your toilet plunger can be done in just a few simple steps.
First, quarantine the used plunger in a plastic grocery bag to contain any residual germs. Next, thoroughly spray the entire plunger with an aerosol disinfectant, ensuring all surfaces are covered for effective germ-killing. Allow it to sit for a few moments to let the disinfectant work its magic.
Quarantine your plunger in a bag, spray it with disinfectant, and let it sit to ensure effective germ elimination.
This method is quick and efficient, perfect for anyone wanting to sanitize their plunger without extensive cleaning. Finally, store the newly disinfected plunger in a clean plunger holder, keeping it off the floor and away from other surfaces to maintain proper hygiene.
Your plunger will be clean and ready for use!
Proper Storage Techniques for Plungers

After you’ve disinfected your plunger, proper storage is key to maintaining its cleanliness and functionality.
Here are a few techniques to guarantee your plungers stay sanitary:
- Use a designated holder or caddy: This keeps mess contained and allows for proper air drying, preventing bacteria growth and odors.
- Avoid floor storage: Never place your plungers on the floor or bathroom surfaces to prevent cross-contamination and hygiene issues.
- Consider a DIY bucket: A plastic bucket can serve as a holder, and adding a cleaning solution helps reduce odors and bacteria. Regularly evaluate your storage area for cleanliness to guarantee your plungers remain clean, dry, and ready for use whenever you need them. Additionally, incorporating storage bins and baskets can further enhance organization and accessibility in your bathroom.
Conclusion
Now that you know how to effectively clean your plunger, you can keep your bathroom tools fresh and hygienic. Whether you choose the traditional method, opt for organic solutions, or need a quick fix, each approach has its merit. Remember, a clean plunger not only guarantees better performance but also contributes to a healthier home environment. So, store it properly after use, and you’ll be ready for any unexpected clogs that come your way!