Vinegar’s a fantastic cleaner that tackles stains and odors with ease. Just mix it with water for window cleaning or soak your showerhead to fight limescale. You can even use it in your laundry to pre-treat stains. However, avoid using it on surfaces like natural stone or unsealed wood, as it can cause damage. Curious about more vinegar hacks and what surfaces to steer clear of? You’re in for some great tips ahead!
The Magic of Vinegar: What Makes It a Top Cleaner?

When it comes to natural cleaning solutions, vinegar stands out as a powerhouse. Its unique vinegar properties make it an exceptional cleaner, thanks to its acetic acid content.
This acid not only cuts through grease but also helps to dissolve mineral deposits and neutralizes odors, enhancing your cleaning effectiveness. You’ll find it works wonders on countertops, bathrooms, and even glass surfaces.
Plus, it’s non-toxic, making it safe for your family and pets. Using vinegar in your cleaning routine can reduce the need for harsh chemicals, promoting a greener home environment. Additionally, vinegar’s general cleaning benefits highlight its versatility as an effective and eco-friendly cleaning agent.
How to Tackle Stains on Your Clothes With Vinegar
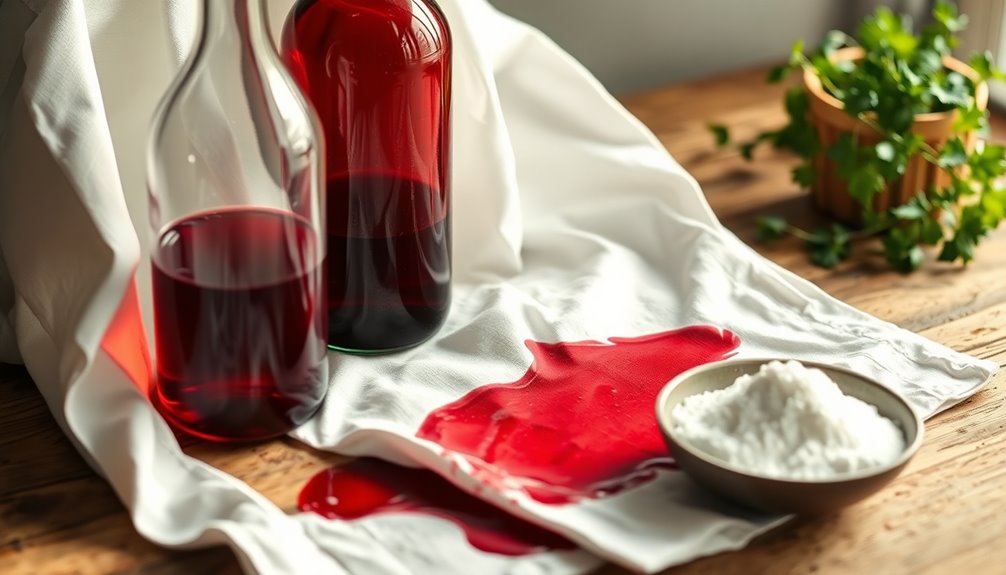
If you’re dealing with stubborn stains on your clothes, vinegar can be your best friend. It’s effective for vinegar stain removal and gentle on fabrics.
Here’s how to use it for vinegar fabric care:
- Pre-treat stains: Mix equal parts vinegar and water, apply it to the stain, and let it sit for 10-15 minutes.
- For sweat stains: Combine vinegar with baking soda to form a paste, apply it, and scrub gently.
- For grease stains: Soak the stained area in vinegar for 30 minutes before washing.
- For ink stains: Dab the area with a cloth soaked in vinegar, then rinse thoroughly.
Always test on a small fabric patch first to verify the color holds. Additionally, using vinegar aligns with eco-friendly methods that reduce environmental impact while effectively tackling stains.
Always perform a patch test on fabric to ensure colorfastness before treating stains.
Happy cleaning!
Freshen Up Your Home: Using Vinegar to Eliminate Odors
If you’re tired of lingering odors in your home, vinegar can be your go-to solution. It works wonders on stinky carpets, freshens up kitchen smells, and eliminates unwanted bathroom scents. Additionally, vinegar sprays can help neutralize kitchen odors effectively, making it a versatile cleaning agent. Let’s explore how you can use this simple ingredient to create a fresher environment.
Vinegar For Stinky Carpets
Stinky carpets can really dampen the atmosphere in your home, but vinegar is a powerful ally in banishing those unpleasant odors.
For effective carpet deodorization, try these vinegar applications:
- Mix equal parts water and vinegar in a spray bottle, then spritz the affected areas lightly.
- Let it sit for 5-10 minutes to allow the vinegar to neutralize odors.
- Blot with a clean cloth to absorb excess moisture and odors.
- Sprinkle baking soda on the area after it dries, then vacuum it up to enhance freshness.
These simple steps can help you restore the freshness of your carpets, making your home more inviting.
Freshening Up Kitchen Odors
After tackling those pesky carpet odors, it’s time to freshen up your kitchen, where lingering smells can often be a nuisance.
Vinegar is your best friend for achieving kitchen freshness! To absorb unwanted odors, place a bowl of vinegar on your counter or in the fridge. The acetic acid in vinegar works wonders for odor absorption, neutralizing smells from cooking or spoiled food.
You can also mix equal parts vinegar and water in a spray bottle to wipe down surfaces, including countertops and cutting boards. This not only eliminates odors but also disinfects.
For a quick fix, simmer a pot of water with vinegar and your favorite herbs or citrus peels. Your kitchen will smell delightful in no time!
Eliminating Bathroom Smells
While you might think the bathroom is a tough spot for odors to vanish, vinegar proves to be a powerful ally in tackling those unwelcome smells.
Here’s how to freshen the bathroom air effectively:
- Identify Odor Sources: Check for damp towels, dirty laundry, or leftover hygiene products that may be causing the smell.
- Vinegar Spray: Mix equal parts water and vinegar in a spray bottle. Spritz around the room, focusing on corners and under the sink.
- Sink Drain: Pour half a cup of vinegar down the drain to neutralize odors and break down residue.
- Air Freshener: Keep a bowl of vinegar in the bathroom to absorb lingering smells over time.
With these tips, you’ll keep your bathroom fresh and welcoming!
Cleaning Your Windows: The Vinegar Solution for Streak-Free Shine
Cleaning your windows with vinegar can give you that streak-free shine you’re after. You’ll want to know the best vinegar mixture ratios and application techniques to achieve the best results. Plus, it’s important to learn when you shouldn’t use vinegar to avoid any mishaps. For optimal cleaning, consider using a vinegar and water solution to eliminate soap scum and mineral deposits.
Best Vinegar Mixture Ratios
For a streak-free shine on your windows, the right vinegar mixture is essential. The vinegar ratios you use can greatly impact mixture effectiveness. Here’s a simple guide to get the perfect blend:
- 1 part vinegar to 1 part water: This classic mix is great for everyday cleaning.
- 1 part vinegar to 2 parts water: Use this for lightly soiled windows.
- 1 part vinegar to 3 parts water: Perfect for a more diluted solution, especially in colder weather.
- Add a few drops of dish soap: This enhances grease-cutting power without compromising the shine.
Streak-Free Application Techniques
Achieving a streak-free shine on your windows requires not just the right vinegar mixture but also effective application techniques.
Start by using a clean microfiber cloth or a squeegee for the best results. Spray your vinegar application generously on the glass surface, ensuring even coverage.
Using a circular motion, wipe the surface with the cloth, then follow up with a vertical or horizontal swipe using the squeegee to catch any excess liquid. This streak-free technique minimizes the chances of residue buildup.
For larger windows, work in sections to maintain control and prevent the vinegar from drying too quickly.
Finish by buffing any remaining spots with a dry cloth for that ultimate shine. Enjoy your crystal-clear windows!
When Not to Use
While vinegar is a powerful natural cleaner, there are situations where you should avoid using it on your windows.
Here are four instances when vinegar safety becomes a concern:
- Tinted Windows: Vinegar can damage the film, leading to peeling or discoloration.
- Unsealed Wood Frames: The acidity can break down finishes, ruining your window frames.
- Extreme Temperatures: Hot or cold glass may react poorly to vinegar, causing cracks.
- High-Quality Glass: For luxury or coated windows, consider vinegar alternatives like mild dish soap or specialized cleaners.
In these cases, opting for safer alternatives helps preserve your windows while ensuring a streak-free shine.
Always prioritize vinegar safety to avoid costly damage.
Revive Your Showerhead: Vinegar for Limescale and Mineral Buildup
Over time, your showerhead can accumulate limescale and mineral buildup, turning what should be a relaxing experience into a frustrating one.
For effective showerhead maintenance, vinegar is your go-to solution for limescale removal. Simply fill a plastic bag with white vinegar and secure it around your showerhead using a rubber band. Let it soak for a few hours, allowing the vinegar to work its magic on the buildup.
After soaking, remove the bag and run the water to flush out any remaining debris. If necessary, use an old toothbrush to scrub away stubborn spots. This simple vinegar hack not only restores your showerhead’s functionality but also enhances your shower experience, making it easier to prevent future build-up of harmful bacteria and mineral deposits. Say goodbye to frustrating water flow and hello to invigorating showers!
Descaling Your Coffee Maker: Why Vinegar Is Your Best Friend
Descaling your coffee maker is essential for maintaining the flavor and efficiency of your morning brew.
Regular descaling of your coffee maker is crucial for preserving the taste and performance of your daily brew.
Vinegar is your best friend for this task, but it’s good to know some vinegar alternatives, too.
Here’s how to effectively descale:
- Mix equal parts vinegar and water in the reservoir.
- Run a brewing cycle, letting the solution work through the machine.
- Discard the mixture and run two cycles with fresh water to rinse.
- Repeat this process every three to six months for ideal coffee maker maintenance.
Using vinegar helps remove mineral buildup, ensuring your coffee tastes fresh. Additionally, vinegar acts as a natural disinfectant that can enhance the cleaning process by reducing bacteria and odors.
While vinegar works wonders, if you prefer alternatives, consider citric acid or commercial descaling solutions.
A Natural Way to Clean Your Dishwasher With Vinegar
Cleaning your dishwasher with vinegar is a simple, natural solution that offers multiple benefits. It helps eliminate odors and removes grime without harsh chemicals. In just a few easy steps, you can have your dishwasher sparkling clean and running efficiently. Additionally, vinegar contains 4-6% acetic acid, which is effective against bacteria and odors, making it an excellent choice for keeping your dishwasher fresh.
Benefits Of Vinegar Cleaning
When you want a sparkling clean dishwasher without harsh chemicals, vinegar is an excellent natural solution.
The vinegar benefits go beyond just its cleaning power; it also offers several advantages as a cleaning alternative.
Here are four key benefits of using vinegar for your dishwasher:
- Deodorizes: It neutralizes unpleasant odors, leaving your dishwasher smelling fresh.
- Mineral Buildup Removal: Vinegar effectively breaks down hard water deposits and mineral buildup.
- Disinfects: It has antibacterial properties, helping to kill germs and bacteria.
- Eco-Friendly: Using vinegar reduces your reliance on chemical cleaners, making it safer for the environment.
Switching to vinegar not only enhances your dishwasher’s performance but also promotes a healthier home.
Steps To Clean Dishwasher
To achieve a sparkling clean dishwasher naturally, using vinegar is both simple and effective.
Start by emptying your dishwasher and removing any debris from the filter. Next, place a cup of white vinegar in a dishwasher-safe container on the top rack. Run a hot water cycle—this helps break down grease and eliminates odors, showcasing vinegar benefits.
For stubborn stains, sprinkle baking soda on the bottom and run a short cycle afterward. This combination enhances your dishwasher maintenance routine, ensuring it runs efficiently.
Finally, wipe down the exterior and door seals with a vinegar-soaked cloth to keep everything fresh.
With these easy steps, you’ll maintain a clean and odor-free dishwasher, maximizing its lifespan and performance.
How to Unclog Drains Using Vinegar and Baking Soda
Unclogging drains can be a simple task with just two common household items: vinegar and baking soda. This method not only helps with clogs but also supports drain maintenance and odor prevention.
Here’s how to do it:
- Boil Water: Start by boiling a pot of water and carefully pour it down the drain.
- Add Baking Soda: Next, pour about a cup of baking soda into the drain.
- Pour Vinegar: Follow up with a cup of vinegar. You’ll see fizzing—this means it’s working!
- Flush with Water: After 10-15 minutes, flush the drain again with hot water.
Using this combination regularly can keep your drains flowing smoothly and eliminate unpleasant smells! Additionally, this eco-friendly method can help prevent future blockages and maintain smooth plumbing by utilizing baking soda and vinegar.
Refresh Your Microwave: Vinegar’s Role in Easy Cleaning
If your microwave needs a refresh, vinegar can be your best friend.
By using the steam cleaning method with vinegar, you’ll not only eliminate tough stains but also neutralize any lingering odors.
Plus, it’s safe for all the materials commonly found in your microwave, making it a hassle-free solution. Additionally, vinegar is effective for cleaning the outside of the microwave, ensuring a thorough clean of your appliance.
Vinegar Steam Cleaning Method
One simple yet effective way to refresh your microwave is by using the vinegar steam cleaning method. This technique harnesses vinegar concentration effects to break down grime and stains effortlessly.
Here’s how you can do it:
- Fill a microwave-safe bowl with 1 cup of water and 1 tablespoon of vinegar.
- Place the bowl in your microwave and heat it on high for 5 minutes.
- Let the steam work its magic for a few minutes before opening the door.
- Wipe the interior with a cloth to remove loosened debris.
The steam cleaning benefits are clear: it softens stuck-on food, neutralizes odors, and leaves your microwave sparkling clean without harsh chemicals.
Enjoy a refreshed microwave in just minutes!
Odor Elimination Properties
After using the vinegar steam cleaning method, you’ll notice not just a cleaner microwave but also a significant reduction in unpleasant odors.
Vinegar’s natural acidity works wonders in breaking down odor-causing particles. By employing vinegar absorption techniques, you can effectively draw out lingering smells that often stick around.
Simply mix equal parts water and vinegar in a microwave-safe bowl, heat it for several minutes, and let the steam work its magic. The steam not only cleans surfaces but also neutralizes odors.
Plus, vinegar’s odor retention properties mean that any smells that remain won’t linger for long. Regular use of this method can keep your microwave fresh and free from unwanted scents, making it a valuable cleaning hack.
Safe Microwave Materials
What materials are safe to use in your microwave when cleaning with vinegar?
When you’re tackling tough grime, it’s essential to guarantee you’re using microwave safe materials for vinegar microwave safety. Here are four safe options to take into account:
- Glass bowls – They’re non-reactive and can withstand heat.
- Ceramic dishes – These are typically safe as long as they’re labeled microwave safe.
- Silicone containers – Flexible and durable, perfect for steaming with vinegar.
- Microwave-safe plastic – Just make sure it’s labeled accordingly to avoid melting.
Using these materials not only simplifies your cleaning routine but also guarantees you won’t compromise your microwave’s safety.
Happy cleaning!
Vinegar and Baking Soda: The Dynamic Duo for Tough Grime
When tackling tough grime, combining vinegar and baking soda creates a powerful cleaning solution that’s hard to beat. The vinegar benefits include its natural acidity, which helps dissolve stubborn stains and cuts through grease.
When you add baking soda’s versatility, you get a fizzing reaction that lifts dirt away effortlessly. This combination not only enhances the cleaning power but also makes it non-toxic and environmentally friendly, ensuring safety for households with children and pets.
To use this dynamic duo, simply sprinkle baking soda on the stained area and spray with vinegar. Let the mixture bubble for a few minutes, then scrub and rinse.
This method works wonders in kitchens, bathrooms, and even on outdoor furniture. Just remember not to mix too much, as the reaction can be intense.
With this combo, you’ll conquer grime with ease and enjoy a cleaner space!
Polish Your Furniture: Using Vinegar Safely on Wood
While vinegar is a fantastic natural cleaner, using it on wood furniture requires a bit of caution. Certain furniture types and wood finishes can be sensitive to acidity.
Using vinegar on wood furniture can be effective, but be cautious as some finishes may react poorly to its acidity.
Here are some tips to polish your wood safely:
- Dilute: Mix equal parts vinegar and water to lessen acidity.
- Test First: Always test on a hidden area to check for reactions.
- Avoid Glossy Finishes: Vinegar can dull shiny surfaces, so steer clear of high-gloss finishes.
- Use Sparingly: Don’t overdo it; frequent use can damage the wood.
The Power of Vinegar in Cleaning Bathroom Tiles and Grout
If you’re looking for an effective way to tackle stubborn stains and grime in your bathroom, vinegar is a powerhouse cleaning agent. Its natural acidity helps break down soap scum and mildew, making it perfect for bathroom maintenance.
Mix equal parts of vinegar and water in a spray bottle, and apply it to your tiles and grout. Let it sit for a few minutes, then scrub with a brush for ideal tile restoration. Rinse with warm water to reveal sparkling clean surfaces.
How to Use Vinegar for Pet Odor Removal
Vinegar’s unique properties make it a go-to solution for tackling pet odors in your home.
When dealing with those pesky pet stains, a vinegar solution can help neutralize odors effectively. Here’s how to use it:
- Blot the Stain: Start by soaking up as much of the pet stain as possible with paper towels.
- Mix the Solution: Combine equal parts of white vinegar and water in a spray bottle.
- Apply the Vinegar Solution: Spray the affected area generously, letting it sit for about 10-15 minutes.
- Rinse and Dry: Blot the area with clean towels, then let it air dry.
This simple method not only removes odors but also helps deter your pets from returning to the same spot.
Vinegar for Cleaning Your Refrigerator: What You Need to Know
After tackling pet odors, it’s time to turn your attention to another area that can benefit from vinegar’s cleaning prowess: your refrigerator.
Vinegar is a powerful, natural cleaner suitable for keeping your fridge fresh and organized. Use white vinegar for general cleaning, as its acidity cuts through grime and odors effectively. Mix equal parts vinegar and water in a spray bottle, then wipe down shelves, drawers, and surfaces.
For tough stains, you can use apple cider vinegar, which also leaves a pleasant scent.
Remember to declutter and organize your fridge before cleaning—this makes the process easier and more efficient.
With the right vinegar types and a little effort, your refrigerator will shine and smell great!
Why Should You Avoid Vinegar on Certain Surfaces?
While vinegar is a versatile cleaning agent, you should be cautious about using it on certain surfaces. Its acidity can cause vinegar damage if you’re not careful.
Vinegar is a powerful cleaner, but be mindful of its acidity to avoid damaging sensitive surfaces.
To guarantee surface compatibility, avoid using vinegar on:
- Natural Stone: It can etch and dull surfaces like granite and marble.
- Wood: Vinegar can strip the finish and warp the wood.
- Electronics: The moisture and acidity can damage internal components.
- Waxed Surfaces: It will remove the protective wax coating, leading to further damage.
When Not to Use Vinegar: Surfaces That Don’t Mix
Although vinegar is often hailed as a miracle cleaner, there are specific surfaces where it can do more harm than good.
You should steer clear of using vinegar on marble countertops, as the acid can etch and dull the stone’s finish. Instead, opt for a pH-balanced cleaner designed for natural stone.
Additionally, vinegar isn’t the best choice for cleaning electronic devices. The acidity can damage sensitive components, and moisture can seep into places where it shouldn’t.
For your gadgets, use a microfiber cloth slightly dampened with water or a cleaner specifically made for electronics.
Tips for Storing and Using Vinegar in Your Cleaning Routine
To get the most out of your vinegar cleaning routine, it’s crucial to store it properly and use it effectively.
Here are some tips to enhance your vinegar storage and usage:
- Keep it cool: Store vinegar in a cool, dark place to maintain its effectiveness.
- Use glass containers: Opt for glass bottles over plastic, as vinegar can degrade plastic over time.
- Label your mixtures: If you create vinegar cleaning solutions, label them clearly to avoid confusion.
- Seal tightly: Confirm all containers are tightly sealed to prevent contamination and evaporation.
Conclusion
Incorporating vinegar into your cleaning routine is like adding a secret ingredient to your favorite recipe—it enhances everything! With its natural ability to cut through grime and odors, vinegar can transform your home. Just remember, it’s not a one-size-fits-all solution; knowing when to use it and when to steer clear is key. So grab your bottle of vinegar, and let it work its magic, but always keep those surfaces in mind that need a gentler touch!