Your choice of mop and broom can boost your cleaning efficiency. Microfiber mops work wonders on hardwood, while string mops tackle grime on tiles. Always rinse and clean your tools after use to prevent bacteria buildup. Change mop heads regularly to maintain hygiene. When sweeping, use smooth motions and a comfortable angle for better results. Don’t overlook eco-friendly cleaning products; they’re better for the environment and your health. Discover even more tips to elevate your cleaning routine!
Why Your Mop and Broom Choices Matter
When you choose the right mop and broom for your cleaning tasks, you not only save time but also guarantee a more effective clean.
The materials used in your mop can greatly impact its performance. For instance, microfiber mops are great for trapping dirt and dust, while sponge mops excel at soaking up spills.
Similarly, broom bristles play an essential role in your cleaning efficiency. Soft bristles work well on delicate surfaces, while stiff bristles are perfect for tackling tough debris.
Broom bristles significantly influence cleaning efficiency; soft bristles are ideal for delicate surfaces, while stiff bristles excel at tough debris removal.
Selecting the appropriate mop and broom based on their materials and bristles guarantees you’re equipped to handle any mess with ease. Additionally, regular maintenance of your cleaning tools ensures they last longer and perform optimally.
Investing in quality tools will make your cleaning routine quicker and more efficient, giving you better results every time.
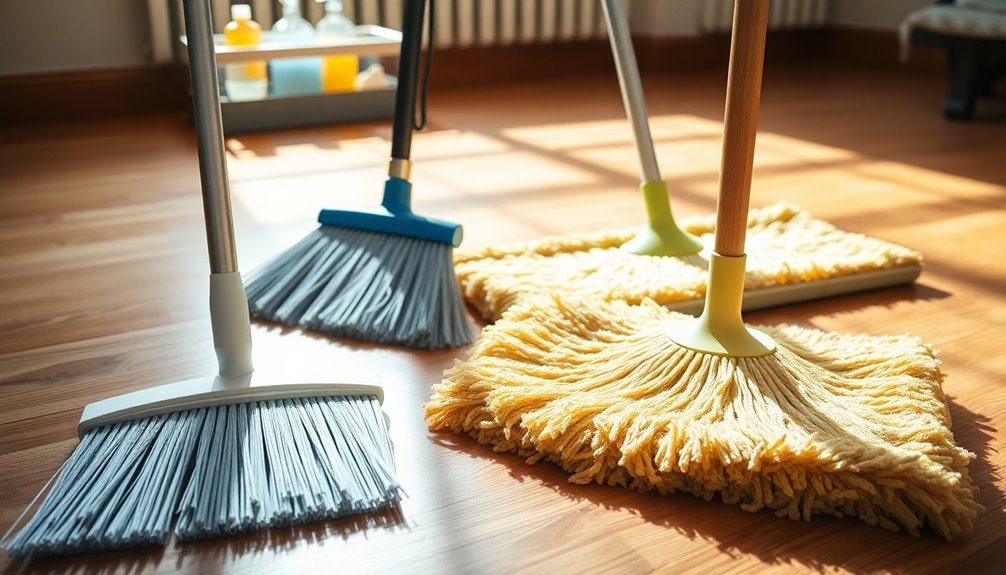
The Best Mop Types for Different Surfaces
Choosing the right mop for various surfaces can make all the difference in your cleaning routine.
For hardwood floors, a microfiber mop is ideal, as it’s gentle yet effective, ensuring your floors shine without scratches.
Tile and laminate surfaces work well with string mop types, which can tackle dirt and grime effectively.
If you’re cleaning vinyl or linoleum, a sponge mop is perfect for its absorbency and ease of use.
For outdoor surfaces, consider a deck mop, designed for rougher textures.
Always check surface compatibility before selecting your mop to maximize cleaning efficiency and avoid damage. Additionally, mop type compatibility is crucial to ensure you use the best tools for specific cleaning needs.
How to Properly Maintain Your Mop and Broom
To keep your mop and broom in top shape, establish a regular cleaning routine. Make sure you rinse them after each use to remove dirt and debris. Proper storage techniques also play a vital role in extending their lifespan, so hang them up or store them upright when you’re done. Additionally, incorporating daily cleaning habits can help maintain their effectiveness and hygiene over time.
Regular Cleaning Routine
Although you mightn’t think about it often, maintaining a regular cleaning routine for your mop and broom is crucial for keeping your home spotless.
Establish a cleaning frequency that works for you—ideally, you should clean your mop and broom after every use. This prevents dirt and bacteria buildup.
Create a maintenance schedule where you deep clean your mop and broom weekly or bi-weekly, depending on how often you use them. For mops, soak the head in a vinegar solution, while brooms can be shaken or beaten outdoors to remove dust and debris.
Proper Storage Techniques
Proper storage techniques are essential for maintaining your mop and broom in top condition. To guarantee longevity, hang your mop and broom on hooks or a rack. This prevents the bristles from becoming misshapen and keeps them ready for use.
For ideal broom positioning, store it with the bristles facing upwards or hanging vertically. This helps maintain their shape and effectiveness.
When it comes to mop organization, make sure to rinse and wring out excess water before storing. If possible, keep your mop head elevated or on a drying rack to prevent mildew.
Finally, store these tools in a cool, dry place, away from direct sunlight, to prevent wear and tear. Proper storage goes a long way in making them last!
The Secret to a Streak-Free Floor With Mops
To achieve a streak-free floor, you need to start with the right mop for your surface. Choosing the correct cleaning solution and using effective drying techniques also plays a vital role. Additionally, using soft mops is essential for laminate and hardwood floors to prevent scratches and maintain their finish. Let’s explore these essential steps to guarantee your floors shine without any streaks.
Choose The Right Mop
Choosing the right mop can make all the difference in achieving a streak-free floor.
First, consider the mop materials. Microfiber mops are excellent for trapping dirt and dust, while sponge mops excel at absorbing spills. If you’re tackling rough surfaces, a string mop might be your best bet.
Next, think about mop sizes. A larger mop head covers more ground quickly, making it ideal for big spaces, but it can be unwieldy in tight areas. Conversely, a smaller mop is perfect for corners and narrow hallways.
Proper Cleaning Solution Usage
Selecting the right mop is just the beginning; the cleaning solution you use plays a significant role in achieving that streak-free finish.
To start, always follow the proper dilution ratios indicated on the cleaning product label. Too much solution can leave a residue, while too little won’t effectively clean your floors.
Additionally, be mindful of safe chemical combinations. Mixing certain cleaners can create harmful fumes or reduce effectiveness. For instance, avoid combining bleach with ammonia, as this can produce toxic gases.
Instead, opt for pH-balanced solutions that are safe for your floor type. By using the right dilution and safe combinations, you’ll enhance your cleaning routine, making it easier to achieve that sparkling, streak-free floor you desire.
Drying Techniques That Work
How can you guarantee your floors dry without streaks after mopping? The secret lies in effective drying methods.
First, use a microfiber mop, as it absorbs moisture better than traditional mops. After mopping, switch to a dry microfiber cloth to wipe up any excess moisture.
For quick drying, open windows or turn on fans to circulate air. You can also use a floor squeegee to push excess water towards the edges, speeding up the drying process.
If you have access to a dehumidifier, use it to draw moisture from the air, ensuring your floors dry faster and streak-free.
Using Vinegar to Enhance Mop Cleaning Power
Vinegar is a powerful ally in your cleaning arsenal, especially when it comes to mopping floors. Its acidity helps break down grime and disinfect surfaces, maximizing your mop’s effectiveness.
To harness vinegar benefits, mix equal parts vinegar and water in your mop bucket. This solution cuts through tough stains and eliminates odors, leaving your floors fresh. For an extra boost in mop enhancement, consider adding a few drops of essential oil, like lemon or lavender, to the vinegar mixture. This not only adds a pleasant scent but also enhances its cleaning power. Additionally, using vinegar as a natural disinfectant can help reduce bacteria and odors throughout your home.
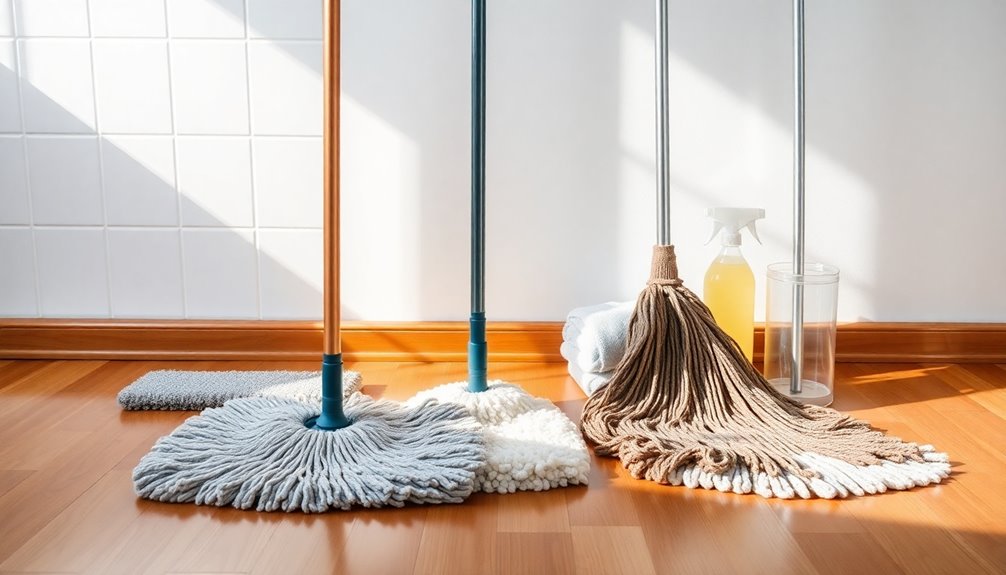
The Benefits of Microfiber Mops Over Traditional Mops
Microfiber mops offer numerous advantages over traditional mops, making them a popular choice for effective cleaning.
One of the key microfiber benefits is their ability to trap dirt and dust more efficiently, thanks to their fine fibers. This means you won’t just push dirt around; you’ll actually pick it up.
Additionally, microfiber mops require less water and cleaning solution, which is eco-friendly and saves you money. Traditional drawbacks include the fact that they can spread germs and require frequent rinsing.
With microfiber, you can clean more thoroughly and reduce your environmental impact. By switching to microfiber, you’ll notice cleaner floors and a more enjoyable cleaning experience overall. Furthermore, using microfiber mops can enhance your cleaning routine by leveraging the power of vinegar and baking soda, which can be used effectively with these mops for a deeper clean.
How to Store Your Broom for Maximum Lifespan
To guarantee your broom remains in top condition, focus on broom bristle care and broom handle protection. Here are a few tips to help you store your broom effectively:
- Keep it upright: Store your broom in a holder or hang it on a wall to prevent bristles from bending.
- Avoid damp areas: Moisture can damage both bristles and handles, so choose a dry location.
- Clean before storage: Remove dirt and debris from the bristles to prolong their life. Additionally, using non-toxic cleaners can ensure your broom stays free from harmful residues that could affect its longevity.
The Right Way to Sweep: Techniques You Need to Know
Mastering the art of sweeping can greatly enhance your cleaning routine. To start, hold the broom at a comfortable angle, around 45 degrees, to allow for efficient sweeping.
Use gentle, sweeping motions rather than aggressive strokes; this helps prevent dirt from scattering. Focus on small sections at a time, pulling debris toward you. Don’t forget to sweep corners and edges—these areas often trap dirt.
For stubborn messes, try a back-and-forth motion to loosen debris. After you’ve gathered the dirt into a pile, use a dustpan for easy collection.
Finally, practice these sweeping techniques regularly to develop a rhythm and improve your efficiency. With these tips, you’ll notice a cleaner space in no time! Additionally, incorporating a consistent cleaning schedule can help maintain a cleaner environment more effectively.
Adding Essential Oils for a Fresh Scent While Cleaning
Adding essential oils to your cleaning routine can transform the way your home smells, creating a more inviting atmosphere.
Transform your home’s aroma with essential oils for a truly inviting atmosphere.
You can easily enhance your mop and broom cleaning by incorporating scent infusion with essential oil blends. Here are a few tips to get you started:
- Choose Your Oils: Peppermint, lavender, or lemon are excellent choices for a fresh scent.
- Mix It Up: Combine a few drops of your selected essential oils with water in a spray bottle for a quick, fragrant cleaning solution.
- Add to Mop Water: Just a few drops in your mop water can leave your floors smelling delightful while you clean. Incorporating natural alternatives to harsh chemicals can further enhance your cleaning routine.
Experiment with different essential oil blends and find the perfect scent that makes your space feel fresh and welcoming!
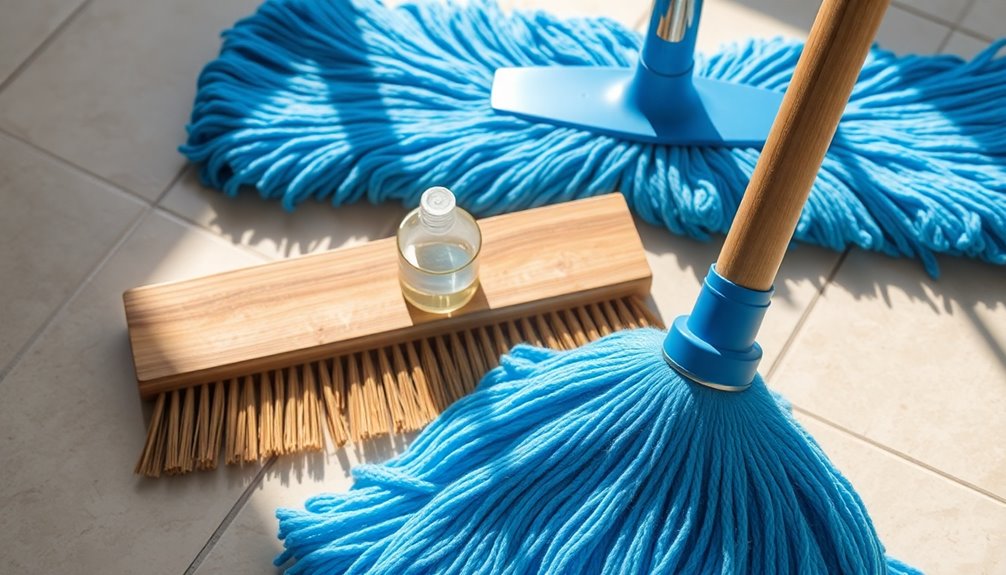
How to Use a Mop for Deep Cleaning Grout
When tackling dirty grout, you’ve got to start with the right mop and cleaning solution. Using effective products will make a huge difference in your results. Plus, applying the proper technique guarantees you get those stains out without damaging your floors. Consider using a power scrubber with multiple attachments to effectively clean grout without causing damage to your tiles.
Select The Right Mop
How can you guarantee your grout gets the deep clean it deserves? Selecting the right mop is essential.
You’ll want to take into account both mop materials and mop sizes to guarantee effective cleaning. Here are some tips to help you choose:
- Mop Materials: Microfiber mops are excellent for grabbing dirt and grime, while sponge mops can hold more water for rinsing.
- Mop Sizes: A larger mop head covers more surface area, but a smaller one allows for better maneuverability in tight spaces.
- Type of Mop: Choose a mop designed specifically for deep cleaning; steam mops can be particularly effective for grout.
With the right mop in hand, you’ll make your grout shine like new!
Effective Cleaning Solutions
Grout cleaning can be an intimidating task, but using the right cleaning solutions makes it much simpler.
Start by mixing effective natural solutions like baking soda and vinegar. Combine 1 cup of baking soda with ½ cup of vinegar to create a paste.
Apply this homemade cleaning recipe to stained grout using your mop. Let it sit for about 10-15 minutes, allowing the solution to break down dirt and grime.
Afterward, mop the area with warm water to rinse away the residue. For tougher stains, you can add a few drops of dish soap to your solution.
With these simple yet effective methods, you’ll achieve cleaner grout without harsh chemicals, making your floors look brand new!
Proper Technique Application
Achieving a deep clean in your grout requires the right technique to guarantee every corner is spotless.
Start by using effective mop techniques that focus on scrubbing rather than just wetting the surface. Here are a few tips to get you going:
- Use a stiff-bristled mop: This helps dislodge dirt and grime from the grout lines.
- Apply cleaner directly: Instead of soaking the area, apply your cleaning solution directly to the grout for better penetration.
- Mop in sections: Work in small areas, scrubbing each section thoroughly before moving on to the next.
The Best Homemade Solutions for Mop Water
While commercial cleaners can be effective, you can achieve a fresh, clean floor with homemade solutions for mop water that are both economical and environmentally friendly.
One simple recipe involves mixing a cup of white vinegar with a gallon of warm water. This acts as a powerful homemade disinfectant, cutting through grime and killing germs. If you prefer a pleasant scent, add a few drops of essential oils like lavender or lemon for a natural fragrance.
Mix a cup of white vinegar with a gallon of warm water for a powerful, natural disinfectant that freshens your floors.
Another option is combining baking soda and water to create a paste for tougher stains before mopping.
These solutions not only save you money but also help maintain a healthy home environment. Give them a try, and enjoy the benefits of your clean floors!
Tricks for Cleaning Corners and Hard-to-Reach Spaces
When it comes to cleaning corners and hard-to-reach spaces, having the right tools and techniques can make all the difference. You don’t need to struggle; just follow these simple tricks for effective corner cleaning:
- Use a microfiber cloth: Wrap it around a broom handle to easily reach those pesky corners.
- Try a corner brush: These specialized brushes can tackle dust and dirt in tight spots where mops can’t reach.
- Employ a vacuum attachment: A crevice tool can help you suck up debris lurking in hard-to-reach spaces.
With these tools at your disposal, you’ll find that corner cleaning becomes a breeze, making your home sparkle in no time!
Why Should You Change Your Mop Head Regularly?
Keeping your home clean involves more than just tackling those hard-to-reach corners; it also means paying attention to the tools you use.
Regularly changing your mop head is essential for maintaining a high level of cleanliness. Over time, the mop head lifespan decreases, and it can become a breeding ground for bacteria and grime.
Regularly changing your mop head is crucial for cleanliness, as worn-out heads can harbor bacteria and grime.
Using a worn-out mop head won’t effectively clean your floors, and it may even spread dirt and germs around your home. By swapping out your mop head, you’ll reap significant hygiene benefits, ensuring you’re actually removing contaminants rather than redistributing them.
Aim to replace your mop head every month or sooner if it shows signs of wear. Your home—and your family—will thank you for it.
How to Sweep Effectively With Minimal Effort
Sweeping doesn’t have to be a chore that drains your energy. With the right sweeping techniques, you can make the task quicker and easier.
Here are some tips for energy efficient sweeping:
- Choose the Right Broom: A broom with stiff bristles works well for outdoor use, while soft bristles are better for indoor floors.
- Use a Proper Stance: Stand with your feet shoulder-width apart. This stance gives you better balance and control, making sweeping easier.
- Sweep in Sections: Break the area into smaller sections. This method keeps you focused and prevents fatigue.
The Importance of Regularly Cleaning Your Broom
A clean broom is crucial for maintaining a tidy home. Regular broom maintenance not only enhances its performance but also improves broom hygiene.
A clean broom is essential for a tidy home, boosting performance and hygiene with regular maintenance.
When you don’t clean your broom, dirt, dust, and allergens build up, making it less effective at sweeping. This debris can transfer back to your floors, negating your cleaning efforts.
To keep your broom in top shape, rinse the bristles after use and let them dry upright. Consider cleaning them with soapy water every few weeks.
If you notice any wear or damage, it’s time for a replacement. By prioritizing broom hygiene, you’ll guarantee your broom remains a reliable tool for a cleaner, healthier living space.
Don’t overlook this simple yet crucial task!
Tips for Choosing Eco-Friendly Cleaning Products for Mopping
When you’re looking to choose eco-friendly cleaning products for mopping, it’s essential to evaluate ingredients that are safe for both your family and the environment.
Opting for products with eco-friendly benefits not only protects your loved ones but also helps reduce your carbon footprint.
Here are some tips to guide you:
- Check for biodegradable ingredients: Verify the product breaks down naturally without harming ecosystems.
- Look for sustainable materials: Choose brands that use recyclable or refillable packaging to minimize waste.
- Avoid harsh chemicals: Steer clear of sulfates and phosphates, which can be harmful to both health and nature.
Conclusion
Incorporating these mop and broom cleaning tips can make a noticeable difference in your home. Did you know that using a clean mop can reduce bacteria by up to 99%? By choosing the right tools, maintaining them properly, and utilizing eco-friendly products, you not only guarantee a spotless living space but also contribute to a healthier environment. So, grab your mop and broom, and start transforming your cleaning routine today! You’ll be amazed at the results.