Dealing with kid messes is tough, but you can tackle stains with ease! For juice, act fast by rinsing with cold water and applying detergent. Marker stains can be removed using rubbing alcohol or vinegar. Stubborn mud? Blot the excess away and clean with soapy water. For grass stains, apply stain remover and wash with cold water. By following these tips, you’ll keep your home clean, and there’s much more to discover for specific messes!
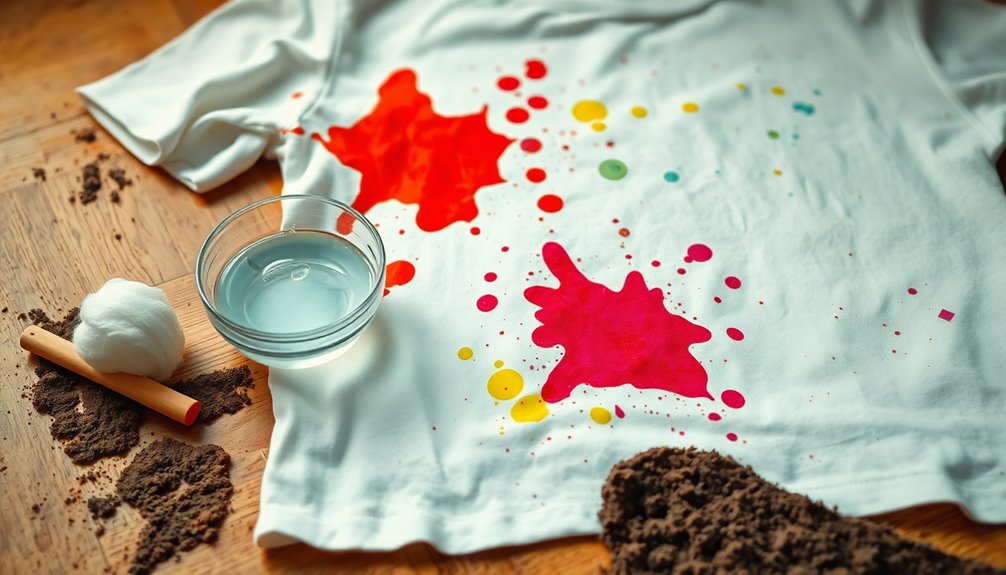
How to Tackle Juice Stains on Clothing

When your child spills juice on their favorite shirt, don’t panic—quick action can save the day.
First, identify the juice type; citrus juices like orange or lemonade can be trickier than apple or grape. Blot the stain gently with a clean cloth to soak up excess liquid, but don’t rub it, as that can spread the stain.
Identify the juice type first; citrus stains can be more difficult than others. Always blot gently to avoid spreading.
Rinse the fabric under cold water for a few minutes. For stain prevention, consider using a stain-resistant spray on their clothes before mealtime. Regularly wiping down surfaces with a damp microfiber cloth can also help minimize stains from spills.
If the stain persists, treat it with a mixture of laundry detergent and water, letting it sit for a few minutes before washing as usual.
With these tips, you can keep your child’s clothes looking great!
The Best Methods for Removing Marker Stains
When your little artist gets carried away with markers, it can feel like a disaster.
Understanding the common types of markers they use can help you choose the right cleaning solutions.
Let’s explore effective methods and step-by-step techniques to tackle those pesky stains. A natural solution like vinegar and water can also be effective for cleaning various stains, including those from markers.
Common Marker Types
Although kids love to express their creativity with markers, these art supplies can leave behind stubborn stains on various surfaces.
Understanding the types of markers can help you tackle those pesky marks. Permanent markers use alcohol-based inks, making them tough to remove. Washable markers, on the other hand, feature water-based inks that come off more easily.
Dry erase markers are designed to wipe off non-porous surfaces without much hassle. Highlighters can also be tricky, as their inks may stain fabric. Fabric markers are meant for textiles and can leave lasting impressions if not treated promptly.
Finally, paint markers create bold colors but can be challenging to clean. Knowing these differences can make stain removal much more manageable!
Effective Cleaning Solutions
To effectively tackle marker stains, you’ll want to act quickly and choose the right cleaning solution for the specific type of ink involved.
Here are some effective options you can consider, especially if you’re looking for eco-friendly solutions that won’t harm your stain-resistant fabrics:
- Rubbing alcohol: Great for breaking down permanent ink.
- Vinegar and water: A natural alternative that works well on most inks.
- Hand sanitizer: Contains alcohol and can lift stains effectively.
- Baking soda paste: Works wonders on lighter fabrics.
- Cornstarch: Absorbs ink when mixed with water and dried.
Step-by-Step Removal Techniques
Removing marker stains doesn’t have to be an intimidating task; with the right techniques, you can tackle them effectively.
Start by identifying the type of marker used—permanent or washable—as this will guide your removal strategy. For washable markers, simply dab the stain with a damp cloth.
For permanent markers, apply rubbing alcohol or hand sanitizer to a cotton ball, gently blotting the stain until it lifts. Always test your cleaning solution on an inconspicuous area first to avoid damage.
To minimize future messes, implement prevention strategies like using washable markers or designating specific art areas.
Quick Solutions for Muddy Shoe Imprints
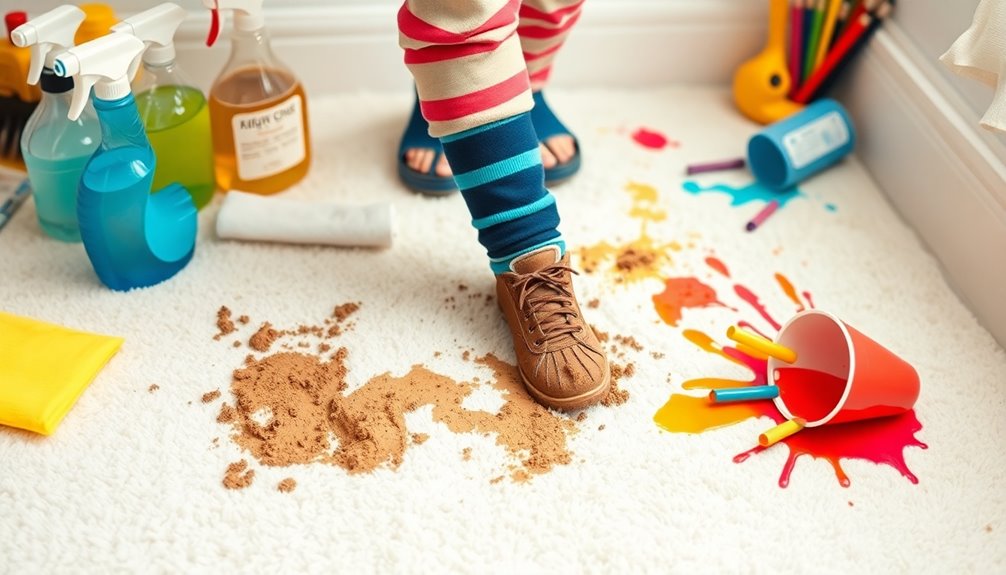
When muddy shoe imprints invade your floors, acting quickly can make all the difference. Here are some quick cleaning tips to tackle those pesky marks and maintain your floors.
- Blot, don’t rub: Use a clean cloth to blot the mud, lifting it without spreading.
- Use a damp cloth: Lightly dampen a cloth with water to wipe away remaining residue.
- Mix a mild detergent: Combine a few drops of dish soap with water for stubborn stains.
- Rinse well: Confirm you remove any soap with a clean, damp cloth to avoid residue.
- Implement muddy shoe prevention: Consider placing mats at entrances to reduce dirt tracking inside.
Additionally, regular maintenance and immediate attention to spills can help maintain the beauty of your laminate floors.
Act fast, and your floors will look great again!
How to Clean up Crayon Marks From Walls
Muddy shoes can create quite a mess, but crayon marks on walls often pose a different challenge for parents.
Luckily, you can tackle this problem with a few effective crayon removal techniques. Start by grabbing a soft cloth and some rubbing alcohol. Dampen the cloth with the alcohol and gently rub the crayon marks until they lift away.
If that doesn’t work, you might try using a baking soda paste—mix baking soda with a little water to create a thick paste, apply it to the marks, then gently scrub. Eco-friendly methods can be a great choice for cleaning as they minimize environmental impact while being effective.
For tougher stains, consider a wall cleaning solution specifically designed for such messes. Always test any cleaner on a small, hidden area first to avoid damaging the paint.
Effective Techniques for Grass Stains on Pants
When your kid comes home with grass stains on their pants, acting quickly can make a big difference. You’ll want to pre-treat the stain before washing to boost your chances of success. Using enzyme-based cleaners can be particularly effective for protein-based stains like grass. Let’s explore washing techniques and some natural remedies that can help restore those pants to their former glory.
Pre-Treating Grass Stains
Although grass stains can seem intimidating, pre-treating them effectively can make a world of difference in restoring your child’s favorite pants. To tackle those stubborn stains, follow these simple steps for effective pre-treating:
- Act quickly; the sooner you treat the stain, the better.
- Rinse the stained area with cold water to dilute the grass.
- Apply a stain remover directly to the grass stain.
- Gently rub the fabric together to help the remover penetrate.
- Let it sit for about 5–10 minutes before laundering.
Implementing these techniques not only aids in removing existing stains but also contributes to grass stain prevention in the future.
With a little effort, you can keep your child’s pants looking great!
Washing Techniques to Use
After pre-treating those grass stains, washing techniques play an important role in guaranteeing the stains come out completely.
Start by checking the fabric care label on the pants. Different fabric types require different washing methods. Use cold water to rinse away grass stains, as hot water can set the stain and make it harder to remove.
Select a heavy-duty detergent designed for tough stain types, and consider adding a stain booster for extra power. Wash the pants on the appropriate cycle based on the fabric care guidelines.
After washing, inspect the pants before drying—if the stain remains, repeat the washing process. Drying can set any leftover stains, so it’s vital to confirm they’re fully gone first.
Natural Remedies to Try
If you’ve found yourself dealing with stubborn grass stains on your child’s pants, natural remedies can be an effective solution. You don’t always need harsh chemicals; simple household items can work wonders.
Here are some techniques to try:
- Baking soda paste: Mix baking soda with water to create a paste, apply it to the stain, and let it sit for 30 minutes before washing.
- Vinegar solution: Combine equal parts vinegar and water, apply it directly to the stain, and blot gently.
- Lemon juice: Apply lemon juice to the stain for its natural bleaching properties.
- Dish soap: Use a few drops of dish soap mixed with water to scrub the area gently.
- Salt scrub: Make a paste with salt and water, apply it, and rinse after a few minutes.
These methods can effectively tackle those pesky grass stains!
Removing Chocolate Smudges From Fabrics
When your little one indulges in chocolate, it often ends up as a smudge on their favorite shirt or your couch. Don’t panic!
First, identify the chocolate type; dark chocolate may require different treatment than milk or white chocolate. Gently scrape off any excess with a knife, being careful not to spread it further.
Start by identifying the chocolate type, as each may need a different approach for effective stain removal.
Rinse the fabric under cold water, working from the back of the stain to push the chocolate out. Apply a stain remover or a mix of dish soap and water, letting it sit for 5-10 minutes. Regular use of natural solutions promotes hygiene without health risks.
Rinse again and check if the stain is gone before washing. Always follow the fabric care instructions for the item to avoid any damage.
How to Deal With Paint Stains on Clothes
Even the most careful artists can end up with paint stains on clothes, so knowing how to tackle them is essential.
Different paint types require different approaches, so be prepared. Here’s a quick guide to help you deal with those pesky stains while keeping fabric care in mind:
- Act fast: The sooner you treat the stain, the better your chances of removal.
- Identify the paint type: Water-based paints are easier to remove than oil-based ones.
- Blot, don’t rub: Gently blot the stain with a clean cloth to lift the paint.
- Use appropriate solvents: Rubbing alcohol works well for oil-based paints.
- Launder carefully: Always follow fabric care instructions after treating the stain.
- Regular cleaning techniques ensure a spotless toilet and can be applied to other fabric stains as well.
With these steps, you’ll be back to clean clothes in no time!
Tips for Eliminating Food Stains From Upholstery
Although food stains on upholstery can feel intimidating, tackling them doesn’t have to be. Start by quickly blotting the stain with a clean cloth to absorb excess food.
Mix a solution of mild soap and water, and gently dab the stain with a cloth soaked in the solution. Rinse with a damp cloth afterward to remove any soap residue.
For tougher stains, consider using a specialized upholstery cleaning product, following the manufacturer’s instructions closely. Regular cleaning sessions are important for maintaining the integrity of your upholstery, as recommended for weekly cleaning sessions.
To promote food stain prevention, encourage your kids to eat at a table rather than on the couch.
Finally, regularly vacuum your upholstery to keep it clean and maintain its appearance.
With these tips, you can keep your furniture looking great, even amidst the mess!
The Right Way to Handle Ice Cream Stains
If your child has just dropped a scoop of ice cream on the carpet, don’t panic! You can handle it quickly and effectively.
Start by acting fast to prevent the stain from setting in. Follow these steps for the best results:
- Scrape off excess ice cream gently with a spoon.
- Blot the stain with a clean cloth to absorb as much liquid as possible.
- Mix a solution of mild dish soap and warm water.
- Apply the solution to the stain using a clean cloth, and work from the outside in.
- Rinse with cold water and blot dry. Additionally, using a homemade cleaner can help maintain your carpets and prevent future stains.
How to Remove Sweat Stains From Kids’ Clothes
Wondering how to tackle those pesky sweat stains on your kids’ clothes? For effective sweat stain removal, start by treating the stain as soon as you notice it.
Mix equal parts of white vinegar and water, then apply the solution directly to the stained area. Let it sit for about 30 minutes before rinsing with cold water.
If the stain persists, make a paste with baking soda and water, apply it to the stain, and scrub gently. Always check the fabric care label before using any cleaning method to avoid damage. Additionally, consider using natural cleaning solutions like vinegar for its disinfectant properties.
Finally, wash the item in cold water with a gentle detergent, and air dry to prevent setting any remaining stains. You’ll have those clothes looking fresh again in no time!
Tackling Ink Stains From Pens and Markers
Have you ever found yourself facing a stubborn ink stain from a pen or marker on your child’s favorite shirt? Don’t worry! Tackling these stains is easier than you think.
First, identify the ink types involved—water-based, permanent, or gel. Stain prevention starts with acting quickly.
Here’s what you can do:
- Blot the stain gently with a paper towel.
- Apply rubbing alcohol or hand sanitizer on a cotton ball.
- Rinse the area with cold water.
- Wash the shirt in cold water with a stain-fighting detergent.
- Air-dry the shirt, as heat can set the stain.
Best Practices for Cleaning Up Spilled Milk
Ink stains are just one of the many messes kids can create; spilled milk is another common challenge.
For an effective milk spill cleanup, act quickly. First, grab a clean cloth or paper towel to soak up the liquid. Start from the outside of the spill and work your way in to prevent spreading.
Next, use a mixture of warm water and dish soap to dab at any remaining residue. Rinse with clean water and blot dry.
To avoid future spills, consider using spill-proof cups or teaching your kids to be careful during mealtime.
How to Get Rid of Pet Mess Stains
How can you effectively tackle pet mess stains before they set in? Quick action is key.
Start by blotting any liquid with a clean cloth to absorb as much as possible. Then, use the right cleaning products to eliminate both stains and pet odor.
Blot liquids with a clean cloth immediately, then use suitable cleaning products to remove stains and odors effectively.
Here’s a simple checklist to follow:
- Blot the stain immediately to prevent it from setting.
- Use enzymatic cleaners designed to break down pet waste.
- Rinse the area with cold water after cleaning.
- Test any cleaning product in a small area first.
- Air out the space to help eliminate lingering odors.
With these steps, you’ll keep your home looking fresh and clean, free from pet mess stains!
Techniques for Removing Blood Stains From Fabric
When you notice a blood stain on fabric, acting quickly can make all the difference in successfully removing it. Start by rinsing the stain under cold water to prevent it from setting.
Next, use gentle soap or a stain remover specifically designed for blood stains. Apply it directly to the stain, and let it sit for about 5 to 10 minutes.
For tougher stains, consider soaking the fabric in cold water with a bit of salt or baking soda.
Afterward, wash the fabric according to its care label, using cold water. Always check if the stain is gone before drying, as heat can set it.
Mastering these blood stain techniques will help you maintain your fabric care routine effectively.
How to Address Sticky Candy Residue on Surfaces
When sticky candy residue ends up on your surfaces, it can be a real hassle.
Start by identifying which surfaces are affected, then choose the right cleaning solutions to tackle the mess.
To avoid future sticky situations, keep these prevention tips in mind!
Identify Affected Surfaces
Sticky candy residue can turn your home into a disaster zone, especially when it clings to various surfaces.
To effectively tackle this mess, you first need to identify the affected surface types and understand their stain characteristics. Different surfaces require different approaches, so be mindful of what you’re dealing with.
Here’s a quick guide:
- Carpet: Soft and absorbent; stains can penetrate deeply.
- Wood: Smooth but can be damaged by moisture.
- Upholstery: Delicate fabric that may require special care.
- Tile: Hard and non-porous; often easier to clean.
- Plastic: Smooth surface, but residue can be stubborn.
Once you know the surface, you’ll be better equipped to handle the sticky situation!
Recommended Cleaning Solutions
Dealing with sticky candy residue can feel intimidating, but having the right cleaning solutions makes the task manageable.
Start by gathering your cleaning supplies: warm water, dish soap, and a soft cloth or sponge. Mix a few drops of dish soap into warm water for an effective cleaning solution. Dampen your cloth with the mixture and gently scrub the sticky area until the residue lifts away.
If the candy residue is particularly stubborn, you might need to use a bit of white vinegar or rubbing alcohol.
Prevention Tips for Messes
To keep sticky candy residue from becoming a problem in the first place, it’s essential to establish some preventive measures.
By implementing these stain proofing strategies, you can minimize messes during those inevitable messy activities. Here are some tips to take into account:
- Use placemats or trays for candy consumption.
- Designate specific areas for eating sweets.
- Encourage kids to wash hands before and after candy.
- Opt for less sticky candy options when possible.
- Clean up spills immediately to prevent residue from setting.
The Ultimate Guide to Preventing Future Stains
While it’s impossible to completely eliminate messes when kids are involved, there are effective strategies you can implement to minimize future stains.
Start by choosing stain resistant fabrics for your home furnishings and kids’ clothing. Look for materials specifically designed to repel spills and dirt.
Additionally, establish clear mess prevention strategies—set up designated art and snack zones to contain potential disasters. Encourage your kids to wear aprons during messy activities and teach them the importance of cleaning up spills immediately.
Regularly inspect and treat any stains as they happen to prevent them from setting. With these steps, you can greatly reduce the risk of stubborn stains, making your life a bit easier and your home more manageable.
Conclusion
By following these simple stain removal tips, you can tackle any mess your kids create with ease. For instance, when your little one spills grape juice on their favorite shirt, just blot the stain with cold water and apply a mixture of dish soap and vinegar. You’ll be amazed at how easily it comes out! Remember, staying prepared with these techniques will not only save your clothes but also keep your home looking great.