To dust your walls the right way, start with essential tools like a microfiber cloth, vacuum with a brush attachment, and an extension duster for high areas. Work systematically from top to bottom, targeting corners and decorative features carefully. Use the right technique based on wall finishes—smooth, textured, or wallpaper. Don’t forget to identify and treat stains appropriately. Keeping your walls clean enhances your home’s health and beauty; discover more tips and techniques along the way.
Why Dusting Walls Is Important for Your Home
Dusting your walls might seem like a minor chore, but it’s crucial for maintaining a healthy home environment. Regularly removing dust and allergens can greatly improve indoor air quality, offering health benefits for you and your family.
When you dust, you reduce the risk of respiratory issues and allergies, making your space more comfortable. Beyond health, clean walls contribute to your home’s aesthetic appeal. Dust can dull the finish of your paint or wallpaper, making your living space feel neglected.
By keeping your walls dust-free, you enhance their appearance and create a more inviting atmosphere. Regular cleaning supports mental well-being, so don’t overlook this simple task; it’s crucial for both your well-being and your home’s charm.
Make it a regular part of your cleaning routine!
What Tools Do You Need for Dusting Walls?
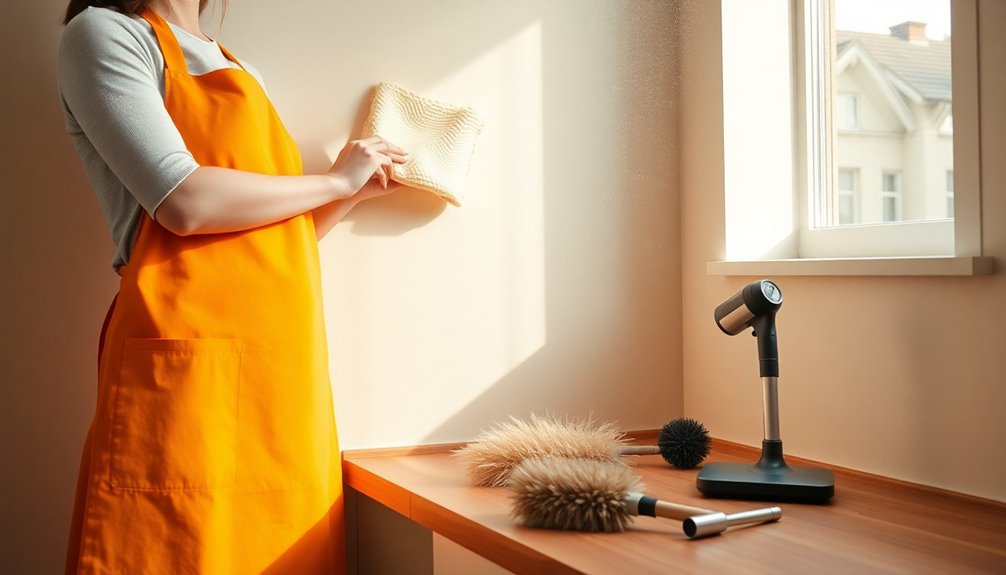
When it comes to dusting walls, having the right tools makes all the difference. You’ll need some essential dusting tools to get started, and a few optional accessories can boost your efficiency.
To ensure a thorough clean, consider using non-toxic cleaners that are safe for your family’s health while effectively eliminating dust and allergens.
Let’s explore what you should gather before tackling this task.
Essential Dusting Tools
Cleaning your walls effectively requires the right tools at your disposal. Start with a microfiber cloth or duster; these are perfect for capturing dust without scratching your paint.
A vacuum with a brush attachment is great for those hard-to-reach areas, ensuring your wall maintenance routine stays efficient. For higher walls, consider a telescoping pole to extend your reach.
If you’re dealing with stubborn grime, a mild cleaning solution can help, but always test it first. Using these essential dusting tools not only makes your job easier but also enhances your dusting techniques, keeping your walls looking fresh.
Optional Accessories For Efficiency
To maximize your wall dusting efficiency, consider incorporating a few optional accessories into your routine. Microfiber cloths are a fantastic addition; they trap dust effectively without scratching your walls. You can dampen them slightly for extra cleaning power, making it easier to tackle stubborn spots.
Extendable dusters are another excellent tool. They allow you to reach high corners and ceilings without the need for a ladder, saving you time and effort.
With their flexible heads, these dusters can get into those tricky areas that are often overlooked.
How to Prepare Your Walls for Dusting
Before you start dusting your walls, it’s essential to gather the right tools and assess the condition of the surfaces.
Begin with wall preparation by inspecting for any damage or stains. If you notice marks or scuffs, take a moment to clean those areas first with appropriate cleaning supplies. Use a mild detergent mixed with water for stubborn spots, guaranteeing the solution is safe for your wall type.
Next, grab a microfiber cloth or a long-handled duster to reach higher areas. Make certain you have a vacuum cleaner with a brush attachment handy for any loose dust. Regular maintenance of your vacuum cleaner can enhance its efficiency during dusting tasks.
Techniques for Dusting Different Wall Finishes
When it comes to dusting walls, the finish matters. Smooth paint finishes require a different approach than textured surfaces or wallpaper. Let’s explore the best techniques for each type to keep your walls looking fresh. Incorporating allergy-friendly dusting techniques can further enhance your cleaning routine and improve indoor air quality.
Smooth Paint Finishes
Dusting smooth paint finishes can feel challenging, but with the right techniques, it becomes a breeze. To maintain that sleek look, start by using a microfiber cloth or a soft duster. These tools capture dust without scratching the surface, ensuring smooth paint protection.
Work from top to bottom, moving in a gentle, circular motion to lift dust effectively. For stubborn spots, lightly dampen your cloth with water or a mild cleaner, but avoid over-saturating it. Regular smooth paint maintenance can prevent buildup and keep your walls looking fresh.
Finally, don’t forget to dust light fixtures and baseboards, as they often collect dust that settles on your walls, giving your space a polished finish.
Textured Wall Surfaces
For effective textured wall maintenance, start by using a soft brush attachment on your vacuum cleaner. This helps reach into the crevices of various wall texture types, such as stucco or knockdown.
If the dust is stubborn, a damp microfiber cloth can gently wipe the surface without damaging the texture. Avoid abrasive cleaners or scrubbing too hard, as this can ruin the finish.
Regularly dusting these surfaces not only keeps your walls looking fresh but also improves air quality in your home.
With the right techniques, you can maintain the beauty of your textured walls effortlessly.
Wallpaper Care Techniques
Maintaining wallpaper requires a slightly different approach than caring for textured surfaces. Start by dusting with a soft, dry microfiber cloth or a feather duster to avoid damaging the material.
For stubborn dirt or stains, you can lightly dampen a cloth with water or a gentle wallpaper cleaning solution. Always test in an inconspicuous area first to verify it doesn’t affect the color or texture.
For vinyl wallpaper, you can use a mild soap solution, but make certain to rinse with a clean, damp cloth afterward. Avoid abrasive cleaners and scrubbers; they’re too harsh for wallpaper maintenance.
Regularly dusting and promptly cleaning any marks will keep your wallpaper looking fresh and vibrant for years to come.
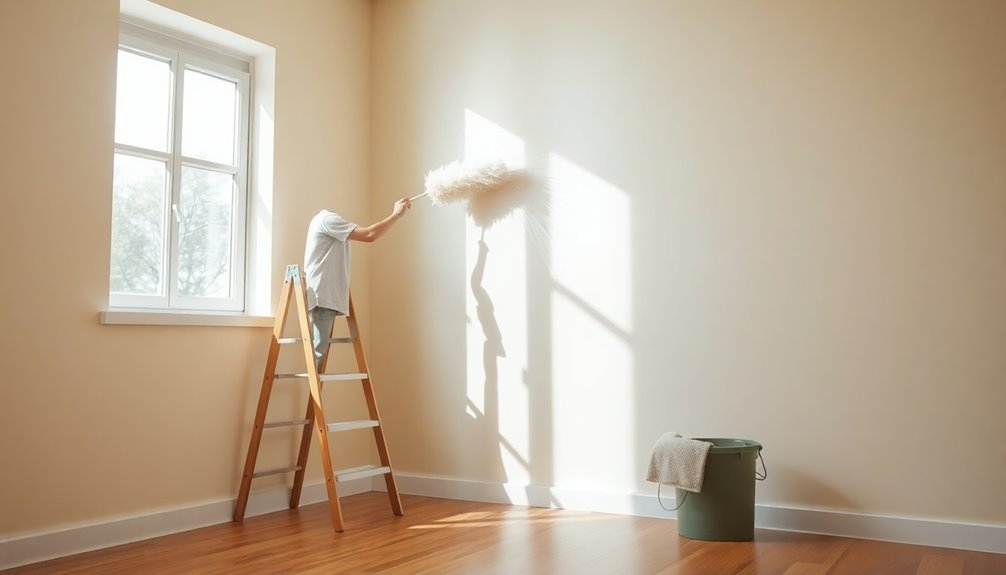
Best Practices for Dusting High Ceilings and Corners
When tackling high ceilings and corners, having the right tools makes all the difference. Start with a sturdy extension duster, which allows you to reach those tricky spots without a ladder.
For effective corner dusting, use a microfiber cloth that traps dust rather than spreading it around.
Incorporate high ceiling techniques by working in a systematic manner—begin at one corner and move around the room. Don’t forget to dust light fixtures and ceiling fans, as they often collect dust too.
To finish, take a moment to check for any cobwebs or accumulated dust in hard-to-reach places. Regularly dusting these areas not only keeps your home looking fresh but also helps maintain better air quality. Additionally, consider using natural cleaning methods to ensure that your dusting routine is both effective and safe for your environment.
How to Dust Walls With Decorative Features
Dusting walls with decorative features can be a bit tricky, but it’s essential for keeping your space looking its best.
To effectively clean around decorative moldings and wall art, follow these steps:
- Use a microfiber cloth: This will trap dust without scratching surfaces.
- Gently dust moldings: Take your time along the edges, where dust tends to accumulate.
- Clean wall art carefully: Use a soft brush or a damp cloth for delicate pieces. Regular dusting helps maintain a sanitary environment in your home, much like preventing bacterial growth in bathrooms.
What to Do If Your Walls Are Stained or Grimy?
If you’ve noticed stains or grime on your walls, the first step is to identify the type of stain. Once you know what you’re dealing with, you can choose the right cleaner for the job. Don’t forget to test it on a small, hidden area to guarantee it won’t damage your paint or finish. For stubborn stains, consider using natural cleaning solutions that are effective and eco-friendly.
Identify Stain Type
Stains on walls can be a real eyesore, but identifying the type is essential for effective cleaning. Knowing how to categorize common stains can streamline your cleaning process and help you choose the right approach.
Here are some common types of stains for stain identification:
- Grease: Often found in kitchens, these stains can be tricky but require specific cleaning methods.
- Water Marks: Usually caused by leaks or humidity, these stains may indicate deeper issues.
- Crayon or Marker: Common in households with kids, these can often be removed with gentle scrubbing.
Once you identify the stain type, you’ll be better prepared to tackle the grime and restore your walls to their former glory.
Choose Appropriate Cleaner
Once you’ve pinpointed the type of stain on your walls, selecting the right cleaner becomes essential for effective removal.
If you’re dealing with light stains, consider eco-friendly options like vinegar or baking soda, which are gentle yet effective.
For tougher grime, commercial cleaners can work wonders, but make sure to choose a product suitable for your wall’s finish. Always check labels for compatibility, especially if your walls are painted or wallpapered.
When using commercial cleaners, ventilate the area to avoid harsh fumes.
Remember, the goal is to restore your walls without damaging them, so don’t hesitate to read reviews or ask for recommendations on the best products for the job.
Happy cleaning!
Test Inconspicuous Area
How can you be certain your chosen cleaner won’t damage your walls? Before you begin, it’s essential to test an inconspicuous area. This step guarantees your walls stay protected, especially if they’re stained or grimy.
Here’s how to proceed:
- Choose a hidden spot, like behind a piece of furniture.
- Apply a small amount of cleaner and wait a few minutes.
- Check for changes in color, texture, or finish.
This simple test helps you gauge your walls’ dust sensitivity and the cleaner’s effectiveness.
If you notice any adverse reactions, switch to a gentler option. Always prioritize your walls’ integrity to maintain their appearance and longevity.
Tips for Dusting Walls in Different Rooms
When it comes to dusting walls, specific techniques can make the process more efficient in different rooms.
In the living room, use a microfiber cloth to capture dust without scattering it.
For bedroom walls, a lightly dampened cloth works wonders to remove allergens.
In the kitchen, focus on surfaces and cabinets, as grease can cling to walls.
When tackling bathroom tiles, don’t forget to wipe down the walls to prevent mold.
For hallway decor, a duster with an extendable handle can reach high spots easily.
In children’s rooms, involve them in the process to teach responsibility.
Finally, in office spaces and dining areas, guarantee you clear clutter first to make dusting a breeze.
How Often Should You Dust Your Walls?
Dusting walls isn’t just about keeping them looking clean; it also impacts your home’s air quality. Regular wall maintenance prevents dust accumulation, which can lead to respiratory issues and allergies. To keep your space healthy, consider these guidelines:
- High-Traffic Areas: Dust every 2-4 weeks in rooms like the living room and kitchen.
- Bedrooms: Aim for once a month since they tend to collect dust more slowly.
- Less Frequent Areas: Dust every 3-6 months in storage rooms or garages. Additionally, maintaining indoor air quality is crucial for reducing allergens and promoting a healthier environment.
The Benefits of Using Natural Cleaning Solutions
While many commercial cleaning products promise a spotless finish, using natural cleaning solutions offers numerous benefits that go beyond mere aesthetics.
Natural ingredients are often less harsh on surfaces, ensuring you maintain the integrity of your walls while effectively removing dust. Plus, these eco-friendly options are safer for your family and pets, reducing the risk of chemical exposure.
You’ll also contribute to a healthier indoor environment by minimizing allergens and irritants commonly found in conventional cleaners. By choosing natural solutions, you not only protect your home but also support sustainable practices that benefit the planet. Additionally, embracing non-toxic cleaning solutions makes cleaning your walls a more responsible and enjoyable task. So, why not give them a try?
Common Mistakes to Avoid When Dusting Walls
Although it might seem straightforward, dusting walls can lead to common pitfalls that undermine your efforts. To guarantee you’re using effective dusting techniques, avoid these mistakes:
- Using the wrong tools: A rough sponge can scratch delicate wall materials like paint or wallpaper.
- Starting in the wrong place: Always dust from the top down to prevent dirt from falling onto already cleaned areas.
- Neglecting corners and edges: Dust accumulates in these spots, so don’t overlook them during your cleaning routine.
- Overlooking regular maintenance: Implementing a structured cleaning routine ensures that dust doesn’t build up, making your efforts more effective.
How to Maintain Clean Walls Between Dusting
Once you’ve mastered the art of dusting walls and avoided common mistakes, keeping them clean becomes much easier.
To maintain clean walls between dusting sessions, incorporate some simple wall maintenance tips. First, consider using washable wall paint; it’s easier to wipe down. Regularly check for scuff marks or stains and address them immediately with a damp cloth.
Additionally, implement dust prevention strategies like using doormats to limit dirt entry and keeping windows closed on windy days. You might also want to invest in an air purifier to reduce airborne dust.
Finally, make it a habit to declutter surfaces; fewer items mean less dust accumulation. By following these steps, you’ll enjoy cleaner walls with minimal effort.
When to Call a Professional for Wall Cleaning?
If your walls show signs of extensive damage or persistent stains that won’t come off, it might be time to call in a professional.
Knowing when to seek help can save you time and guarantee your walls look their best. Here are some signs needing assistance:
Knowing when to seek professional help ensures your walls stay beautiful and well-maintained. Look for key signs of damage.
- Mold or Mildew: If you notice growth on your walls, it requires specialized treatment.
- Heavy Stains: Persistent stains from grease, smoke, or water damage often need professional wall cleaning.
- Peeling Paint or Wallpaper: This indicates underlying issues that should be addressed by an expert.
Don’t hesitate to reach out for help.
A professional can restore your walls while preventing further damage, ensuring your home remains beautiful and healthy.
Conclusion
Dusting your walls might seem tedious, but it’s a small effort that pays off big in a fresh, inviting home. Think of it this way: a little time spent now saves you from a bigger mess later. While the task may feel mundane, the satisfaction of seeing clean walls can transform your space. So, grab your tools, embrace the process, and enjoy the calm that comes with a dust-free environment—because a happier home starts with clean walls!