You can easily make a DIY stainless steel cleaner for your kitchen using simple ingredients like vinegar, olive oil, and baking soda. Mix equal parts vinegar and water in a spray bottle for most surfaces. Wipe with a damp microfiber cloth, following the grain, and buff with a dry cloth for that perfect shine. This natural solution is safer for your family and the environment. Want tips on maintaining that gleam? There’s more to explore!
Why Choose DIY Stainless Steel Cleaners?
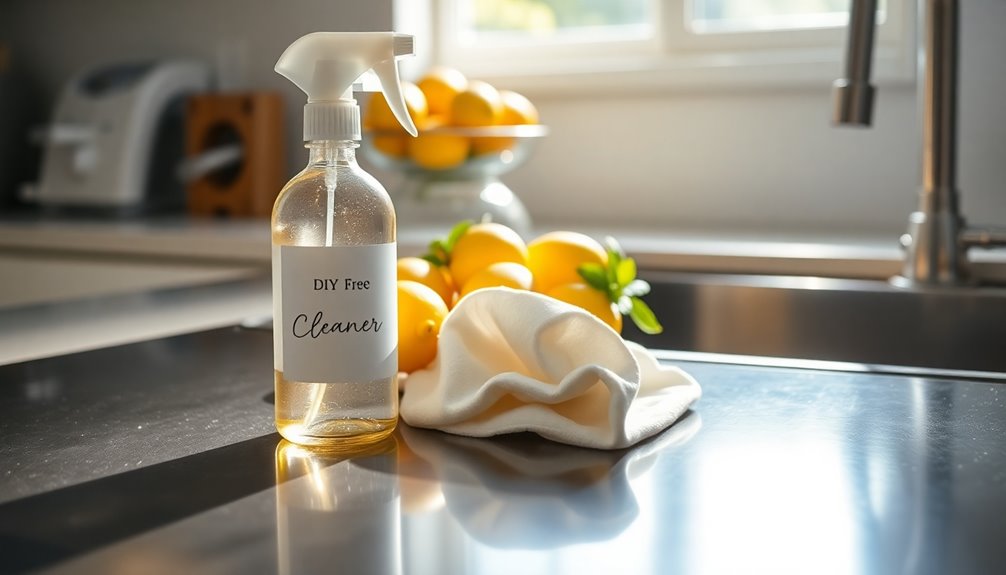
When you want to keep your stainless steel surfaces shining without harsh chemicals, DIY cleaners are a fantastic option. They provide eco-friendly options that protect both your health and the environment.
You can easily whip up a cleaner using ingredients like vinegar and olive oil, ensuring your surfaces sparkle without toxic residues. Plus, making your own cleaners offers significant cost savings compared to store-bought alternatives.
You won’t have to spend money on branded products filled with unnecessary additives. Instead, you’ll know exactly what’s in your cleaner, making it safer for your family. Regular maintenance with natural agents can enhance both the longevity and aesthetic appeal of your appliances.
Common Store-Bought Cleaner Ingredients to Avoid
While DIY stainless steel cleaners are a great way to keep your surfaces shining, it’s important to be aware of the harmful ingredients often found in store-bought alternatives.
Many of these products contain toxic chemicals that can pose risks to your health and the environment. For instance, ammonia and bleach can emit harmful fumes and may damage your stainless steel over time.
Additionally, watch out for fragrance additives, which might seem harmless but can trigger allergies or respiratory issues.
Instead of relying on these potentially harmful ingredients, consider making your own cleaner with natural components. This way, you can guarantee a safe and effective solution for your kitchen that keeps your stainless steel looking its best.
Moreover, using natural disinfectants like hydrogen peroxide can enhance both safety and effectiveness in your cleaning routine.
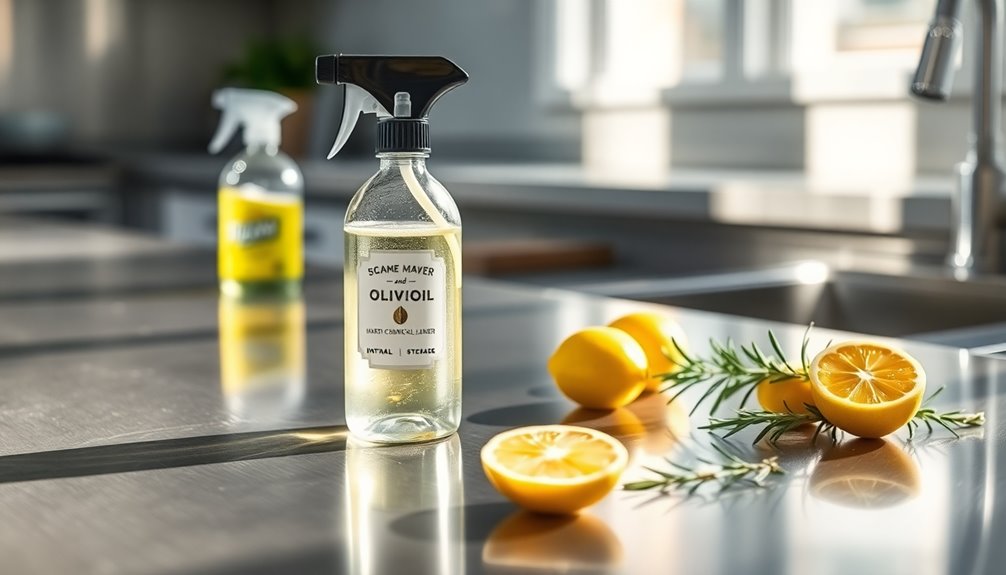
Essential Ingredients for Your DIY Cleaner
When creating your DIY stainless steel cleaner, you’ll want to focus on a few key ingredients. Vinegar offers natural cleaning power, while olive oil adds shine and protects the surface. Plus, baking soda’s abrasiveness helps tackle tough stains without scratching. Additionally, using eco-friendly options can enhance your cleaning routine while being gentle on the environment.
Vinegar’s Natural Cleaning Power
When you use vinegar, you’re not just removing grime; you’re also killing harmful bacteria and germs, keeping your kitchen safe and sanitary. Its acidic nature helps break down tough stains and fingerprints on stainless steel surfaces, restoring their shine effortlessly.
Plus, vinegar is non-toxic, making it a safer choice compared to harsh chemicals. Simply mix equal parts vinegar and water in a spray bottle, and you’ve got a powerful cleaner ready to tackle any mess.
Embrace vinegar’s versatility and enjoy a sparkling clean kitchen!
Olive Oil Benefits
Olive oil is more than just a staple in your kitchen; it’s a fantastic addition to your DIY stainless steel cleaner. Not only does it help lift dirt and grime, but it also offers several kitchen benefits that make your cleaning routine easier and more effective.
- Natural shine: Olive oil leaves a streak-free finish, enhancing the appearance of your stainless steel surfaces.
- Protection: It helps create a protective barrier against fingerprints and smudges, keeping your appliances looking pristine.
- Eco-friendly: Using olive oil is a sustainable choice, reducing your reliance on harsh chemicals.
Incorporating olive oil into your cleaner not only boosts its effectiveness but also promotes a healthier kitchen environment.
Baking Soda Abrasiveness
While olive oil enhances your stainless steel cleaning routine, baking soda offers its own unique advantages.
This versatile ingredient acts as a natural scrubbing agent, making it perfect for tackling tough stains and grime. When you sprinkle baking soda on your stainless steel surfaces, it gently abrasively lifts away dirt without scratching the finish.
Simply mix it with a bit of water to create a paste, and you’ll have a powerful cleaner ready to go. Use a soft cloth or sponge to apply the mixture, and watch as it effortlessly removes fingerprints and smudges.
Plus, baking soda neutralizes odors, leaving your kitchen smelling fresh. Incorporating this natural powerhouse into your cleaning routine will surely elevate your stainless steel care.
Step-by-Step: How to Make Your Stainless Steel Cleaner
Now that you’ve gathered your essential ingredients, it’s time to create your stainless steel cleaner. You’ll learn the right application tips and techniques to get the best results. Using a non-toxic cleaner is essential for maintaining a safe kitchen environment. Let’s get started on making your surfaces shine!
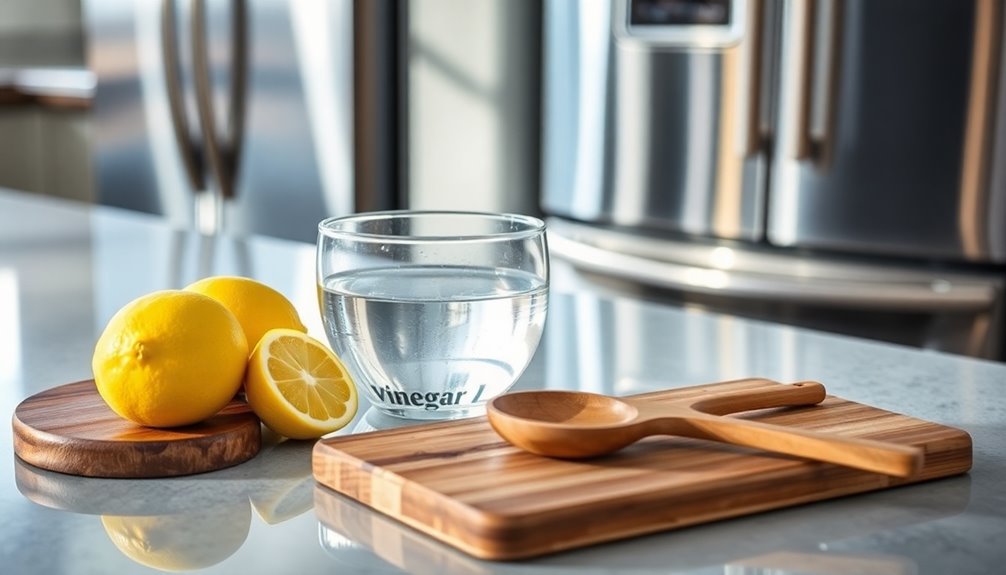
Essential Ingredients Needed
Creating your own stainless steel cleaner is simple and requires just a few essential ingredients. By using these natural alternatives, you can enhance your cleaning efficiency while avoiding harsh chemicals.
- White vinegar: A powerful natural disinfectant that cuts through grime and leaves a streak-free shine.
- Olive oil: This acts as a conditioner, helping to restore the surface’s luster and prevent fingerprints.
- Essential oil (optional): A few drops can add a pleasant scent while providing additional antibacterial properties.
Gather these ingredients, and you’ll be ready to tackle those stainless steel surfaces effectively.
With just a bit of effort, you can create a cleaner that’s not only effective but also eco-friendly!
Application Tips And Techniques
With your ingredients gathered, you’re ready to make your stainless steel cleaner.
Start by mixing equal parts of vinegar and water in a spray bottle. Before applying, verify your stainless steel surfaces are free of dust and grime through proper surface preparation.
Spray the cleaner onto a small section of the surface.
Use a microfiber cloth to wipe in the direction of the grain, which minimizes streaks. For tougher spots, apply a little extra cleaner and let it sit for a minute before wiping.
After cleaning, buff the surface with a dry cloth for a shiny finish.
Tips for Applying Your Cleaner Effectively
Here are some helpful application techniques:
- Use a microfiber cloth: It’s gentle and won’t scratch the surface.
- Apply in sections: Work on small areas at a time for better control and coverage.
- Wipe in the direction of the grain: This helps avoid streaks and enhances the shine.
To further enhance your results, consider using a non-abrasive stainless steel cleaner for tougher grime during your cleaning process.
How to Remove Stubborn Stains and Marks
When it comes to stubborn stains on stainless steel, knowing the common culprits is key. You’ll need effective cleaning techniques to tackle them head-on, along with some preventive maintenance tips to keep your surfaces looking pristine. Regular maintenance prevents dirt and grime buildup for long-lasting shine. Let’s explore how to banish those marks for good.
Common Stains Explained
Stainless steel surfaces can easily fall victim to a variety of stubborn stains and marks, but tackling them doesn’t have to be a hassle. Understanding common stains can help you address them effectively:
- Water spots: These often appear due to mineral deposits from hard water.
- Fingerprints: They’re a common annoyance, especially in high-traffic areas.
- Stainless steel scratches: While they can be unsightly, there are ways to minimize their appearance.
To keep your stainless steel looking pristine, remember that immediate clean-up can prevent these stains from setting in.
Regular maintenance will go a long way in preserving the sleek look of your kitchen surfaces, making them a joy to use and admire.
Effective Cleaning Techniques
Tackle stubborn stains on stainless steel with effective cleaning techniques that make your surfaces shine like new.
Start by using a damp microfiber cloth to wipe away loose dirt and debris. For tougher marks, mix equal parts vinegar and water in a spray bottle, then spritz the solution onto the stain. Let it sit for a few minutes before scrubbing gently with the microfiber cloth. Rinse with water and dry immediately to prevent streaks.
If you encounter grease, sprinkle baking soda on the affected area, then scrub with the cloth in a circular motion.
Regular cleaning frequency helps maintain that pristine look, so aim to clean your stainless steel surfaces weekly. You’ll notice the difference!
Preventive Maintenance Tips
Maintaining the shine of your stainless steel surfaces goes beyond just regular cleaning; it also means knowing how to prevent stubborn stains and marks from taking hold.
Establishing a preventive cleaning routine can help you stay ahead of these issues, so consider incorporating a few simple tips into your maintenance schedule:
- Wipe up spills immediately to avoid staining.
- Use protective mats or coasters under appliances.
- Regularly polish surfaces with a suitable stainless steel cleaner.
Best Practices for Maintaining Stainless Steel Surfaces
Keeping your stainless steel surfaces looking their best requires just a few simple practices.
First, wipe down surfaces regularly with a soft cloth to maintain stainless steel durability and prevent grime buildup. Use warm, soapy water for everyday cleaning, and don’t forget to dry surfaces immediately to avoid water spots.
Wipe down your stainless steel surfaces regularly with a soft cloth and warm, soapy water to prevent grime buildup and avoid water spots.
For tougher stains, opt for a gentle cleaner instead of harsh chemicals. Make a habit of cleaning your stainless steel at least once a week to keep it shining. Additionally, always follow the grain of the steel when wiping, as this minimizes scratches.
Finally, consider using a stainless steel polish occasionally to enhance its shine and protect it from fingerprints. Regular cleaning can lead to rediscovering the joy of a spotless kitchen, ensuring your surfaces look great for years!
Eco-Friendly Alternatives to Traditional Cleaners
While regular cleaning is key to maintaining the shine of your stainless steel surfaces, you might want to contemplate eco-friendly alternatives to traditional cleaners.
These options not only keep your kitchen sparkling but also provide numerous eco-friendly benefits. By using natural ingredients, you can eliminate harsh chemicals from your home.
- Vinegar and Water: A simple mixture cuts through grime and leaves a streak-free finish.
- Baking Soda Paste: Combine with water for a gentle abrasive cleaner that tackles tough stains.
- Olive Oil: Use a few drops on a cloth to polish and protect your surfaces.
Embracing these alternatives not only enhances cleanliness but also promotes a healthier environment for you and your family. Additionally, using natural alternatives helps preserve waterways and aquatic life, ensuring a cleaner ecosystem.
Troubleshooting Common Cleaning Issues
Sometimes, even the best cleaning methods can lead to frustrating issues, like streaks or stubborn stains. If you notice streaks after cleaning, try using a microfiber cloth for better absorption.
For stubborn stains, mix equal parts vinegar and water, then gently scrub the area. Remember, it’s essential to avoid harsh abrasives, as they can cause surface scratches. Using a vinegar solution is a safe and effective way to tackle grease and grime.
If you see rust spots, immediately address them with a mixture of baking soda and water, applying it gently. Regular cleaning not only enhances shine but also aids in rust prevention.
If you’re still struggling, adjust your cleaning routine or products, ensuring they’re suitable for stainless steel. A little trial and error can help you achieve that flawless finish.
How Often Should You Clean Stainless Steel?
Regularly cleaning your stainless steel surfaces is key to maintaining their shine and preventing damage.
Establishing a cleaning frequency that fits your lifestyle will help keep your kitchen looking great. Here’s a simple maintenance schedule to follow:
- Daily: Wipe down surfaces with a soft cloth to remove fingerprints and smudges.
- Weekly: Deep clean with a stainless steel cleaner to tackle tougher stains and restore shine.
- Monthly: Inspect for scratches and use a polish to keep the finish intact. Additionally, regular maintenance contributes significantly to the longevity of stainless steel kitchen appliances.
Final Thoughts on Keeping Your Kitchen Gleaming
Keeping your kitchen gleaming requires a consistent effort, but the results are well worth it. Regular stainless steel care not only enhances the look of your appliances but also makes cooking and cleaning more enjoyable.
Start by establishing a routine that includes wiping down surfaces and organizing your kitchen. A clutter-free space helps maintain that polished appearance and makes it easier to spot areas needing attention.
Don’t forget to choose the right cleaning solutions; DIY stainless steel cleaners can be effective and safe. By dedicating a little time each week to both kitchen organization and stainless steel care, you’ll create a welcoming environment that shines, making your kitchen a joy to use and share with others.
Conclusion
Keeping your stainless steel kitchen gleaming is like polishing a diamond—it takes a little care, but the shine is worth it. By choosing a DIY cleaner, you can avoid harsh chemicals while achieving a sparkling finish. Regular maintenance and the right techniques will help your surfaces shine like new. So, roll up your sleeves and embrace the satisfaction of a clean kitchen, knowing you’re doing your part for both your home and the environment!