To clean your microwave fast, start by unplugging it for safety. Remove the turntable and wash it in warm, soapy water. Fill a microwave-safe bowl with equal parts vinegar and water, then heat it for five minutes to steam away grime. Wipe down the interior with a damp cloth, focusing on stubborn spots. For lingering odors, try a baking soda paste. Keep it clean regularly for better performance—discover more handy tips to keep your microwave shining!
Why Clean Your Microwave Regularly?
Cleaning your microwave regularly is essential, not just for hygiene but also for efficiency. When you keep your microwave clean, you enhance its performance, ensuring that your food heats evenly and quickly.
Neglecting this task can lead to food splatters and residue buildup, which can harbor bacteria, compromising microwave hygiene.
Additionally, a clean microwave contributes to your overall health benefits. By removing old spills and odors, you’re not only preventing unpleasant tastes but also minimizing the risk of foodborne illnesses. Regular cleaning helps you maintain a safe cooking environment, making your kitchen a healthier space. Moreover, incorporating natural cleaning agents into your routine can boost cleaning power and ensure a fresh-smelling microwave.
Essential Supplies for Quick Microwave Cleaning
To tackle microwave messes quickly, having the right supplies on hand makes all the difference.
Start with eco-friendly products like vinegar and baking soda; they’re effective and safe. Grab a microwave-safe bowl for steaming and loosening grime.
Begin your cleanup with eco-friendly vinegar and baking soda, using a microwave-safe bowl to steam away stubborn grime.
A clean, damp cloth or sponge acts as your go-to tool for wiping down surfaces. For tougher stains, consider a time-saving tool like a scrub brush specifically designed for kitchen use.
Don’t forget a spray bottle for easy application of your cleaning solution. If you’ve got a microwave cover, keep it handy to prevent future spills. Additionally, using an all-purpose cleaner made with vinegar can enhance your cleaning efficiency and leave your microwave smelling fresh.
With these essentials, you’ll streamline your cleanup process and enjoy a sparkling microwave in no time!
Step-by-Step: The Fastest Way to Clean Your Microwave
To clean your microwave quickly, start with some simple prep steps that set you up for success. Choose effective cleaning solutions that tackle stubborn stains without hassle. Regular cleaning ensures a safe and healthy environment, as the average kitchen sink harbors more germs than a toilet seat. Let’s get into the fastest way to make your microwave sparkle!
Quick Prep Steps
Getting your microwave ready for a quick clean takes just a few simple steps. First, unplug the microwave to guarantee safety while you work.
Next, remove the turntable and any other removable parts, like the splash guard. Rinse these items in warm, soapy water—this is a great microwave maintenance tip to keep them fresh.
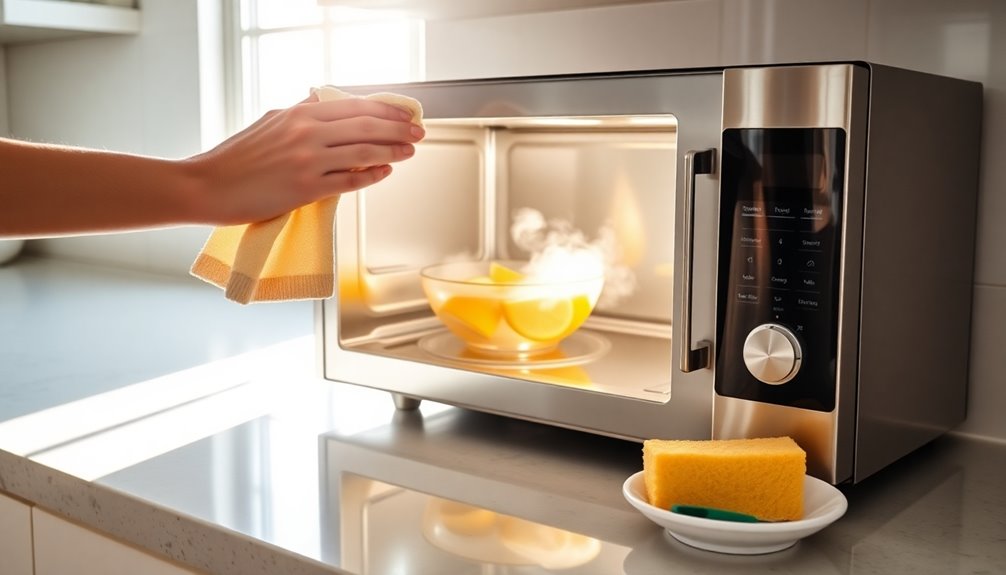
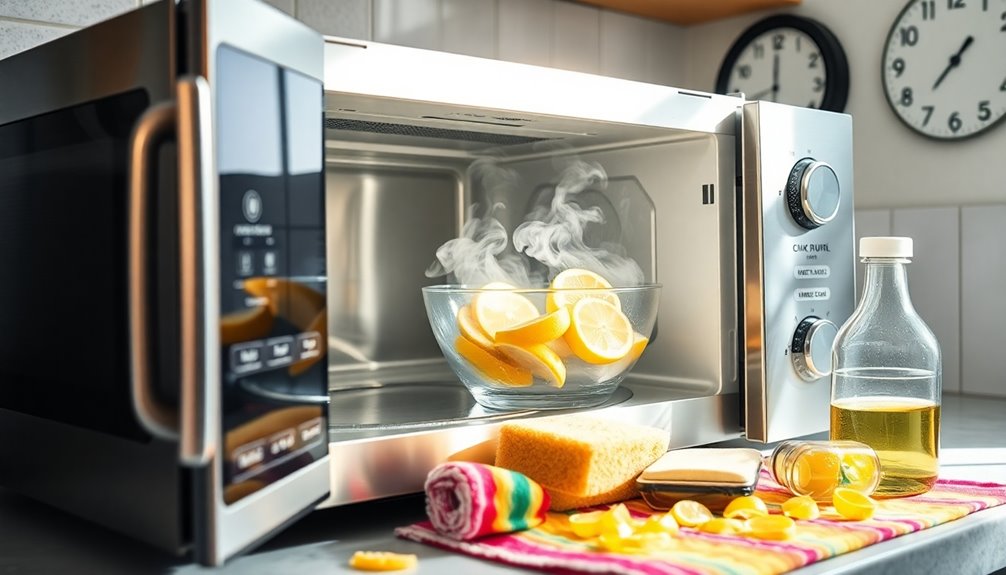
Now, wipe down the interior surfaces with a damp cloth to remove loose debris. For tougher spots, consider using a quick cleaning hack: fill a microwave-safe bowl with water and a slice of lemon, then heat it for a few minutes. The steam will loosen grime, making it easier to wipe away.
With these prep steps done, you’re ready for effective cleaning!
Effective Cleaning Solutions
While you’ve prepped the microwave for cleaning, it’s time to choose effective cleaning solutions that’ll tackle stubborn stains and odors quickly. You can opt for eco-friendly cleaners or try some homemade solutions.
Here are a few options to contemplate:
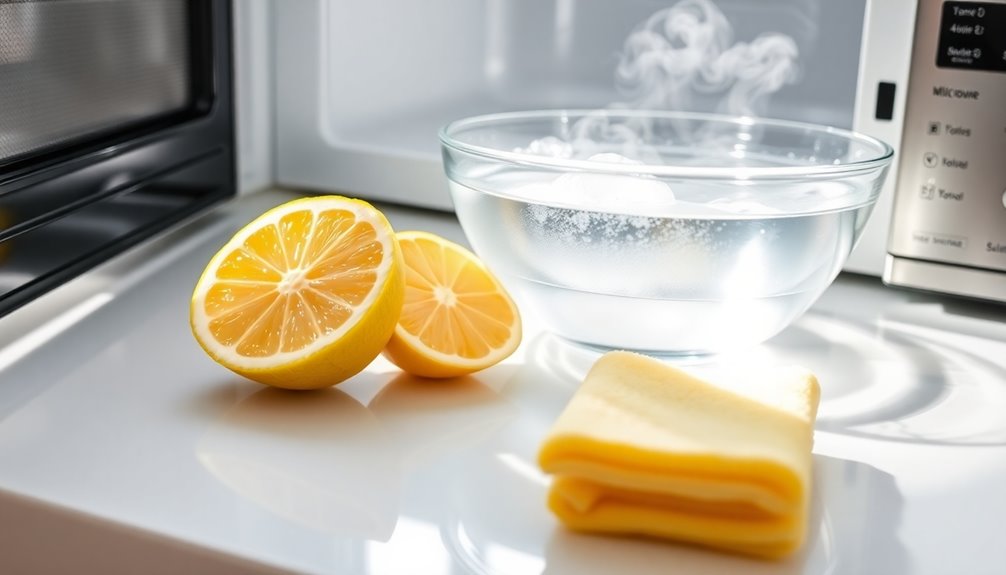
- Vinegar and Water: Mix equal parts and heat for a few minutes. The steam loosens grime.
- Baking Soda Paste: Combine baking soda with a little water; apply it to tough spots and scrub away.
- Lemon Juice: Add lemon slices to water, heat, and enjoy a fresh scent while cleaning.
These solutions aren’t only quick but also safe for your family and the environment. Choose what works best for you, and get that microwave sparkling in no time!
Using Vinegar for Stubborn Stains
If you’ve ever faced stubborn stains in your microwave, vinegar can be your best ally. This natural solution not only cuts through grime but also offers numerous vinegar benefits.
To tackle those tough spots, mix equal parts water and vinegar in a microwave-safe bowl. Heat the mixture for about five minutes, allowing steam to build up. The steam will loosen the stains, making them easier to wipe away.
Afterward, grab a damp cloth or sponge and gently scrub the inside of your microwave. You’ll be amazed at how effortlessly the stains lift away. Plus, the vinegar leaves behind a fresh scent, ensuring your microwave looks and smells clean. Additionally, using vinegar as a natural disinfectant helps maintain a healthier cooking environment. Don’t let stubborn stains win—use vinegar for a quick and effective clean!
How to Use Baking Soda for Odors
Baking soda’s a powerful odor absorber that can tackle those lingering smells in your microwave.
It’s easy to use and requires just a few simple steps to refresh your appliance. Let’s explore how this kitchen staple can help keep your microwave smelling fresh. Additionally, you can create a Baking Soda and Lemon Juice Cleaner for a deeper clean when needed.
Benefits of Baking Soda
When it comes to tackling stubborn odors in your microwave, baking soda is your go-to solution. This natural odor neutralizer not only absorbs smells but also leaves your appliance fresh and clean.
Here are some benefits of using baking soda:
- Effective Odor Absorption: It traps and neutralizes unwanted odors, ensuring your microwave smells great.
- Non-Toxic and Safe: Unlike harsh chemicals, baking soda is safe for food-related surfaces, making it an ideal choice.
- Cost-Effective: A small box of baking soda goes a long way, saving you money while keeping your microwave fresh.
With these benefits, you can’t go wrong choosing baking soda to combat odors and maintain a pleasant cooking environment!
Simple Application Steps
Transform your microwave with a simple baking soda solution that tackles odors effectively. Start by mixing two tablespoons of baking soda with a cup of water in a microwave-safe bowl.
Place the bowl inside your microwave and heat it on high for about five minutes. The steam will help loosen any grime while the baking soda neutralizes unpleasant smells.
After the time’s up, carefully remove the bowl (it’ll be hot!) and wipe down the interior with a clean cloth or sponge. This quick maintenance trick not only freshens your microwave but also makes it easier to clean.
For ongoing freshness, sprinkle a bit of baking soda inside when not in use. Follow these microwave cleaning tips for a consistently odor-free appliance!
The Power of Lemon in Microwave Cleaning
Lemon not only brightens up your kitchen but also works wonders for cleaning your microwave. The fresh scent and natural disinfectant properties of lemons make them a perfect choice for tackling stubborn grime.
When heated, the lemon steam helps loosen food particles, making cleanup a breeze.
- Easy to Use: Just slice a lemon and microwave it with water.
- Natural Disinfectant: Kills bacteria and germs without harsh chemicals.
- Pleasant Aroma: Leaves your microwave smelling fresh and clean.
To harness the power of lemon, fill a bowl with water, add lemon slices, and microwave for a few minutes. Using eco-friendly methods not only makes cleaning easier but also promotes a healthier home environment. Once the steam has done its job, wipe down the interior for a spotless finish. It’s that simple!
Quick Wipe-Down Techniques for Daily Maintenance
Daily maintenance of your microwave can be quick and hassle-free with just a few simple techniques. Start by making it a daily habit to wipe down the interior and exterior after each use. Use a damp cloth or sponge with a mild dish soap solution. Focus on areas where food splatters or spills are likely to occur.
For stubborn spots, let the damp cloth sit for a minute to soften the grime before wiping. Incorporating this quick wipe-down into your maintenance routine will keep your microwave looking fresh and prevent buildup. Additionally, using a bowl of water in the microwave can help create steam for easier cleaning of tough stains.
Don’t forget to clean the microwave’s turntable and remove any food debris from the edges. With these simple steps, you’ll guarantee your microwave stays clean with minimal effort.
What Not to Use When Cleaning Your Microwave?
When cleaning your microwave, there are several items you should steer clear of to avoid damage or unpleasant odors.
Using the wrong cleaning tools can harm delicate microwave materials and leave behind lingering smells.
Using improper cleaning tools can damage your microwave and result in unpleasant odors lingering long after.
- Abrasive scrubbers: These can scratch the interior surface and damage the finish.
- Harsh chemicals: Strong cleaners can create toxic fumes and degrade the microwave’s components.
- Vinegar in excess: While it’s a great cleaner, too much can cause corrosion. Additionally, it’s important to avoid non-toxic cleaners that are overly concentrated, as they can also lead to unwanted residue.
Tips for Cleaning Microwave Accessories
When it comes to cleaning your microwave accessories, start by removing them and soaking them in warm, soapy water. This helps loosen any stuck-on grime. After soaking, wipe them down with vinegar for a fresh, streak-free finish. Additionally, using non-toxic cleaning solutions can enhance safety for your family while maintaining a clean microwave environment.
Remove And Soak Accessories
Start by removing all accessories from your microwave, including the turntable, roller ring, and any other components. Soaking these items is one of the best microwave cleaning techniques to tackle stubborn stains and grease.
- Use warm, soapy water for a quick clean.
- For tough grime, try a vinegar-water solution.
- Let them soak for at least 15-20 minutes.
These accessory soaking methods work wonders, loosening debris and making scrubbing a breeze.
After soaking, gently scrub with a soft sponge to avoid scratches. Rinse thoroughly and dry before placing them back in the microwave.
This step not only guarantees cleanliness but also helps maintain your microwave’s performance.
Now you’re ready to tackle the next phase of your microwave cleaning!
Wipe Down With Vinegar
After soaking your microwave accessories, it’s time to tackle the interior with vinegar. This powerhouse cleaner not only cuts through grease but also neutralizes odors.
To use it effectively, mix equal parts vinegar and water in a microwave-safe bowl, then heat it for a few minutes. The steam will help loosen any stubborn stains.
Once the cycle’s done, simply wipe down the walls, ceiling, and turntable with a clean cloth.
If you’re looking for vinegar alternatives, consider lemon juice or baking soda, which also work well for cleaning.
However, vinegar’s benefits—like being non-toxic and eco-friendly—make it a top choice. Enjoy a sparkling clean microwave in no time!
How Often Should You Clean Your Microwave?
- Daily: Wipe down spills or splatters immediately after use.
- Weekly: Do a deeper clean, focusing on the interior, exterior, and turntable.
- Monthly: Remove and clean any filters or vents if applicable. Regular cleaning helps maintain a clutter-free space, enhancing your overall kitchen environment.
Safety Precautions While Cleaning Your Microwave
While cleaning your microwave can be a quick task, it’s vital to prioritize safety to avoid accidents. Start by unplugging the microwave before you begin, which eliminates any risk of electrical shock.
Cleaning your microwave should be quick, but prioritize safety by unplugging it first to prevent electrical shock.
Use non-toxic cleaners to prevent harmful fumes; this guarantees both your safety and the integrity of your appliance. Wear gloves to protect your hands from harsh chemicals and potential cleaning hazards.
If you’re using a steam method, be cautious of hot steam when opening the door. Always check for any loose parts or damage before cleaning; this is important for microwave safety.
Finally, confirm the area around the microwave is dry to avoid slips. Keeping these precautions in mind will make your cleaning process smooth and safe.
Troubleshooting: What If Stains Won’t Come Off?
Even with safety precautions in place, stubborn stains can sometimes resist your cleaning efforts. If you’re facing stubborn grime that just won’t budge, don’t worry.
Here are some cleaning hacks to tackle those tough spots:
- Baking Soda Paste: Mix baking soda with water to form a paste. Apply it directly to the stains and let it sit for 15 minutes before wiping.
- Vinegar Steam: Fill a microwave-safe bowl with water and add a cup of vinegar. Microwave it for five minutes, then wipe down the interior to lift stains.
- Lemon Power: Squeeze a lemon into a bowl of water, microwave it for a few minutes, and let the steam work its magic on the grime.
Give these methods a try, and watch those stains disappear!
Final Touches: Making Your Microwave Shine
Once you’ve tackled the tough stains, it’s time to focus on making your microwave shine. Start by wiping down the interior with a microfiber cloth and a mixture of water and vinegar. This not only cleans but also adds a lovely sheen.
For the exterior, use a gentle all-purpose cleaner or a vinegar solution, and don’t forget to polish the door and handle.
For extra shine, try these shine techniques: buffing with a dry cloth after cleaning and using a little olive oil on a cloth to give the exterior a final glow.
Remember these polishing tips: always use soft cloths to avoid scratches. With these final touches, your microwave will look like new and be ready for use!
Conclusion
Cleaning your microwave doesn’t have to be a chore! With just a few simple steps and supplies, you can tackle those messes in no time. Imagine your microwave sparkling like new—doesn’t that sound satisfying? By making it a regular part of your cleaning routine, you’ll keep odors and stains at bay. So grab your vinegar or baking soda, and give your microwave the quick refresh it deserves! You’ll be amazed at the difference!